Do you have a question about the Rocktron Prophesy II and is the answer not in the manual?
Highlights the primary capabilities and distinct advantages of the Rocktron Prophesy unit.
Provides essential safety advice for operating the equipment, covering water proximity, power cord, ventilation, and handling.
Details conditions requiring qualified service personnel and emphasizes user non-interference to avoid warranty voidance and shock hazards.
Specifies the unit's power input needs and its operational temperature range for optimal performance.
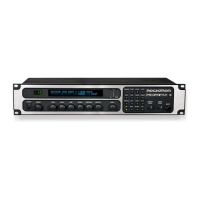
Details the function of the power switch, preset selection knob, display screen, and gain adjustment control.
Explains the operation of the Bass, Mid, Treble, and Presence adjustment knobs for tone control.
Describes the Master volume, Page navigation, input/compression meters, and various function buttons.
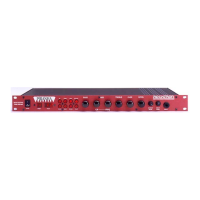
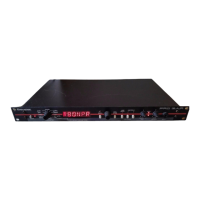
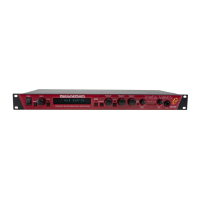
Covers the front panel input and output level controls and the primary input jack.
Details the rear panel input, output-to-tuner, and main output jacks for signal routing.
Explains the function of the loop send/return jacks and the main stereo outputs for amplifier connection.
Describes the recording outputs, power input, footswitch, and MIDI interface jacks on the rear panel.
Illustrates how to connect the Prophesy to a stereo power amplifier and speaker cabinet.
Shows the configuration for routing the Prophesy's signal directly into a mixing console via recording outputs.
Diagrams the connection of external processors into the Prophesy's signal path using the effects loop.
Explains the concept of presets, their memory storage, and what information they recall.
Details how to access and navigate through the various parameter pages for each preset.
Illustrates the structured layout of pages and their corresponding displays for preset management.
Describes how to adjust parameters using front panel controls and the instant access feature from the title page.
Introduces the concept of effects assigned to presets, noting automatically included effects.
Explains the signal path structure, differentiating between pre-effect and post-effect locations.
Details the display pages used for assigning effects to pre-effect and post-effect locations.
Guides on how to store changes made to presets, ensuring they are activated upon recall.
Explains how the rear panel effects loop can be assigned to internal effect locations.
Describes the initial display upon preset recall, showing title and assigned effects.
Explains the digital implementation and operational principles of the HUSH noise reduction system.
Lists the parameters for the HUSH page and provides usage notes for different gain settings and guitars.
Details the compressor's function for volume leveling and sustain enhancement, with parameter descriptions.
Offers guidance on using the compressor effectively with clean and distorted tones, and with different guitars.
Describes the internal wah-wah effect, its control via expression pedal, and its frequency parameters.
Details the first preamp page, covering Gain and basic EQ level adjustments with parameter descriptions.
Explains preamp channel selection, volume control, and the initial Pre EQ settings.
Lists and describes the parameters for shaping tone before the distortion stage, including low, mid, and bright EQ.
Details the post-distortion EQ parameters, including level, frequency, and bandwidth for two EQ sections.
Explains the Global EQ feature for adjusting tone across all presets simultaneously, with parameter descriptions.
Describes the page used to assign an effect before the preamp stage and its parameters.
Details the three pages for assigning effects after the preamp stage and their parameters.
Explains the flanger effect and lists the parameters for its first voice, including level, pan, depth, and rate.
Lists the parameters for the second voice of the flanger effect, including level, pan, depth, rate, and regeneration.
Describes the chorus effect and lists parameters for voices 1 and 2, covering level, pan, delay, depth, and rate.
Lists parameters for chorus voices 3 and 4, including regeneration, level, pan, delay, depth, and rate.
Explains the rotary speaker simulation and details its parameters like speed, acceleration, and balance.
Provides usage advice for the rotary effect, warning about potential processor overload with simultaneous modulation effects.
Describes the phase shifting effect and lists its parameters: depth, rate, resonance, and stages.
Explains pitch shifting for harmony and details parameters for the first voice, including pitch interval, fine tuning, level, and pan.
Introduces the delay effect and its ducker function, detailing delay time, level, mute, and spillover parameters.
Continues detailing delay parameters, focusing on spillover, level, pan, delay time, and regeneration.
Details parameters for high-frequency damping and the ducker function, including sensitivity, attenuation, and release.
Explains the tremolo effect and lists its parameters: depth, rate, shape, and pre/post reverb placement.
Introduces reverb and describes various reverb types like Plate, Room, Hall, Stadium, and Dual.
Details parameters for Reverb Page 1, including pan, decay, high-frequency damping, low-frequency, and reverb type selection.
Explains Reverb Page 2 parameters related to pre-delay, gate timing, threshold, and hold.
Describes the speaker simulator for direct recording, detailing speaker type, mic position, and reactance parameters.
Details the mixer settings for the pre-effect block, controlling direct/effect mix and output level.
Explains mixer settings for Post Effect 1 and 2, controlling effect output and mix levels.
Details mixer settings for Post Effect 3, controlling direct/effect mix and output levels.
Provides usage examples for post-effect mixing, explaining how to blend direct and effected signals.
Details mixer settings for reverb, controlling reverb input, output, direct signal, and panning.
Offers tips on using reverb mixing, direct signal control, output modes, and preset level matching.
Explains how to map parameters to MIDI controllers like expression pedals or foot switches for real-time control.
Details the parameters used for controller assignments: controller number, parameter selection, and limit settings.
Explains how the Tap Button allows real-time setting of delay times and tremolo rates based on tap tempo.
Lists parameters for the Tap Button page, including tap behavior, quantization, and LED indicator settings.
Details setting the MIDI channels for receiving commands and transmitting controller data.
Details how to map MIDI program changes to recall specific presets.
Describes the interface for editing preset titles, highlighting the flashing cursor for character selection.
Covers functions like preset dumping, loading, and restoring presets to factory defaults.
Explains the process of selecting presets and editing their parameters using the front panel controls.
Details the procedure for saving changes made to presets, ensuring they are activated upon recall.
Guides on how to assign custom titles to presets using the Title Edit page and front panel controls.
Emphasizes the necessity of storing edited titles to make them effective upon preset recall.
Explains how to map parameters to MIDI controllers like expression pedals or foot switches for real-time control.
Describes setting parameter limits for controllers and reversing upper/lower limit operations.
Explains the ADSR (Attack/Decay/Sustain/Release) function, its pluck detection trigger, and its parameters.
Details the steps to set up a controller assignment for the ADSR function, starting with accessing the Controller page.
Guides on assigning the ADSR function to available effect locations (Pre Effect, Post Effects) within a preset.
Explains how to set the ADSR parameters (Attack, Decay) for a chosen preset effect.
Details setting the Sustain Time, Sustain Level, and Release Time parameters for the ADSR function.
Describes how ADSR affects parameters when a note is plucked and how to view its operation in real-time.
Explains how the Tap Button sets delay and tremolo rates based on detected tap tempo and quantization.
Explains how MIDI program changes can be mapped to recall specific Prophesy presets.
Details setting the MIDI channels for receiving commands and transmitting controller data.
Provides instructions on connecting the All Access footcontroller to the Prophesy using a MIDI cable.
Guides on configuring the Prophesy's MIDI settings to enable remote control and title transfers.
Details how to set up the All Access footcontroller's operating mode, bank size, and title display.
Explains the process of transferring a single preset between two Prophesy units via MIDI.
Details how to dump all Prophesy presets to a sequencer for backup or archiving.
Guides on how to revert a single preset to its original factory condition, overwriting user modifications.
Explains the procedure to reinitialize the entire Prophesy memory to its original factory state.
Describes how to activate the tuner via the MUTE button and how to read note pitch and tuning status.
Explains how the tuner display indicates tuning status, showing 'TUNED' when a note is perfectly in pitch.
Provides a chart detailing the Prophesy's MIDI functions, transmitted and recognized commands, and remarks.
| input impedance | 470 kW |
|---|---|
| maximum input level | +16 dBu |
| input jack | ¼” mono |
| output impedance | < 150W |
|---|---|
| maximum output level (main out) | +16 dBu |
| maximum output level (recording out) | +13 dBu |
| output jacks (main out) | ¼" unbalanced left and right |
| output jacks (recording out) | XLR left and right |
| MIDI in | 7-pin DIN |
|---|---|
| MIDI thru/out | 5-pin DIN |
| power requirements | 9VAC /3.4A |
|---|---|
| dimensions | 19" x 8" x 3½" |