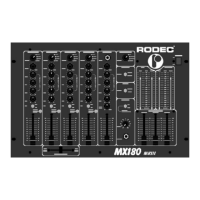
RODEC MX180 MKII RODEC MX34
5
Balanced microphone input. To reduce the interference on the microphone cord, you have to
use a microphone with balanced output. The use of a microphone without balanced output is
possible in this case, connect the mike as shown on the back of the panel.
F) Recording outputs
Outputs to connect cassette recorder or (HIFI) video recorders to make recordings. These
outputs can be switched with or without recording the DJ microphone signal. (21)
G) DJ mike input
Balanced microphone input with a sensitivity of 1,7mV.
This input is in combination with the input JACK (15) on the front of the set. The JACK (15)
has priority on the XLR input (G) on the back of the set.
H) Effects IN/OUT
Input and output to connect effect apparatus to the microphone channel. If there is no plug in
the JACK, the microphone channel works normally, if there is a plug inserted in the JACK, the
internal link is interrupted. The sensitivity of this IN/OUT connection is 160mV.
I) AUX output
Output for different apparatuses as integrated amplifiers or recorders.
The output level is 770mV.
J) Equalizer IN/OUT
Terminals to connect audio processors such as a graphic equalizer, compressor or
limiter. When the terminal is not being used, connect the OUT and IN for each channel with a
jumper pin.
WHEN THE SET IS BUILD IN, TAKE CARE THAT THERE’S NOTHING IN CONTACT WITH
THE JUMPERS!!
K) Master output
Output for slave or integrated amplifier. The output level can be adjusted with the
master fader (11). The maximum output is 1,5V.
With the balance control (5) you can make the balance between left and right.
If the slave amplifier needs more than 1,5V, the master output can be changed into 3V, by
disconnecting two links inside the set on circuit RC 25 252.
L) Remote control terminal option
The terminal is completely independent of the electronics of this set.
Only for switching low current/low voltage.
Please use signal cables shorter than 1 meter for the inputs and the outputs.
OPERATING INSTRUCTIONS
1) Press the power switch (1) to turn the power supply on. The power indicators (2) will light up
and a few seconds later the mixing panel will be in operation, ready state.
2) Connect the headphones to phones output (7).
3) Choose with input switch (17) the right source.
4) Switch the PFL button (8) in position ON to listen at the desired source. With the PFL of this
mixing panel, you can listen to two or more sources at the same time. You can see the
choosen signal on the level meters (3). With the SUM button (8) you can listen to the mixed
signal. All these switches do not change the output signal. Adjust with the level control (18)
the input signal so, that the red indicators of the level meters (3) light sometimes. Adjust if
necessary the quality of the sound with the equalizer (12).