3) Using a good amount of pressure, polish the
cleaned, circular area of the feeder using a
scratch pad or steel wool. Repeat step 2, and
then go to step 4.
4) Wipe the cleaned surface with an alcohol wipe or
with a 50/50 isopropyl alcohol/water combination.
5) Dry the surface thoroughly using a low lint cloth or
a clean paper towel.
6) Remove the vibration sensor from its protective
packaging. Remove the liner from the adhesive
backing. Avoid touching the tape. Align the
sensor as shown in figures 1 and 2. Apply the
vibration sensor to the prepared area of the
feeder. Press the sensor very firmly onto the
feeder surface for at least 10 seconds.
7) Allow the vibration sensor at least 20 minutes to
cure before operation. Note it takes 72 hours for
the adhesive to fully cure at 70°F (21°C).
Alternatively, #8 or M4 screws can be used to mount the
sensor to the feeder. The hole centers are 1.375”
(3.49cm) apart.
D. ROUTE THE SENSOR CABLE to protect it from
strain due to vibration. The cable that attaches to the
sensor will not break from normal vibration; however,
some care should be used when routing the sensor
cable from the sensor to the control. The cable should
hang straight down from the sensor without touching the
feeder bowl or anything else. Then, the sensor cable
should curve towards the power control with a bend
radius larger than 3” (8cm).
Use a cable tie and an adhesive-backed mount to
attach the sensor cable to the side of the drive base.
See Figure 2. Clean the mounting area before applying
the adhesive-backed mount.
E. CONNECT THE SENSOR to the control. The
sensor’s brown wire connects to +12VDC at TB2-9. The
blue wire connects to the signal input at TB2-12.
F. Section 13 explains how to enable the CFR feature.
WARNING:
Fuses should be replaced with Bussman ABC or
Littelfuse 3AB "Fast Acting" type or equivalent of
manufacturer's original value.
Mounting this control on a vibrating surface will
void the warranty.
WARRANTY
Rodix Control Products are Warranted to be free from
defects in material and workmanship under normal use
for a period of two years from date of shipment. For the
full description of the warranty, terms, and software license,
please contact the factory.
For assistance installing or operating your Rodix Feeder
Cube® please call the factory or visit our web site.
Technical help is available to answer your questions and
fax any needed information. To return a control for IN or
OUT of warranty service, please ship it prepaid to:
Rodix Inc., ATTN: Repair Department
If under warranty, Rodix will repair or replace your control
at no charge; if out of warranty, we will repair it and you will
be billed for the repair charges (Time and Material) plus the
return freight. Quotes for repairs are available upon
request. A brief note describing the symptoms helps our
technicians address the issue.
Feeder Cube® is a registered TM of Rodix Inc.
Banner is a registered Trademark of Banner Engineering Corp,
9714 10th Ave, Minneapolis, MN 55441
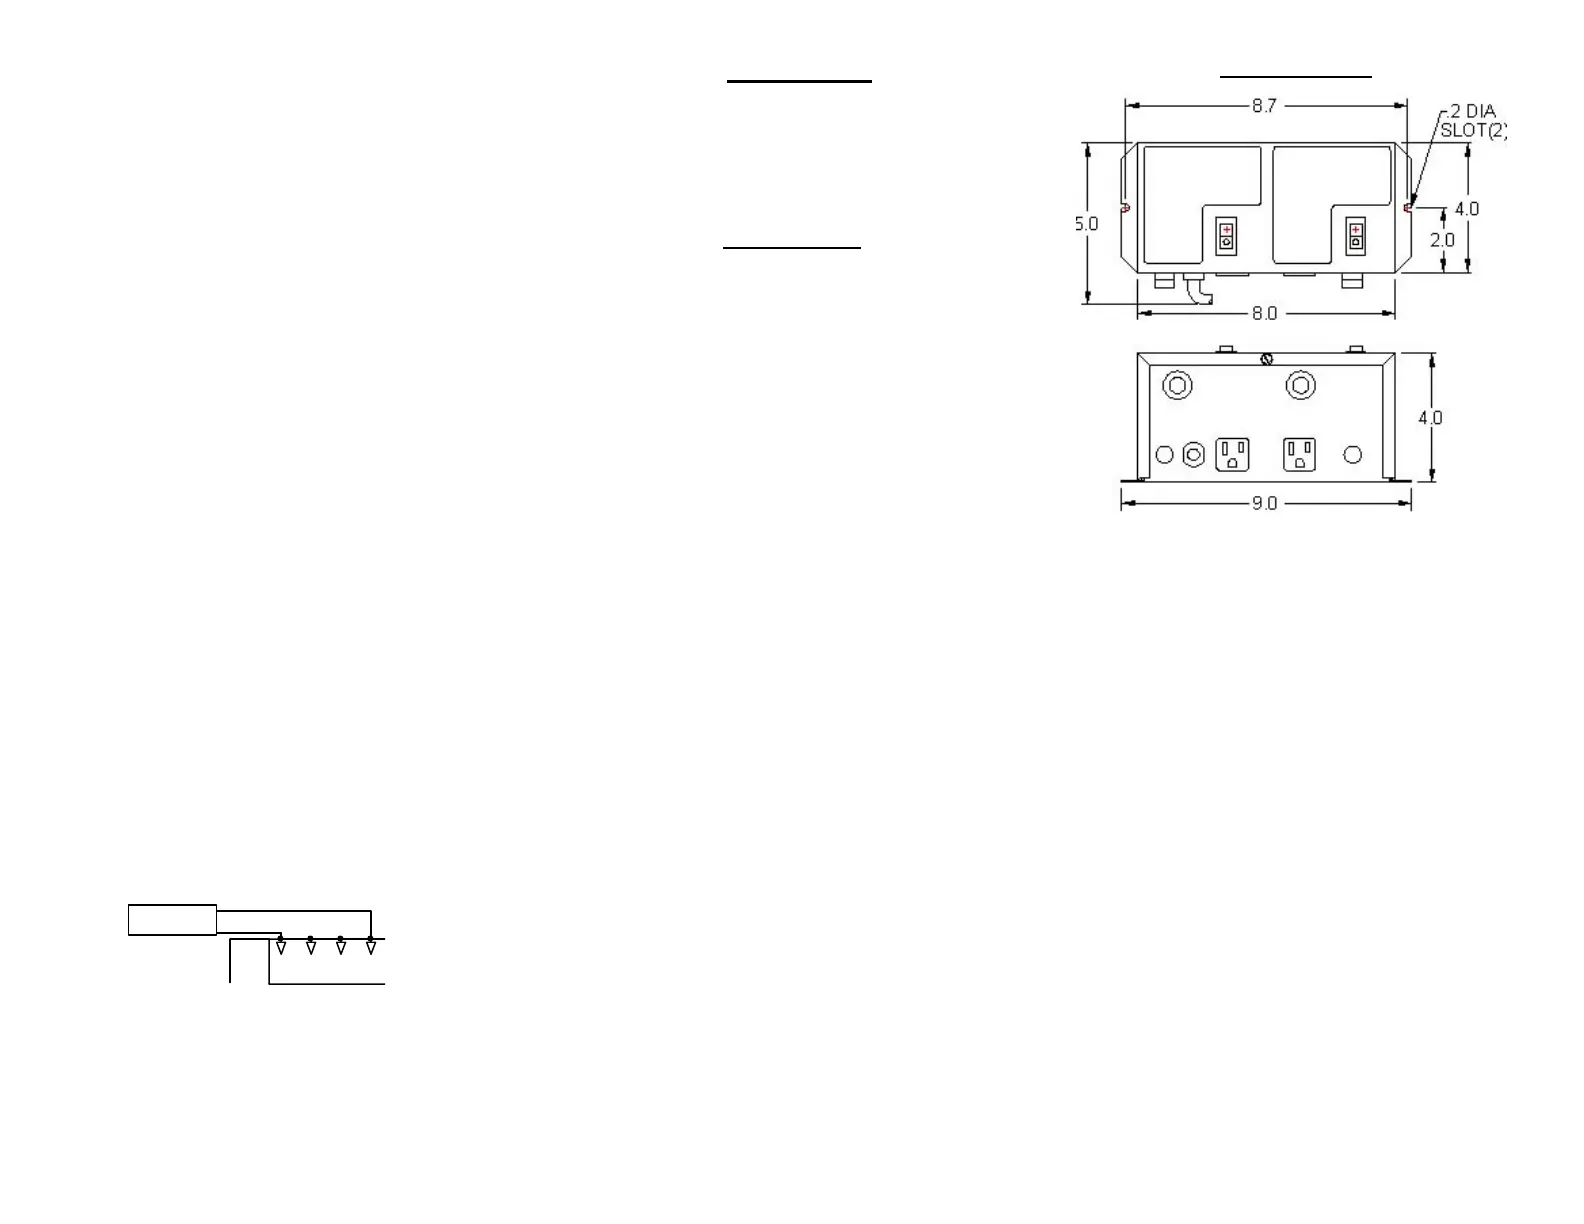
DIMENSIONS
Rodix Inc.
2316 23
rd
Ave., Rockford, IL 61104
Toll free 800-562-1868, fax 815-316-4701
custserve@rodix.com
www.rodix.com
FC-200-2.doc 11/1/2011 Page 4
-
12
123-170
+
910
Bu or #2
11
TB2
Br or #1
 Loading...