9
Jun. 2021 AE-30
1. VERSION
This verifies the program version.
fig.test1.eps
Press or to switch the CPU Program, Snd or WAVE ROM 0/
ROM 1/ROM 2 versions. Verify the version informations.
Press to advance to the next test item.
2. DEVICE
This checks the operation of the Program ROM.
fig.test2.eps
1. Press .
Program ROM check begins automatically. If no error occurs, Test
Finish is displayed. If an error occurs, NG is displayed for the
corresponding item and execution does not advance to the next test item.
2. Press to advance to the next test item.
3. WAVE ROM
This checks the operation of the Wave ROM.
fig.test3.eps
1. Press .
WAV ROM check begins automatically. If no error occurs, Test Finish is
displayed. If an error occurs, NG is displayed for the corresponding item
and execution does not advance to the next test item.
2. Press to advance to the next test item.
4. LCD
This checks the screen display.
fig.test4.eps
The screen is displayed with all dots white.
1. Each time is pressed, verify that the display of the screen changes as
follows.
All Black -> Checkered Pattern -> Checkered Pattern (revise) -> contrast
(minimum) -> contrast (intermediate) -> contrast (maximum)
2. Press to advance to the next test item.
5. LED
This checks whether each LED lights up correctly.
fig.test5.eps
The power LED lights up orange and the LED goes off.
1. Press .
The power LED goes dark and the LED lights up blue.
2. Press .
The LED goes dark.
3. Press to advance to the next test item.
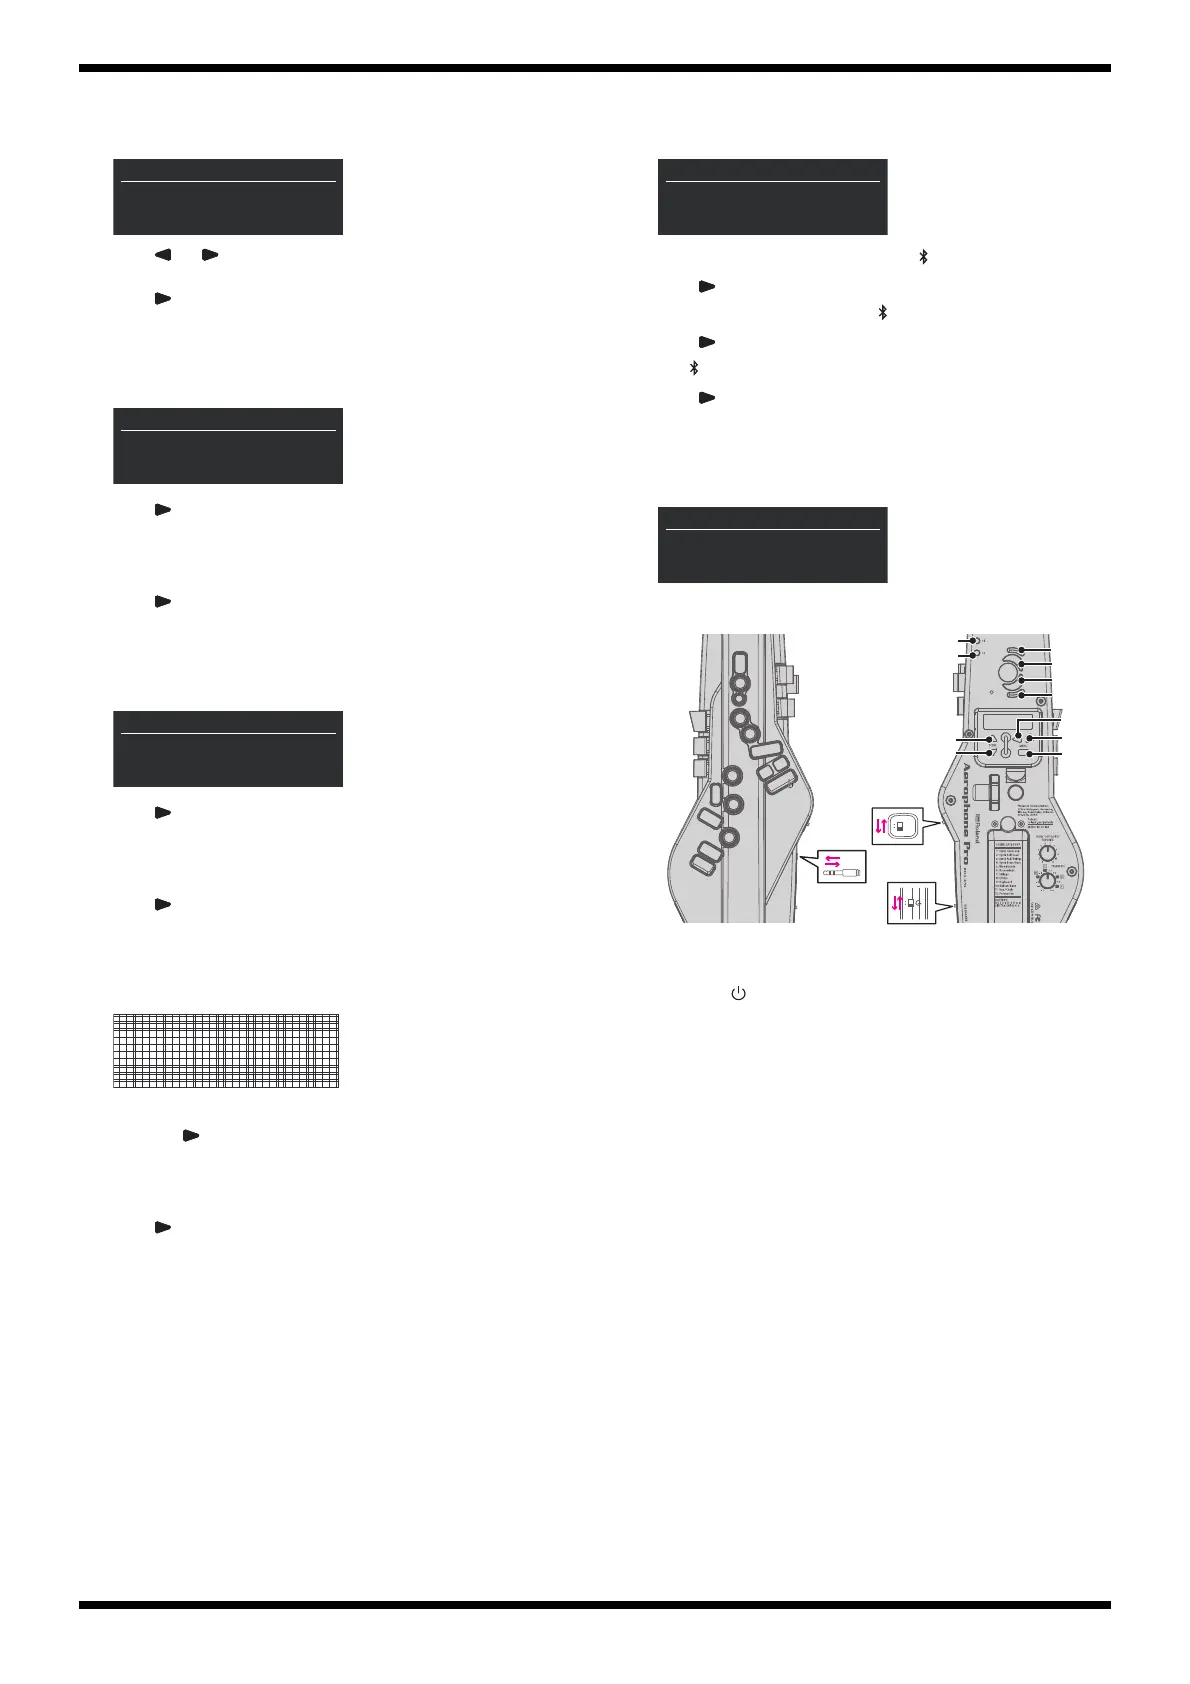
6. SW
This checks the operation of the switches.
fig.test6.eps
1. Press the buttons displayed on the screen in sequence.
fig.test6-2.eps
When all buttons have been pressed, To Off PWR is displayed on the
screen.
2. Switch the switch in sequence of ON -> OFF, OFF -> ON.
To On MIDI CONTROL is displayed on the screen.
3. Switch the MIDI CONTROL switch in sequence of ON -> OFF, OFF ->
ON.
To On PH SENES is displayed on the screen.
4. Connect the audio cable to the PHONES jack and disconnect it.
When the audio cable is disconnected, execution automatically advances
to the next test item.
T-S
01/14
VERSION
1/5
App: *.**(****)
T-S
02/14
DEVICE
1/7
Ready to Test
T-S
03/14
WAVE ROM
1/3
Ready to Test
T-S
05/14
LED
1/3
ON Power LED
T-S
06/14
SW
1/36
To On KEY_X
MIDI
CONTROL
ON
OFF
ON
OFF
X
2
G
#
C
2
S1S1
OCTOCT
+2+2
OCTOCT
+1+1
OCTOCT
-1-1
OCTOCT
-2-2
C
1
C
4
C
#
T
f
C
3
T
c
T
a
B
B
3
4
5
6
C5
C5
C
1
P
E
d
S2S2
INCINC
DECDEC
MENUMENU
PWRPWR
MIDIMIDI
CONTROLCONTROL
PH SENSPH SENS
RIGHTRIGHT
LEFTLEFT

 Loading...