14
To navigate between the different types of parts on the Studio Play screen,
hold down SHIFT and use the 3 and 4 cursor buttons.
A studio set offers quite a lot of effect-processing power:
PFX—
• Each of the 16 Internal and EXP parts has its own PFX.
MFX (for “multi-effects”)—
• Each studio set has a pair of MFX, a chorus,
and a reverb that any of its Audio Track or Internal parts can use.
ARX effects—
• Each ARX board provides its own effects for its EXP-part
sounds. (The number and type of effects varies from board to board.)
Mastering effect—
• Each studio set contains a mastering effect with
which you can add the final overall processing to an entire mix.
Input FX—
• A separate input effect is available for processing live audio as
it comes into the Fantom-G for recording on one of your song’s tracks.
The Fantom-G contains helpful factory-built PRST studio sets. The Studio
Mode in the Fantom-G Workshop booklet gets into Studio mode and studio
sets in more detail.
Recording Your Own Song
Starting a New Song
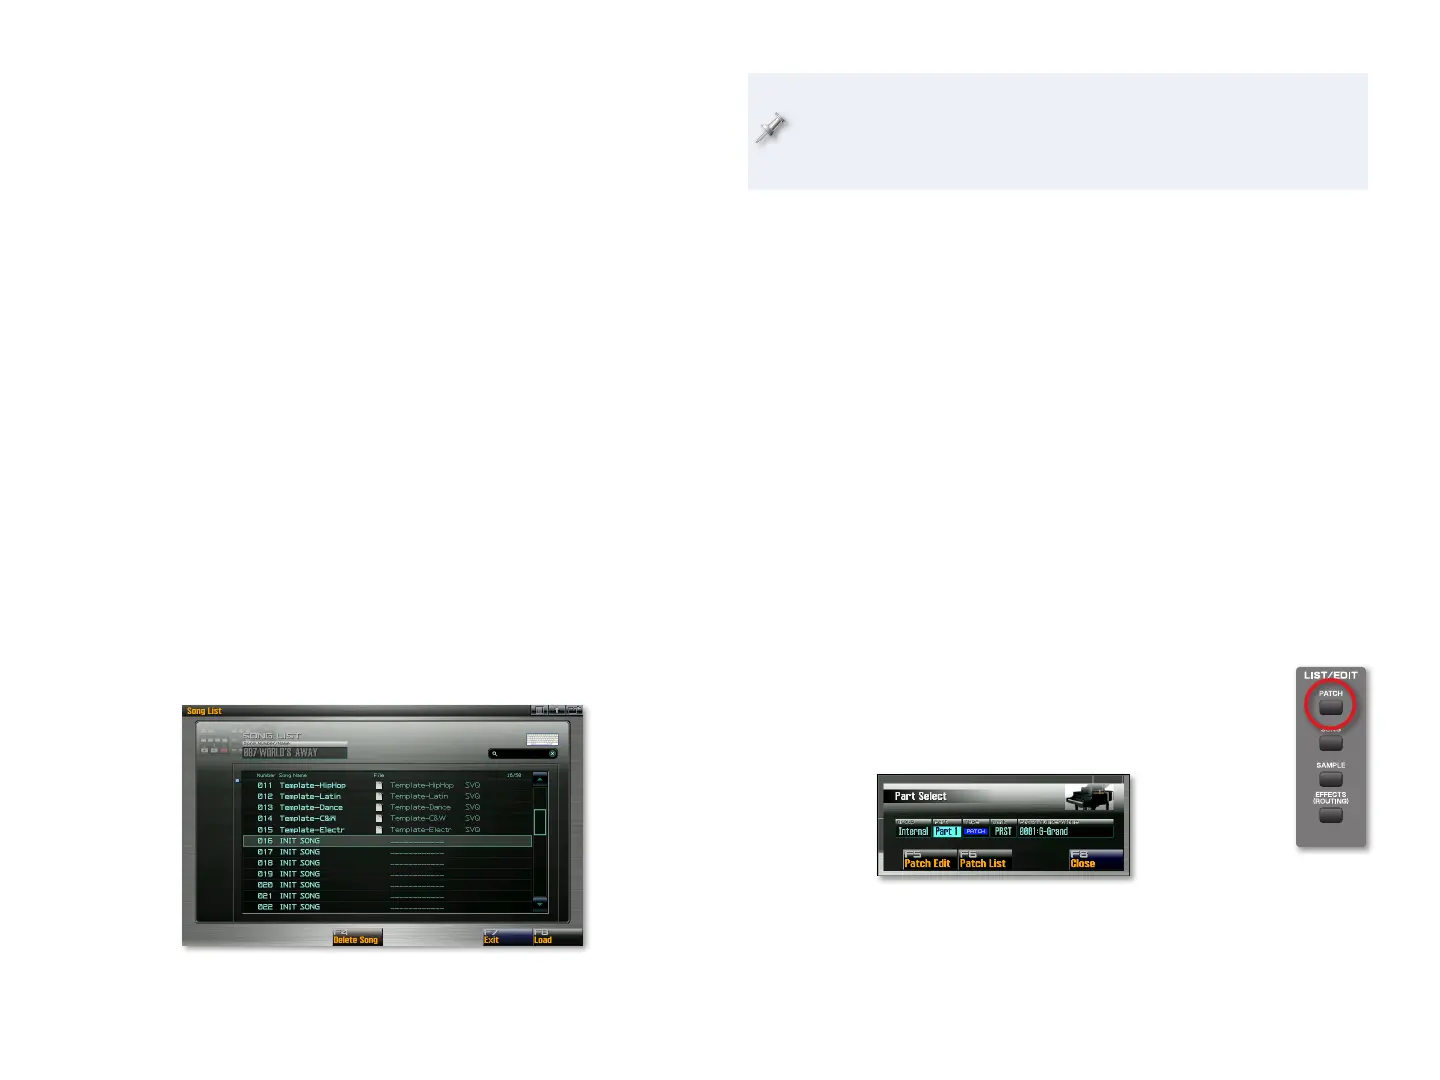
Press SONG, and then F1 (Song List) to display the project’s song list. 1
Select any USER “INIT SONG”— these are blank, empty songs. (We’re 2
already in the USER bank because the demo songs load from there.)
Here we’ve selected the 16th song location, which is currently empty.
Since the “INIT SONG” title is a good way to see if a song location is
empty, we strongly recommend naming your songs as you save them so
you can tell if a location is truly empty later on. We’ll explain how to
do this in the Saving Your Work on the Fantom-G booklet.
Press F8 (Load), and then press F7 (OK) to confirm the operation—the 3
new, empty song loads and the Song Play screen is displayed.
Let’s grab a bunch of sounds to work with by pressing the STUDIO
4
button, and then selecting the PRST 001: Standard Set studio set.
Recording MIDI Sequencer Tracks
The capture of MIDI data—data that plays the Fantom-G’s sounds—is called
“sequencing,” a term we’ll use consistently from here on. We’ll save the word
“recording” for the process of capturing live audio onto tracks.
Each time you sequence in the Fantom-G, you create a chunk of MIDI data
called a “phrase.” The phrase is assigned to a MIDI track in your song for
playback. There are two big advantages to phrase-based recording:
Phrases make song construction and editing easier.
1
You can use a project’s phrases as many times as you like in one or 2
more songs in the current project.
Sequencing a Track
If the Song Play screen isn’t visible, press SONG.1
Press the PATCH button in the LIST/EDIT area to open 2
the Part Select window.
We’ll start recording with Part 1. The Part parameter’s already set to
Part 1, so we’re good to go. Likewise, since we want to use an Internal
instrument for now, the Group parameter’s Internal setting is also just
what we want.