®ÂØÒňΠG-800 Supplemental Notes
© 1997 Roland Corporation U.S. Recording User Styles on the G-800 Page 4 of 5
R
ecording Procedure (continued)
2) Use the corresponding knobs to set the recording values as desired (see FIG.5 on the previous page).
3) Press PAGE UP to select Page #1 and use the TEMPO dial to select the desired tempo. New User Styles in
the G-800 default to 120 beats per measure.
4) Press REC (in the recorder section) followed by PLAY to start the recording process. The metronome will
give you a one-measure count-in before recording. The pattern will loop for the specified pattern length (see
p.2).
5) Begin playing the keyboard. Press START/STOP to stop recording. Press START/STOP again to listen to
your performance.
6) If you wish to record another instrument, use the Drum/Part knob to select the desired track and repeat steps 1-
5.
External MIDI Recording
You can record from an external MIDI controller, drum machine, or sequencer in a similar manner. Select a Track
in the G-800, match the MIDI channel for the part you wish to record, and follow the steps in the previous section
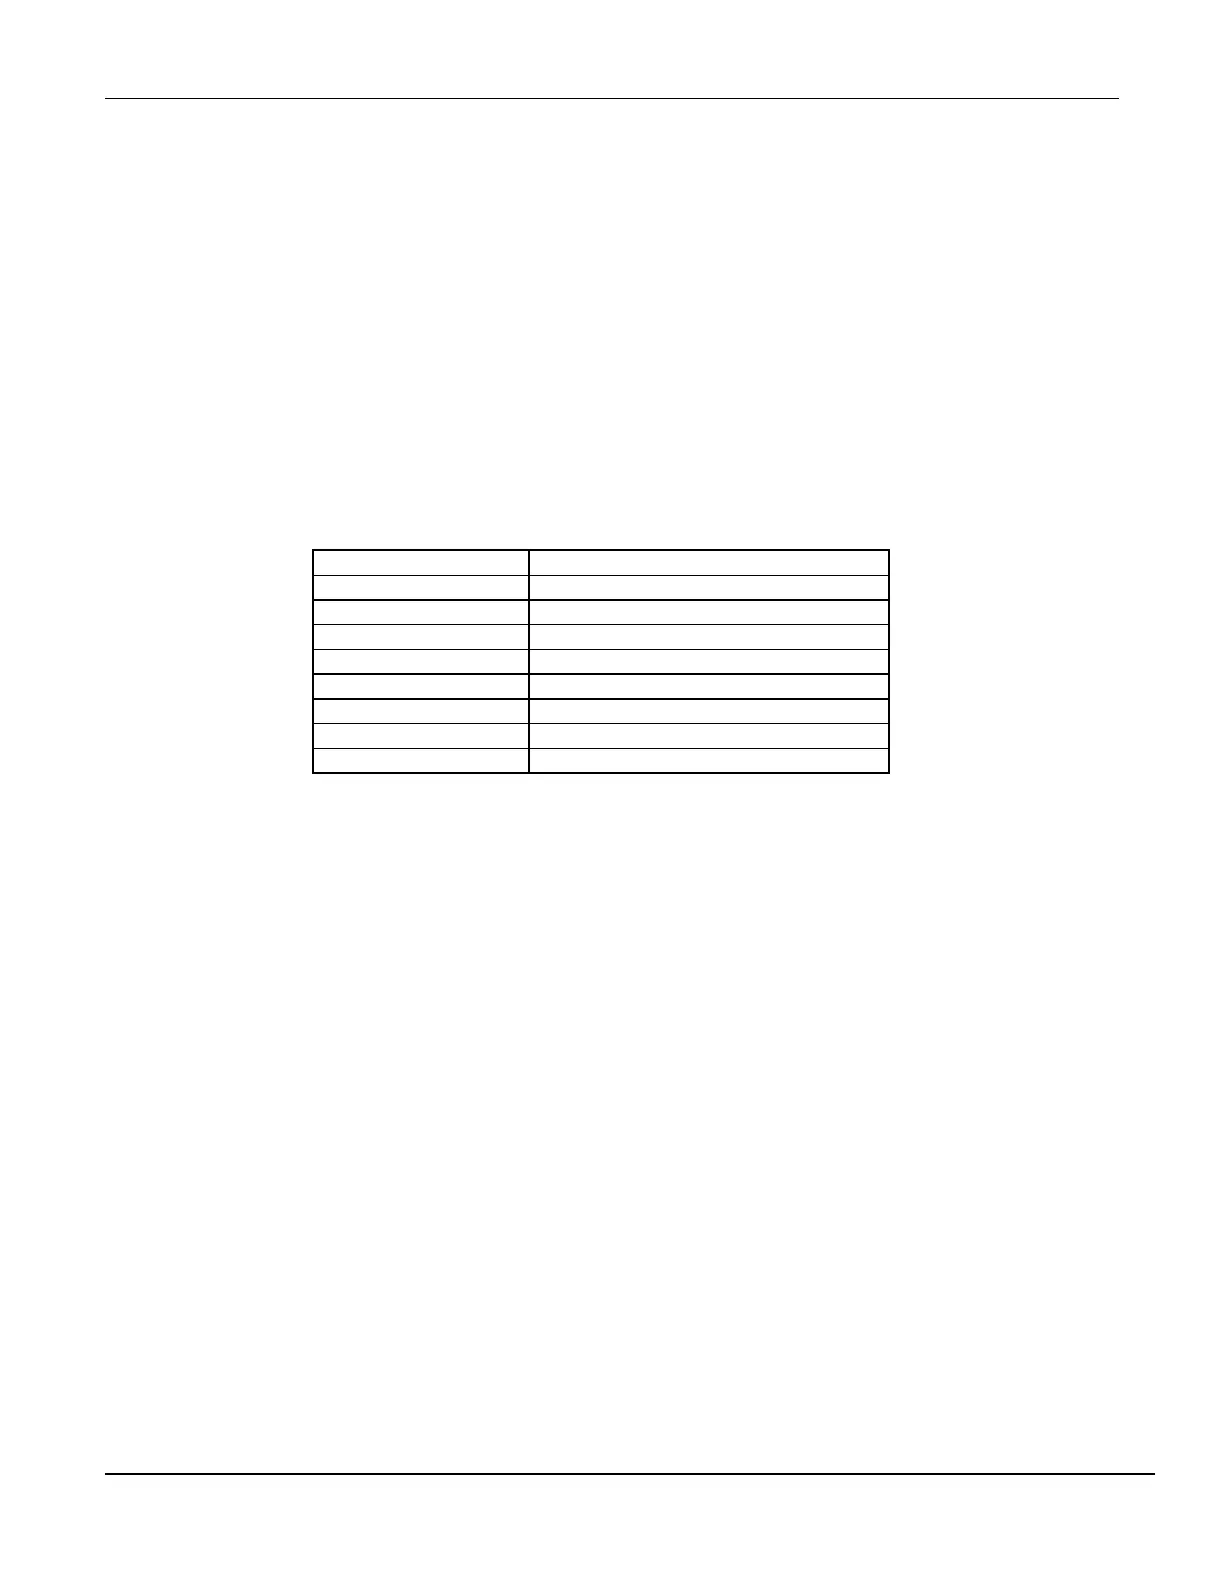
to record your performance. Normally, the MIDI channels in the G-800 are set as follows:
MIDI Channel G-800 Part
1 Accompaniment 1
2 A. Bass
3 Accompaniment 2
5 Accompaniment 3
7 Accompaniment 4
8 Accompaniment 5
9 Accompaniment 6
10 A Drums
If you are using an external sequencer or drum machine, use the following procedure to set the G-800 to sync to
xternal MIDI clock:
e
1) From the Master page, press [F3] MIDI.
2) Hold SHIFT and press [F4] Sync.
3) Use the PAGE UP and DOWN buttons to select the RX page.
4) Use
the ACCOMP/GROUP knob to set Style Sync to MIDI.
NOTE: Remember to change this setting back to INT when you are done using the external MIDI device.
5
) Press [F5] EXIT.
NOTE: Be aware that when the style ends, the G-800 will loop to the beginning and continue recording. You
should not leave your drum machine or sequencer running through more than one repetition as this could
result in double notes or other material being recorded on top of the original data.
Erasing a Track
A
ny Track within a Style can be erased. Use the following procedure to erase a Track:
1) Press F4 [Edit], then F1 [Erase].
2) Use the PAGE UP/DOWN buttons to select Page #1.
3) Use the corresponding knobs to set the Track, Mode, Type, and Division parameters (see FIG.1 on p.1).
4) Press PAGE DOWN to select Page #2.
5) Use
the corresponding knobs to set the To/From, Bar, Beat, CPT, and Data Type parameters (see FIG.2 on p.2).
NOTE: The “From” and “To” parameters represent the beginning and ending points for the section to be erased and
are designated in bars, beats, and clock pulses (CPT). The “Data Type” parameter allows you to select specific
type
s of MIDI data to be erased.
6) Press PAGE DOWN to select Page #3.
7) Use the corresponding knobs to set the From Note, To Note, and Octave parameters (optional).
8) Press M. Drums [Execute] to erase the selected information.
 Loading...