®ÂØÒňΠG-800 Supplemental Notes
© 1997 Roland Corporation U.S. Recording User Styles on the G-800 Page 3 of 5
S
etting the Time Signature (continued)
3) Press the [Upper 1] “Execute” button to confirm the time signature settings.
4
) After this function is complete, press [F4] to return to User Style Page #1.
II. Sound and Effect Setup
Now that we have chosen the basic setup for the User Style, we need to choose some sound settings for our
ndividual tracks.
i
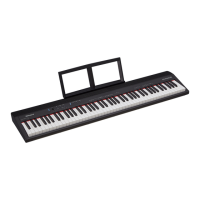
1) Use the PAGE UP/DOWN buttons to select Page #4.
Tone - Selects one of the 689
Tones (or 25 Rhythm Sets if you
are on the ADR track.)
Expression - Sets the volume of
the selected Track.
Reverb - Sets the amount of reverb
applied the selected Track.
Page - Used to
select the display
screens available in
the current mode.
FIG.4
Panpot - Sets the placement (Left to
Right) of the Track in the stereo field.
Chorus - Sets the amount of chorus
a
lied the selected Track.
2
) Use the corresponding knobs to adjust the parameters as desired (see FIG.4 above).
NOTE: The settings for the instruments and effects are automatically recorded at the beginning of each
division. This allows you to select a different instrument or effect on the same Track for each division.
III. Recording a User Style
Recording Procedure
Use the following procedure to begin recording:
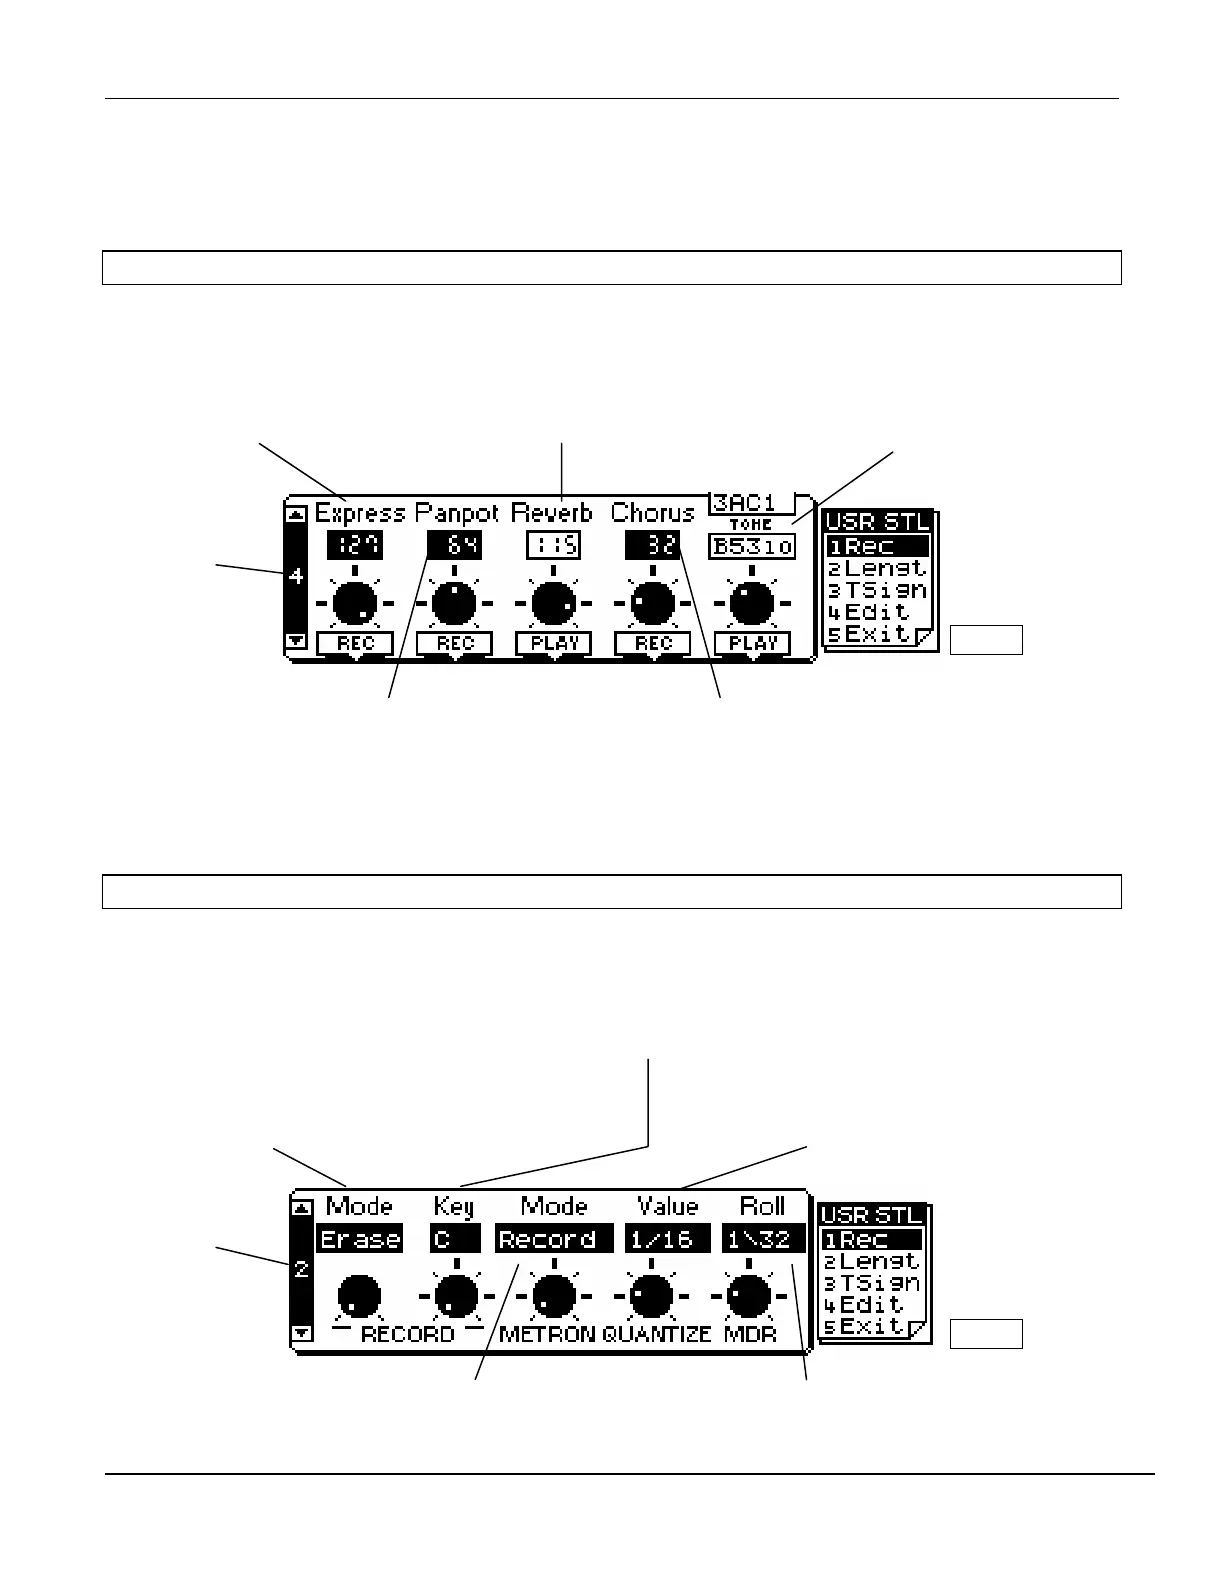
1) Use the PAGE UP/DOWN buttons to select Page #2.
Key - Selects the Key that you will be recording in. It is
generally recommended that you record in the key of C.
Value - Selects the Quantize value. The available
settings are 1/8, 1/8t (eighth-note triplets), 1/16,
1/16t, 1/32, 1/32t, 1/64, and Off.
Mode - Selects the type of recording (Erase - recorded data will
replace all data on the selected Track or Merge - recorded data
will be added to the existin
data on the selected Track
.
Mode - Selects when the Metronome will sound
Record onl
Pla
onl
Rec. and Pla
and Alwa
s.
Roll - Selects the value of the roll when a
MDR
Manual Drums
drum roll is desired.
Page - Used to
select the display
screens available in
the current mode.
FIG.5
 Loading...