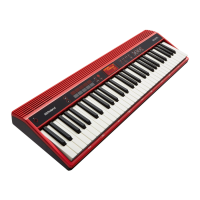
3
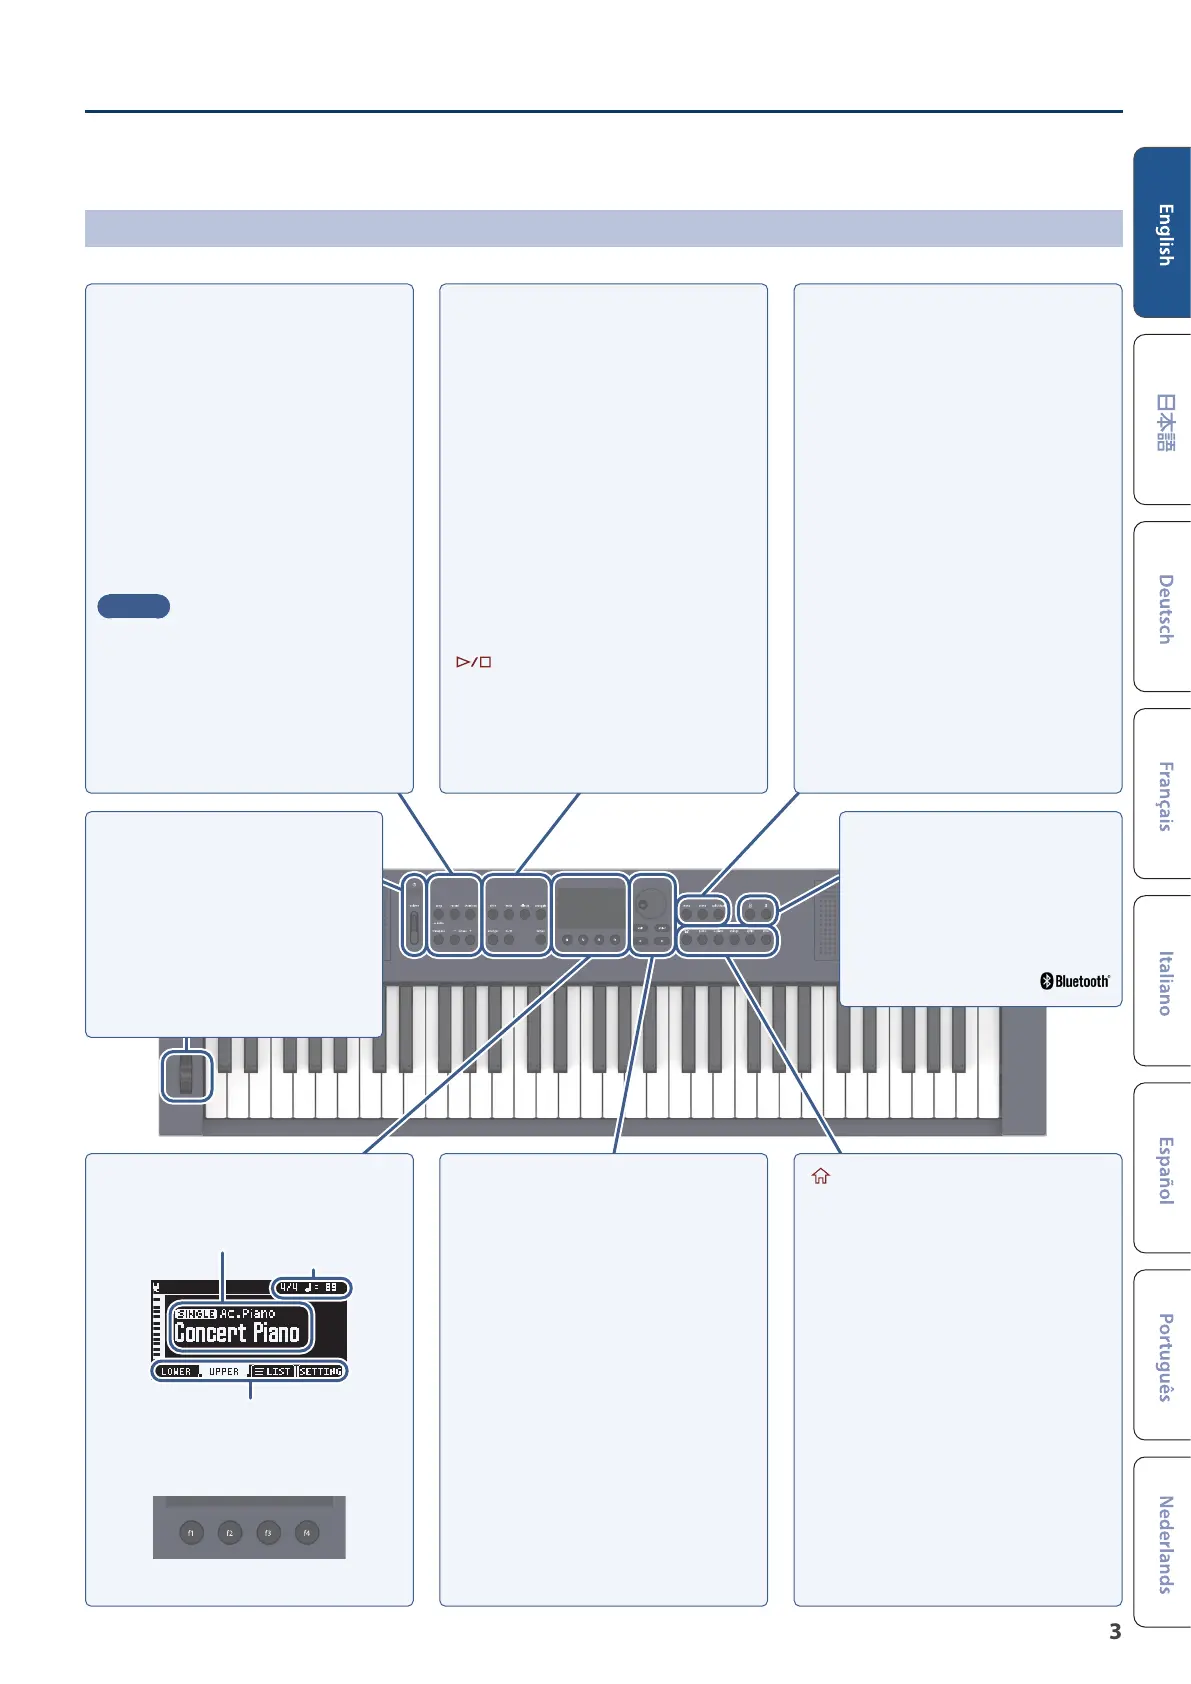
Panel descriptions
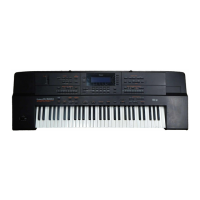
GO:KEYS 3
[song] button
Selects the song to play back.
* Long-press the [song] button to start the demo function.
[record] button
Records a new song.
[chord seq] button
Shows the chord sequencer view screen.
The chord sequencer function plays back chords as an auto-
accompaniment based on the chord pattern, even if you
don’t use the keyboard to specify a chord.
[transpose] button
To transpose the key in semitones, hold down the [transpose]
button and press the octave [-] or [+] button. (This only
transposes what you play on the keyboard.)
MEMO
While holding down the [transpose] button, you can also
change the keyboard transpose value by pressing the root
on the keyboard for the key to which you want to transpose.
octave [-] [+] buttons
Raises or lowers the pitch in octaves.
[style] button
Shows a selection screen for selecting the style to use in
auto-accompaniment.
[mute] button
The mute settings screen appears.
This turns the drums, bass and other accompaniment parts
on/o. When this is turned on, those parts stop playing.
[eects] button
Shows a screen where you can congure the eects that
apply to the entire performance.
[arpeggio] button
Shows the arpeggio settings screen.
[arranger] button
Changes the mood of the accompaniment.
This lets you play an intro or ending with the auto-
accompaniment, or use variations to change the mood of the
accompaniment.
[ ] button
Plays/stops the auto-accompaniment.
[tempo] button
Changes the metronome and auto-accompaniment tempo.
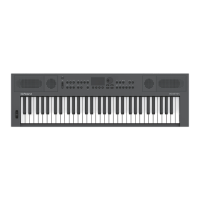
Display
Shows various information according to the operation.
Functions assigned to the function buttons
Time signature, tempo
Mode/category
Tone name
Function buttons [f1]–[f4]
Press these buttons to select the parameters shown at the
bottom of the display or to execute a function.
Dial
Moves between parameters and changes their values.
[exit] button
Cancels the operation.
This can also be used to exit a screen.
[enter] button
Conrms the operation.
[
Ì
][
Ê
] button
Use these buttons to select parameters and change their
values. Hold down the buttons to make the value change
continuously.
Press the other button when changing the value
continuously to make the value change quickly.
On the home screen, use these buttons to change tone
categories; and on the list screen, use these buttons to switch
between pages.
[menu] button
Press this button to show the menu. Select a parameter to
make detailed settings.
For details, refer to the “Reference Manual” (Roland website).
[scene] button
Shows the scene selection screen.
* Long-press the [scene] button to show the save screen.
[split/dual] button
Press the [split/dual] button to cycle between the settings in
order: “Single”
Ó
“Split”
Ó
“Dual”.
Single: Plays with a single tone.
Split: Lets you play this instrument with dierent
tones in the left and right parts of the keyboard,
separated by a key you choose. For instance, you
can assign a bass sound to the left hand and a
piano sound to the right hand.
Dual: Lets you play two dierent tones at the same
time with each key press.
[ ] (Home) button
Returns you to the home screen.
[piano] [e.piano] [strings] [synth] buttons
(tone buttons)
Selects the tones in each category.
[other] button
Selects the tones for other categories.
[
Ċ
] (Metronome) button
Turns the metronome on/o.
Long-press the [
Ċ
] (Metronome) button to show the
settings screen.
[
Ġ
] (Bluetooth) button
The System > Bluetooth screen appears.
Long-press the [
Ġ
] (Bluetooth)
button to start pairing.
[
Ā
] (Power) button
Turns the power on/o.
To turn the instrument o, long-press this button.
[volume] slider
Adjusts the speaker volume when you are using this
instrument’s speakers, or the headphone volume when
headphones are connected.
Wheel
Controls the pitch bend and modulation depth.
 Loading...