11
1 Move your audio file(s) to a location, such as your desktop, from
which it’ll be easy to copy them onto your card.
2 Double-click the card’s ROLAND folder to reveal its contents.
In the ROLAND folder you’ll see—among other things—an IMPORT
folder.
3 Drag any audio file you want to import straight onto the IMPORT
folder to copy it into the folder.
4 Unmount the JUNO_Gi card from your computer as you would any
other removable storage device.
5 Insert the card into the JUNO-Gi’s card slot.
Import the Audio Into the Current Song
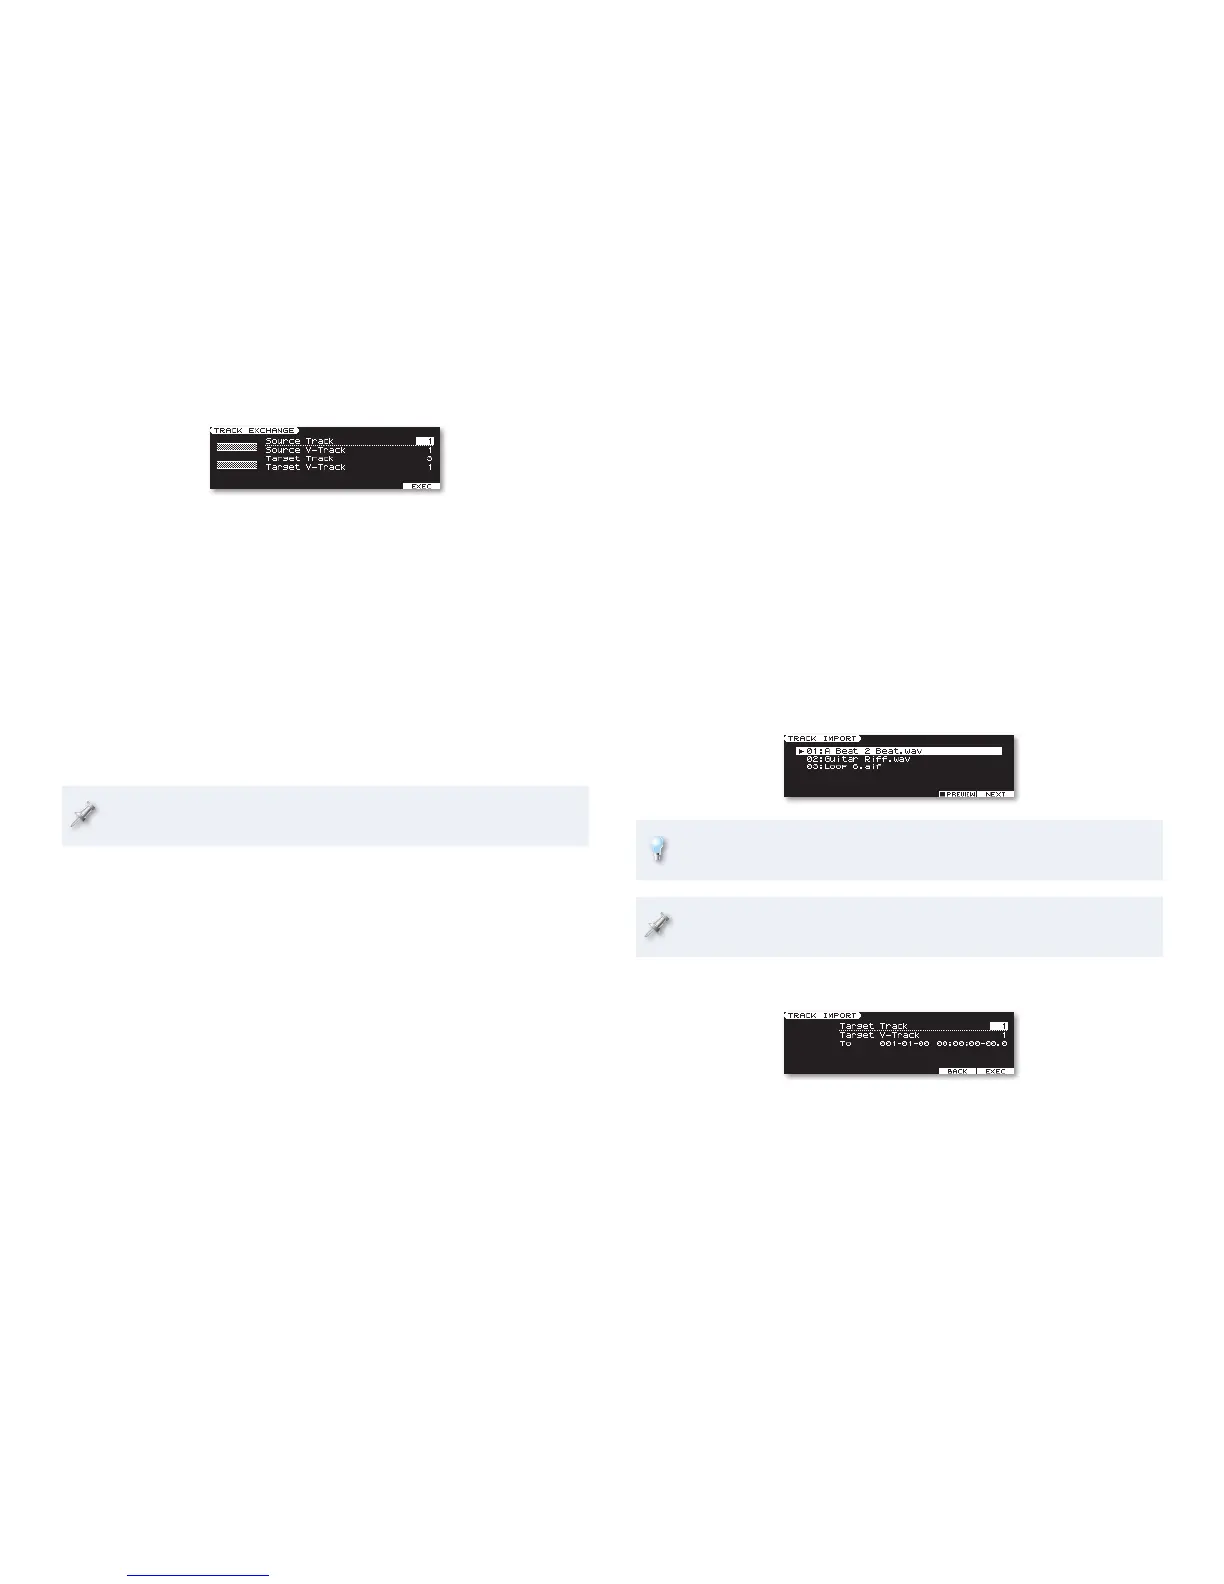
When you select Track Import from the TRACK EDIT MENU screen, you’ll see
a list of audio files in your card’s IMPORT folder.
You can audition any file you see here by highlighting it, and then
pressing 5 (PREVIEW). Press it again to stop playback of the file.
The TRACK IMPORT screen also lists the contents of your card’s EXPORT
folder—files you’ve exported from the JUNO-Gi, as we’ll discuss next.
1 Highlight the audio file you want to import, and then press 6 (NEXT).
2 Select the track and V-Track on which you want to place the imported
audio, and select the time location at which you want it to start, in
bars and beats, or in time.
Track Exchange
Track Exchange allows you to swap the location of a pair of V-Tracks. You
might want to do this for organizational purposes. To use it:
1 Set Source Track and Source V-Track to the first V-Track.
2 Set Target Track and Target V-Track to the second V-Track.
3 Press 6 (EXEC), and when the JUNO-Gi asks if you’re sure, press 5
(EXEC) to proceed with the swap, or press 6 (CANCEL).
Track Import
One of the more powerful features of the JUNO-Gi’s digital recorder is its
ability to import audio files into a song. This lets you add beats, tracks, or
other recordings to a JUNO-Gi song.
In this section, we’ll assume you know how to use your computer. If you
don’t, please consult its documentation.
You can import any audio file into the JUNO-Gi that
• is an uncompressed, or “linear,” .WAV or AIFF file—with “.wav” or “.aif” at
the end of its name.
• uses a 44.1 kHz sampling rate.
• has a resolution of 8, 16, or 24 bits.
• is longer than one second in length.
There are two steps to this process: getting the audio file onto your card, and
then importing it into the JUNO-Gi.
Put the Audio to Be Imported On Your SD Card
In “What You Need” on page 4 of this booklet, we discussed using your
JUNO-Gi SD card with your computer—everything we said there applies
here, too. Once you’ve got your JUNO-Gi’s card mounted on the computer:

 Loading...


