右左右左
右 左右 左
8
TEST MODE/テストモード
NOTICE: Before executing test mode, be sure to backup user data as
explained in the section "Saving and Loading user data". And
when you execute test mode, the various parameters will be
given special settings. After executing test mode, be sure to
load the Factory preset data, and the User data.
SS Required items
MIDI Cable
SmartMedia x2 (Formatted / Protected)
Foot pedal (DP-2 etc.)
Monitor Speaker (MA-12 etc.)
SS
Entering the TEST MODE
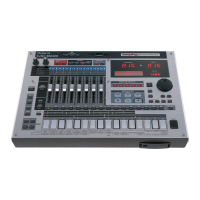
1. Connect the Monitor Speaker to the MIX OUT of the MC-505.
2. Turn the power on while holding down [DBeam TYPE], [DBeam ON]
and [FUNC].
You will enter the TEST MODE and the following basic display will
appear.
3. Press [ENTER].TEST MODE will be started.
As a rule, tests are in the order of test number, but you can select the
each test items directly by pressing the Keyboard pad [1] to [11] while
pressing [SHIFT] button.
SS Exiting the TEST MODE
When LCD Test ends, the following display appears.
( or in the initial display of the test mode, press keyboard Pad [16] while
holding down [SHIFT])
Press [ENTER] button to load the factory preset data.
To abort a command, press [BWD] button.
SS Test Items
The MC-505 has the following 11 test items.
Some test items will be started automatically, when the next previous test
ends normally.
1. Memory Test
2.MIDI Test (Identifying the program version)
3.Card Test
4.Pedal Test
5. SW/LED Test
6. Encoder Test
7. A/D Test
8. DBeam Test
注意:テストモードを実行する前に、「ユーザーデータのセーブとロード」
の項目を参照して、必ずユーザーデータのバックアップを行って
ください。また、テストモードを実行すると各種設定が特殊なも
のになってしまいますので、テストモードを実行した後は、ファ
クトリープリセットデータのロードを行った後、ユーザーデータ
のロードを行ってください。
◇ 用意するもの
・MIDIケーブル
・スマート・メディア 2枚
(一方はフォーマット済みのもの、一方はプロテクトシール
を貼ったもの)
・フットペダル (DP-2等)
・モニタースピーカー (MA-12等)
◇ テストモードへの入りかた
1.モニタースピーカーを MIXOUTジャックにつないでください。
2.[DBeamTYPE][DBeamON][FUNC]の3つのボタンを押しながら電
源を投入します。
テストモードプログラムが起動し、LCDに次の初期画面が表示され
ます。
3.[ENTER]を押すと、メモリーテストが始まります。
任意の項目からテストを開始するには、
[SHIFT]を押しながら[1]から[11]のキー・パッドを押してください。
◇ テストモードの抜けかた
LCDテストが終わると次の画面になります。
(または、初期画面が表示されているときに、[SHIFT]を押しながらキー
ボード・パッドの[16]を押します。)
[ENTER]を押すと、ファクトリー・プリセット・データがロードされま
す。
作業を中止する時は [BWD]を押してください。
◇ テスト項目
テストは、次の 11項目が有ります。詳細は各項目を参照してください。
いくつかの項目は、直前のテストが正常終了すると自動的に始まります。
1.メモリーテスト
2.MIDIテスト (バージョン確認)
3.カードテスト
4.ペダルテスト
5.SW/LEDテスト
6.エンコーダーテスト
7.ADテスト
8.DBEAMテスト
9. Sound Test
10. DSP Test
11. LCD Test
• Exiting the each Test item
Press [ENTER] while holding down [EXIT].
The test will be suspended and MC-505 return to basic test mode
display.
1. Memory Test
1-1. Press [ENTER] in the basic test display. Memory Test will be started.
The following display will appear.
1-2. When the test of the each device end, display --- will change to "ok"
or "NG".
If test result are OK, next test runs automatically.
2. MIDI Test
When Memory Test ends normally, MIDI Test runs automatically.
( or in the initial display of the test mode, press keyboard Pad [2] while
holding down [SHIFT])
2-1. When MIDI test starts, the following display appears.
2-2. Make a loop with MIDI cable that connects MIDI IN and MIDI OUT.
Does the LCD display "ok"?
2-3. Press [ENTER]. The system program version will be displayed.
2-4. And press the [ENTER] again. You can check the program version
number of the CPU and Preset Data.
2-5. Remove the MIDI cable.
Display shows " Disconnect ok", and then next test runs
automatically.
3. Card Test
9.サウンドテスト
10.DSPテスト
11.LCDテスト
・各テスト項目からの抜けかた
[EXIT]を押しながら [ENTER]を押してください。
テストが中断され、初期画面に戻ります。
1.メモリーテスト
1−1.初期画面で [ENTER]を押すと、メモリーテストを開始します。
ディスプレイには次の様に表示されます。
1−2.各デバイスのテストが終わると、"---"と表示されている部分が
"ok"または"NG!"に変わります。
すべて "ok"であれば、自動的に次のテストが開始されます。
2.MIDIテスト
メモリーテストが正常終了すると、自動的に MIDIテストが始まります。
(または、初期画面で [SHIFT]を押しながら、キーボード・パッドの[2]
を押します。)
2−1.MIDIテストが開始されると、ディスプレイには次の様に表示さ
れます。
2−2.MIDIINと OUTのジャックを MIDIケーブルでつないでください。
"ok"が表示されますか ?
2−3.[ENTER]を押すと、プログラムのバージョンを確認できます。
2−4.さらに [ENTER]を押すと、プリセットデータと CPUのバージ
ョンを確認できます。
2−5.MIDIケーブルをぬくと、"Disconnectok"と表示されて、自動
的に次のテストが始まります。
NOTICE:
It takes a few minutes to complete the data loading.
Never turn the power off during this procedure.
注意: 作業が終了するまでには数分時間がかかります。
この間、絶対に電源を切らない様に注意して下さい。
Prg Dat Usr Ram
--- --- --- ---
Result of Test Check
テストの結果 チェック項目
Prg NG! Check IC4 on MAIN BOARD
Dat NG! Check IC6 or IC7 on MAIN BOARD
Usr NG! Check IC5 on MAIN BOARD
Ram NG! Check IC8 on MAIN BOARD
Troubleshooting for Memory test/メモリーテストトラブルシューティング
MC-505 Test MIDI
Connect ---
MC-505 Test MIDI
SYS Version 1.00
Result of Test
/テストの結果
"Connect ok" is not appeared
/"Connect ok" が表示されない
Check
/チェック項目
Check IC52
Is the signal detects from PIN 1 and PIN 4 ?
/IC52をチェック
1番と4番ピンに信号が確認できますか?
Check IC20
Is the signal detects from PIN 2 and PIN 4 ?
/IC20をチェック
2番と4番ピンに信号が観測できますか?
Check Q16/17
Is the Low level signal detects from the base of Q16 ?
/Q16/17をチェック
Q16のベースにローレベルが入力されていますか?
Troubleshooting for MIDI test/MIDIテストトラブルシューティング

 Loading...
