4
Oct. 2013 PX-7B, PX-7C
Keyboard Assembly Procedure
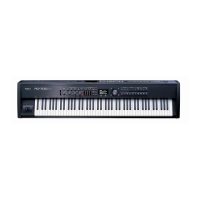
Removing the Key
Insert the tip of needle nose pliers into the U-groove on the pivot side and push in the direction of arrow A.
*Before removing black keys, first be sure to remove the adjacent white keys.
*Take care to ensure that the grease applied to the pivot area is not adhered to the rubber switch.
fig.key-release-e.eps
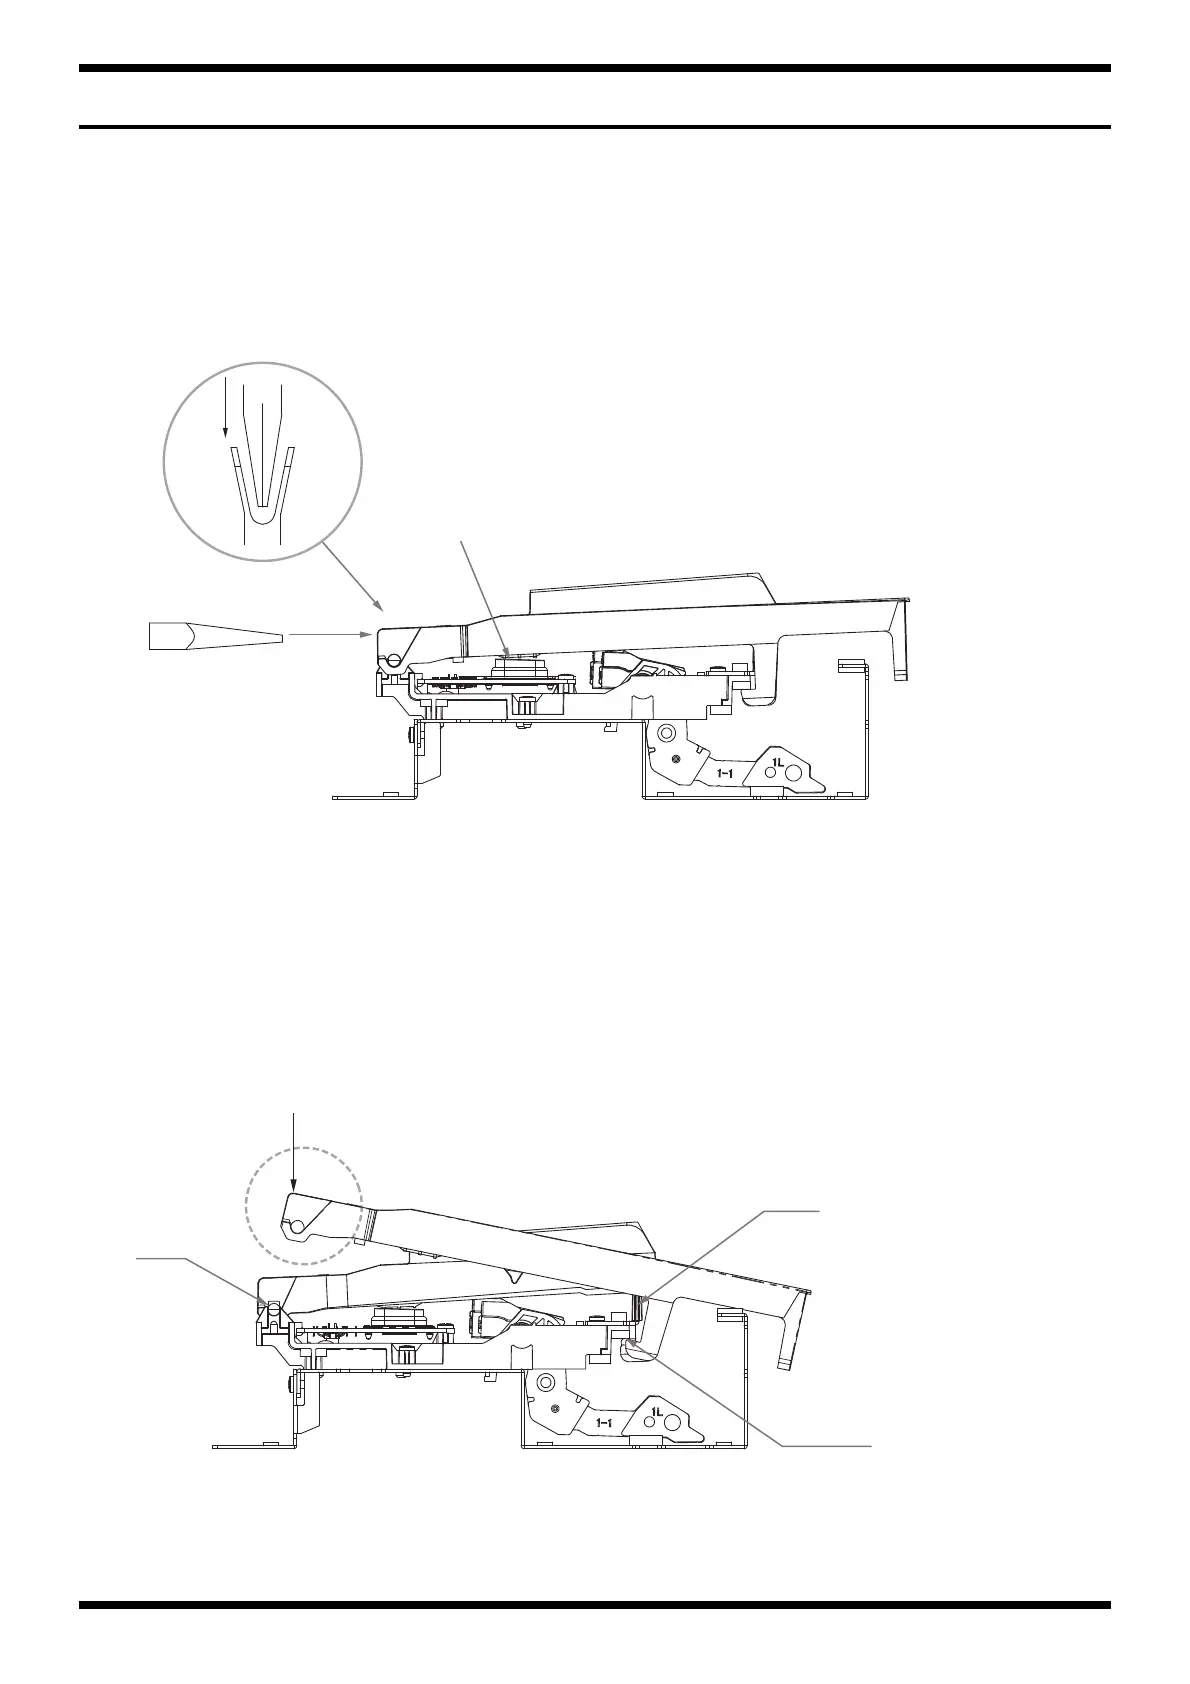
Installing the Key
While hooking the foot of the key under the cushion, align the inner wall of the key with the guide, place it as shown in the figure, and press the area shown by the
dotted line in the direction of the arrow until it engages with the pivot with an audible click.
*Before installing white keys, first be sure to install the adjacent black keys.
fig.key-set-e.eps
A
A
Needle nose pliers
Rubber switch
Cushion
Guide
Pivot
 Loading...