25
Troubleshooting
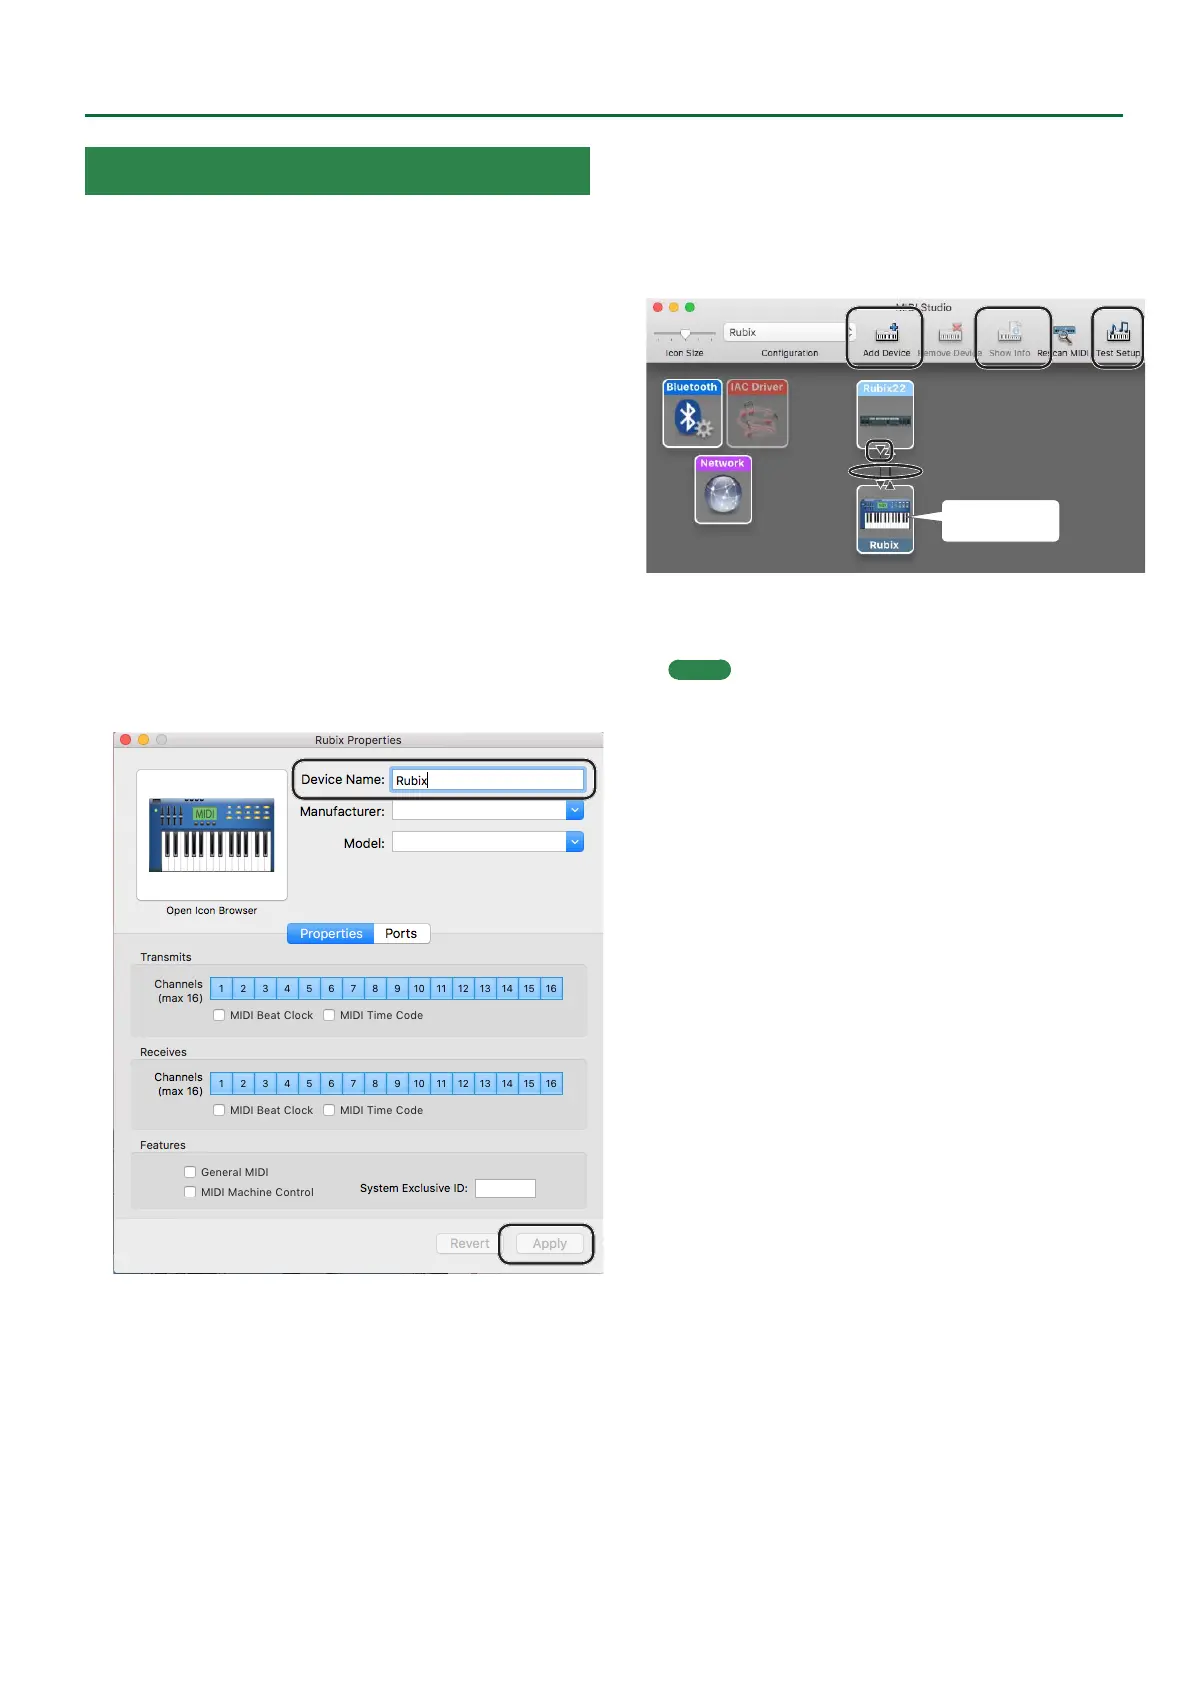
Mac OS X MIDI Settings
Here’s how to congure the MIDI settings for Mac OS X.
1. In the Mac OS X Finder, open the [Applications]
folder and then the [Utilities] folder, and then
double-click [Audio MIDI Setup].
2. Click [Show MIDI Window] in the [Window] menu.
3. Conrm that [Rubix22] (or Rubix24, Rubix44)
appears in the “MIDI Studio” window or the “Audio
MIDI Setup” dialog box.
If [Rubix22] (or Rubix24, Rubix44) does not appear or if it is grayed
out, it means that the Rubix is not being detected properly.
In this case, click the [Rescan MIDI] icon. Also, try turning the Rubix
o and then on again.
4. Click the [Add Device] icon once.
One [new external device] icon will appear.
5. Click the added [new external device] icon and then
click the [Show Info] icon.
6. Enter “Rubix” in the [Device Name] eld and then
click the [Apply] button.
7. Using your mouse, drag and connect the [
I
] [H]
buttons (which represent the input/output ports of
each device) of the existing [Rubix22] and the newly
added [Rubix] so that they are connected as shown
in the gure.
4
8, 10
5
9
3
7
New Device
8. Click the [Test Setup] icon.
The [Test Setup] icon turns on (blue).
MEMO
If you have a sound module connected to the Rubix’s MIDI
OUT connector, a fairly loud sound will be heard when you
perform the next step. Reduce the volume of your sound
module before continuing.
9. Click the Rubix22’s [
I
] button.
A conrmation sound is played from the sound module.
10. Click the [Test Setup] icon.
The [Test Setup] icon turns o (gray).
11. Close the “MIDI Studio” window or the “Audio
MIDI Setup” window.
 Loading...