8
Before You Start
7.
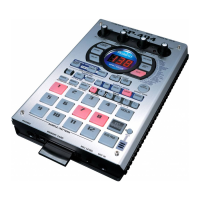
PATTERN SELECT Button
Use this button to play or record a pattern. When this button is
lit, you can press a pad to select a pattern. (p. 13, p. 34, p. 44)
LENGTH Button
Use this button to specify the length of the pattern when
recording a pattern. (p. 35, p. 44)
QUANTIZE Button
Use this button to make quantize settings for automatic timing
correction when recording a pattern. (p. 35, p. 44)
8.
START/END/LEVEL Button
Use this button to change the start point, end point, or volume
of a sample. (p. 17, p. 29, p. 32, p. 35, p. 44)
TIME/BPM Button
Use this button to specify the playback time or BPM (tempo)
of a sample. (p. 14, p. 25, pp. 33–35, p. 44)
TAP TEMPO Button
By pressing this button several times at the desired interval,
you can set the tempo to the corresponding timing. (p. 25, p.
34)
9.
DEL Button
Use this button to delete a sample or pattern. (p. 15, p. 27, p.
32, p. 36)
REC Button
Use this button to start/stop sampling or to record a pattern.
(p. 14, p. 23, p. 34, p. 44)
RESAMPLE Button
Use this button to apply an effect to a sample and then sample
it again (“resampling”). (p. 26)
10.
LO-FI Button
This button switches the grade (standard/lo-fi) when
sampling. Lo-fi sampling is selected when the button is lit, and
standard sampling is selected when the button is dark. (p. 23)
STEREO Button
This button switches between monaural and stereo sampling.
Stereo sampling is selected when the button is lit, and
monaural sampling is selected when the button is dark. (p. 17,
p. 23)
GATE Button
This button switches between
gate playback
(whereby the
sample plays only while you hold down the pad) and
trigger
playback
(sample alternately begins playing or stops with
each press of the pad). Gate playback is selected when the
button is lit, and trigger playback is selected when the button
is dark. (p. 29)
LOOP Button
This button switches between
loop playback
(whereby the
sample plays repeatedly when you press the pad) and
one-
shot playback
(the sample plays only once). Loop playback is
selected when the button is lit, and one-shot playback is
selected when the button is dark. (p. 29)
REVERSE Button
This button selects
reverse playback
, which causes the
sample to play backward. Reverse playback is selected when
the button is lit, and normal playback is selected when the
button is dark. (p. 30)
11.
CANCEL Button
You can press this button to cancel a sampling or sample-
delete operation before it’s actually executed. This button also
stops pattern playback or recording.
By pressing this button four times in rapid succession, you can
stop all currently sounding notes.
REMAIN Button
When you press this button, the display will indicate the
remaining time available for sampling. By holding down this
button and pressing a pad, you can select the sample to which
you want to apply an effect or the sample whose settings you
want to change. (p. 18, p. 28)
MARK Button
Use this button to play just a portion of a sampled sound. If
this button is lit, only the specified portion of the sound will
play. (p. 31)
12.
BANK Buttons (A, B, C/G, D/H, E/I, F/J)
When [PATTERN SELECT] is not lighted or when you’re
recording a pattern, these buttons switch sample banks. When
[PATTERN SELECT] is lit, these buttons switch pattern banks.
If you press BANK [A] or [B] so it’s lit, the SP-404’s internal
bank A or B will be selected. If you press BANK [C/G]–[F/J] to
light a button, banks C–F on the memory card can be selected. If
you press BANK [C/G]–[F/J] once again so a button is blinking,
banks G–J on the memory card can be selected.
13.
Pads (1–12)
When [PATTERN SELECT] is not lighted, pressing a pad will
play the sample assigned to that pad. The pad will light while
the sample plays.
When [PATTERN SELECT] is lit, you can use the pads to select
the pattern you want to play or record.
14.
HOLD Pad
When you hold down a pad and press the HOLD pad, the
sample will continue playing even after you release the pad.
(p. 16)
EXT SOURCE Pad
By pressing the external source pad so the button is lit, you
can mute/unmute or apply an effect to an external audio
input source (line or mic). (p. 17, p. 45)
SUB PAD
You can use the sub pad to play the sample of the pad you
pressed most recently. For example, this is a convenient way
to play a drum roll by hand.
15.
MIC Button
This button switches the mic input on/off. The mic input is on
when the button is lit. (p. 17, p. 24)
16.
Internal Mic
This is the SP-404’s internal mic. The internal mic is disabled if a
separately available mic is plugged into the front panel MIC IN
jack.
SP-404_e.book 8 ページ 2006年3月3日 金曜日 午後2時46分
 Loading...
