5
2. PREPARING GUIDE RUNNERS
FOR INSTALLATION
1
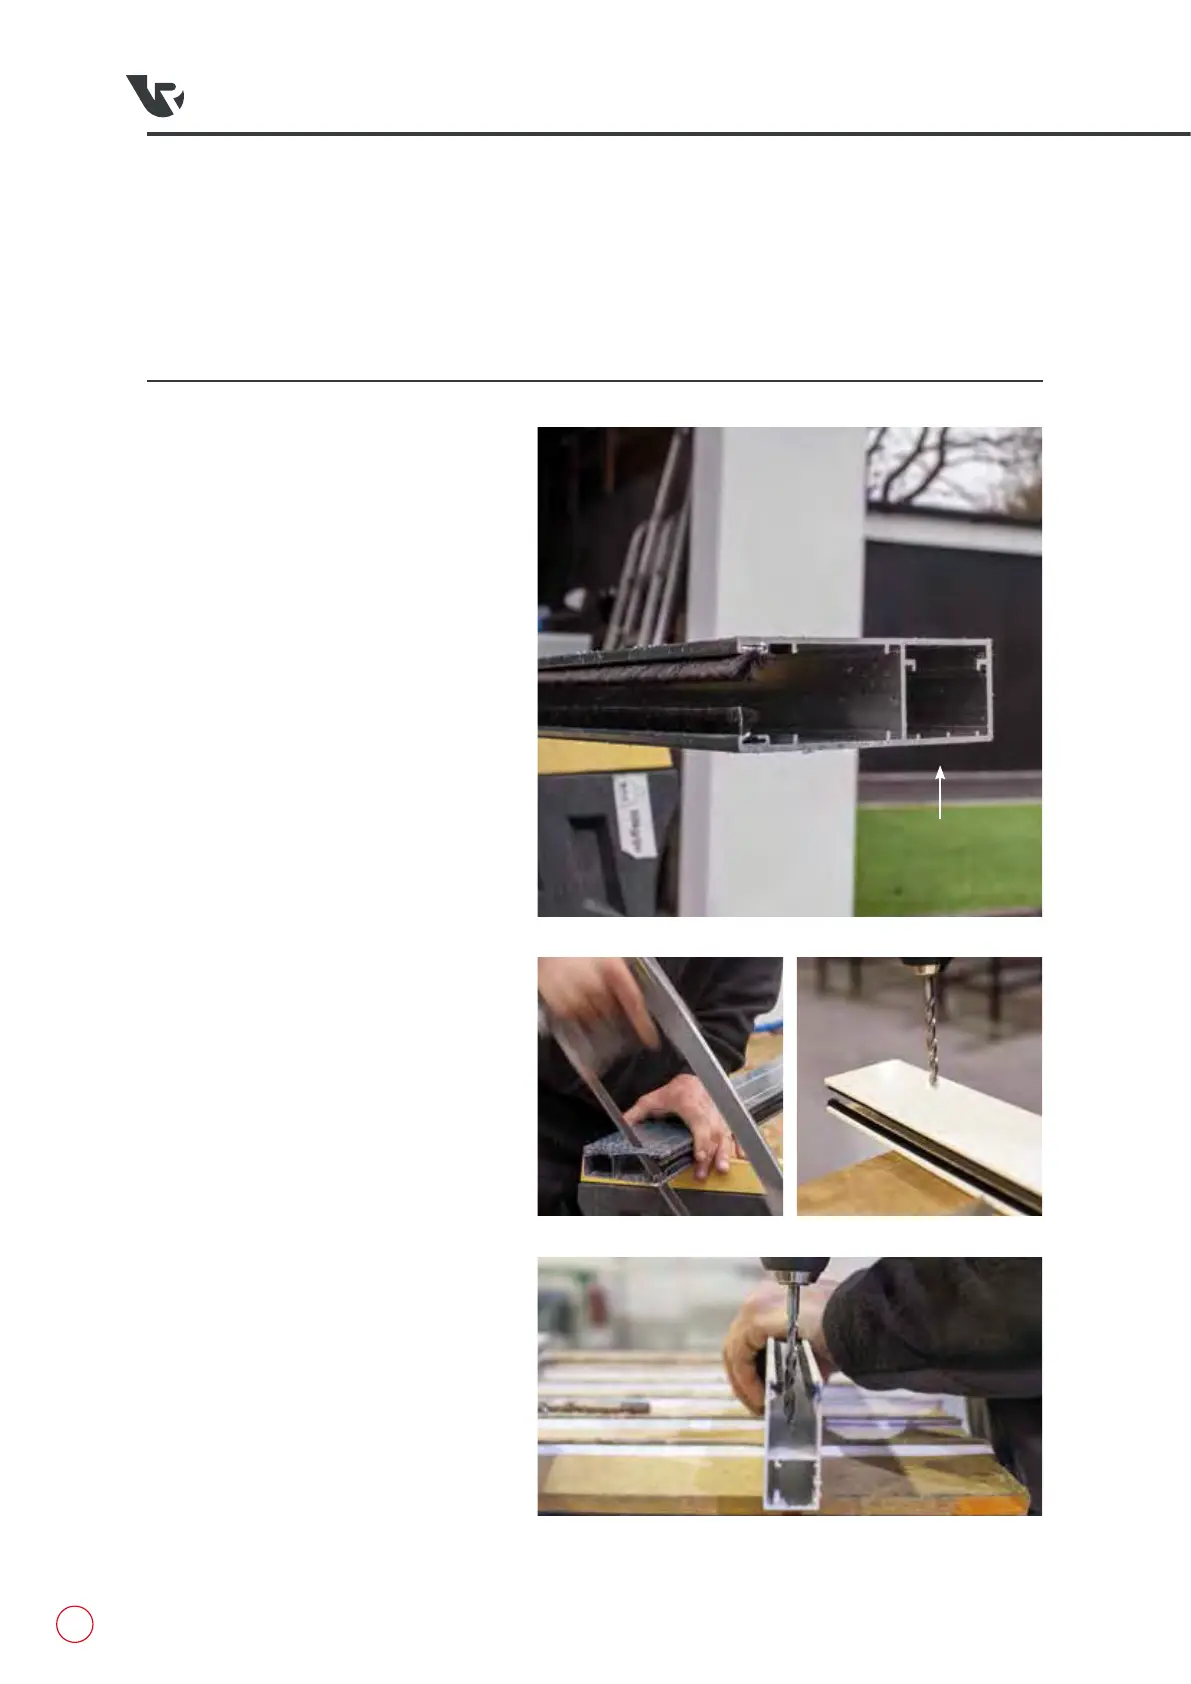
Both guide runners will be marked
with the letter ‘F’ to indicate the
front. This has the flat face when
looking in the rear box section of
the guide runner (fig.2.1). It will fit
against the wall for a behind fixing or
face out of the garage for a between
fixing.
2
Measure from floor to lintel and refer
to diagram 2, checking the lintel is
level. Cut the guide runners to size
as needed using a hack saw, for best
results cut the end which will be the
bottom (fig.2.2).
3
Offer both cut guide runners up
against the walls they will be fixed
to and mark the fixing points, either
on the flat face for a behind fixing
(fig.2.3) or for a between fixing in
the opening (fig.2.4). For best results
these should be as follows;
A
Top fixing between 50mm to
100mm down from the top of the
guide rail.
B
Bottom fixing 50mm to 100mm up
from the floor.
C
Marking at least one other fixing,
spread these evenly between
the two already marked points
on the guide runners so that you
have a secure fixing.
D
Drill a 7mm hole all the way
through each of the marks on
the guide runners and then drill
a 10mm hole to countersink
through the first layer only so you
can get the screw head through.
fig.2.1
fig.2.2
fig.2.4
fig.2.3
Front Face


 To Next Page