6
Step 3:
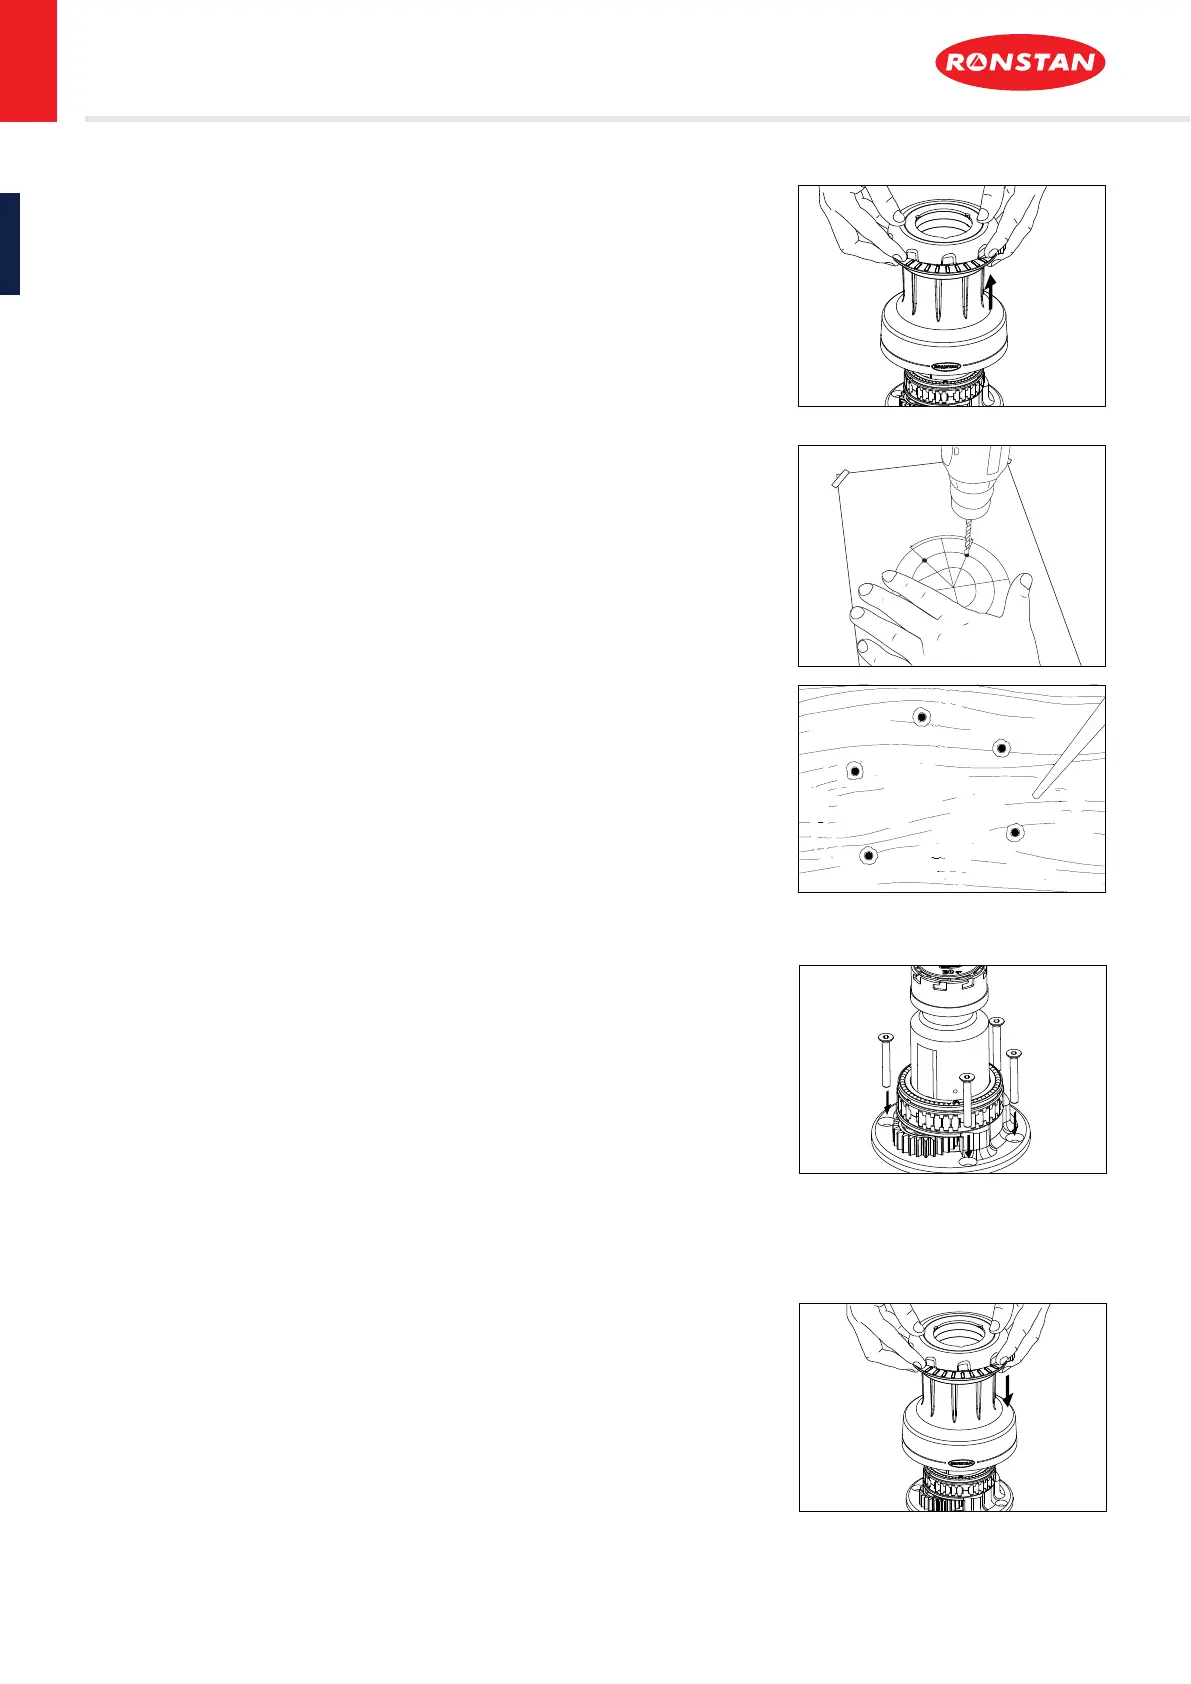
Remove the drum:
Grip the top of the drum assembly [7] with your ngers and pull vertically upward to remove it from the centre
stem [18]. As the winch is not xed to the deck yet, you may need to push gently with your thumbs against the
central drive shaft [11] to separate the parts. Set the drum assembly [7] aside for now.
Place the centre stem [18] on the drilling template with mounting hole positions aligned to check that the
orientation of rope entry in relation to the output drive gear [16] is correct.
Step 4:
Drill the mounting holes:
With the template in place, drill the Ø6.5mm holes for the M6 mounting bolts (or Ø9/32” holes for 1/4” bolts).
Remove the template, clean away any debris from the holes, and clean the deck thoroughly to ensure deck sealant
can adhere properly.
Step 5:
Apply sealant under the base of the centre stem [18] around the mounting holes, ensuring that the drainage
channels in the underside of the base plate [20] remain clean and free of sealant. For mounting on metal
or carbon bre surfaces, the base must also be completely isolated from the mounting surface to prevent
galvanic corrosion.
Step 6:
Fasten the centre stem to the deck:
Fit the centre stem [18] to the deck using large washers (or backing plate) and locking nuts below deck. Apply
Tef-Gel™ under the head of each mounting fastener to isolate it from the aluminium centre stem [18].
To avoid wearing the anodised surface of the centre stem [18], use a hex key to prevent the fastener from
turning and use a spanner to tighten the nuts from below*.
* 5x M6 or 1/4” Grade 316 countersunk stainless steel fasteners. Use of grade A4-70 hex socket CSK screws is recommended, installed
at a torque setting of no more than 7.1Nm as per industry standards.
Tef-Gel™ is a trademark of Ultra Safety Systems, Inc.
Step 7:
Re-assemble the winch drum:
Lift the drum assembly [7] over the centre stem [18], then slide it fully down into position.
Lay the closing washer [3] in its recess within the self tailer, taking care that the correct side is facing upward.
Place the closing plate [2] over the central drive shaft [11], so that it rests on the top of the centre stem [18]. A
pip on the bottom of the closing plate [2] will locate in a dimple in the aluminium surface when it is in its correct
orientation, leaving the bayonet notches around the edge exposed.
30QT ORBIT WINCH
™
RA6302 WITH QUICKTRIM™
 Loading...