Do you have a question about the ROOM LIFE SPENCER and is the answer not in the manual?
Do not stand on product. Do not use as a step ladder. Ensure all bolts are secured. Use on even surfaces.
STRONGLY RECOMMENDED to anchor product to prevent toppling, serious injuries, and death. Use provided anchor strap/bracket.
Regularly check anchors. Stability affected by carpet/uneven floors. Do not place unanchored TVs.
Check walls for wires/plumbing before drilling. Use appropriate fixings for wall type (e.g., masonry, plasterboard).
Keep children away. Do not use if parts are missing/damaged. Product must be used with wall attachment device.
Attaches cam bolts (A) and wood dowels (D) to side panels (2 and 3).
Installs wall anchors (N, O) to secure the product to the wall and prevent tipping.
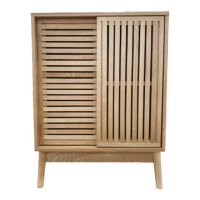
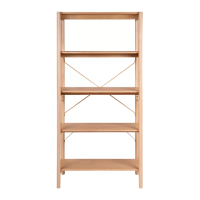
The SPENCER KIDS TALL BOOKSHELF is a piece of indoor furniture designed for children aged 7-12 years. It serves as a storage unit with multiple shelves and a cabinet, offering a practical solution for organizing various items in a child's room. The bookshelf is designed for simple assembly and is manufactured in China.
The bookshelf is intended for indoor use only. It features multiple open shelves and a closed cabinet, providing versatile storage options. The design includes a mix of open and concealed storage, allowing for both display and discreet organization.
A critical aspect of this product is its strong recommendation for anchoring to a wall or other solid surface to prevent tipping. Toppling furniture can cause serious injuries and death, especially to children. The product comes fitted with an anchor strap/bracket for this purpose.
When attaching anchor fixings, it is crucial to:
The manual provides detailed step-by-step assembly instructions with diagrams, indicating the parts and hardware required for each stage. It also includes instructions for fine-tuning the door position to ensure smooth operation.
| Brand | ROOM LIFE |
|---|---|
| Model | SPENCER |
| Category | Indoor Furnishing |
| Language | English |