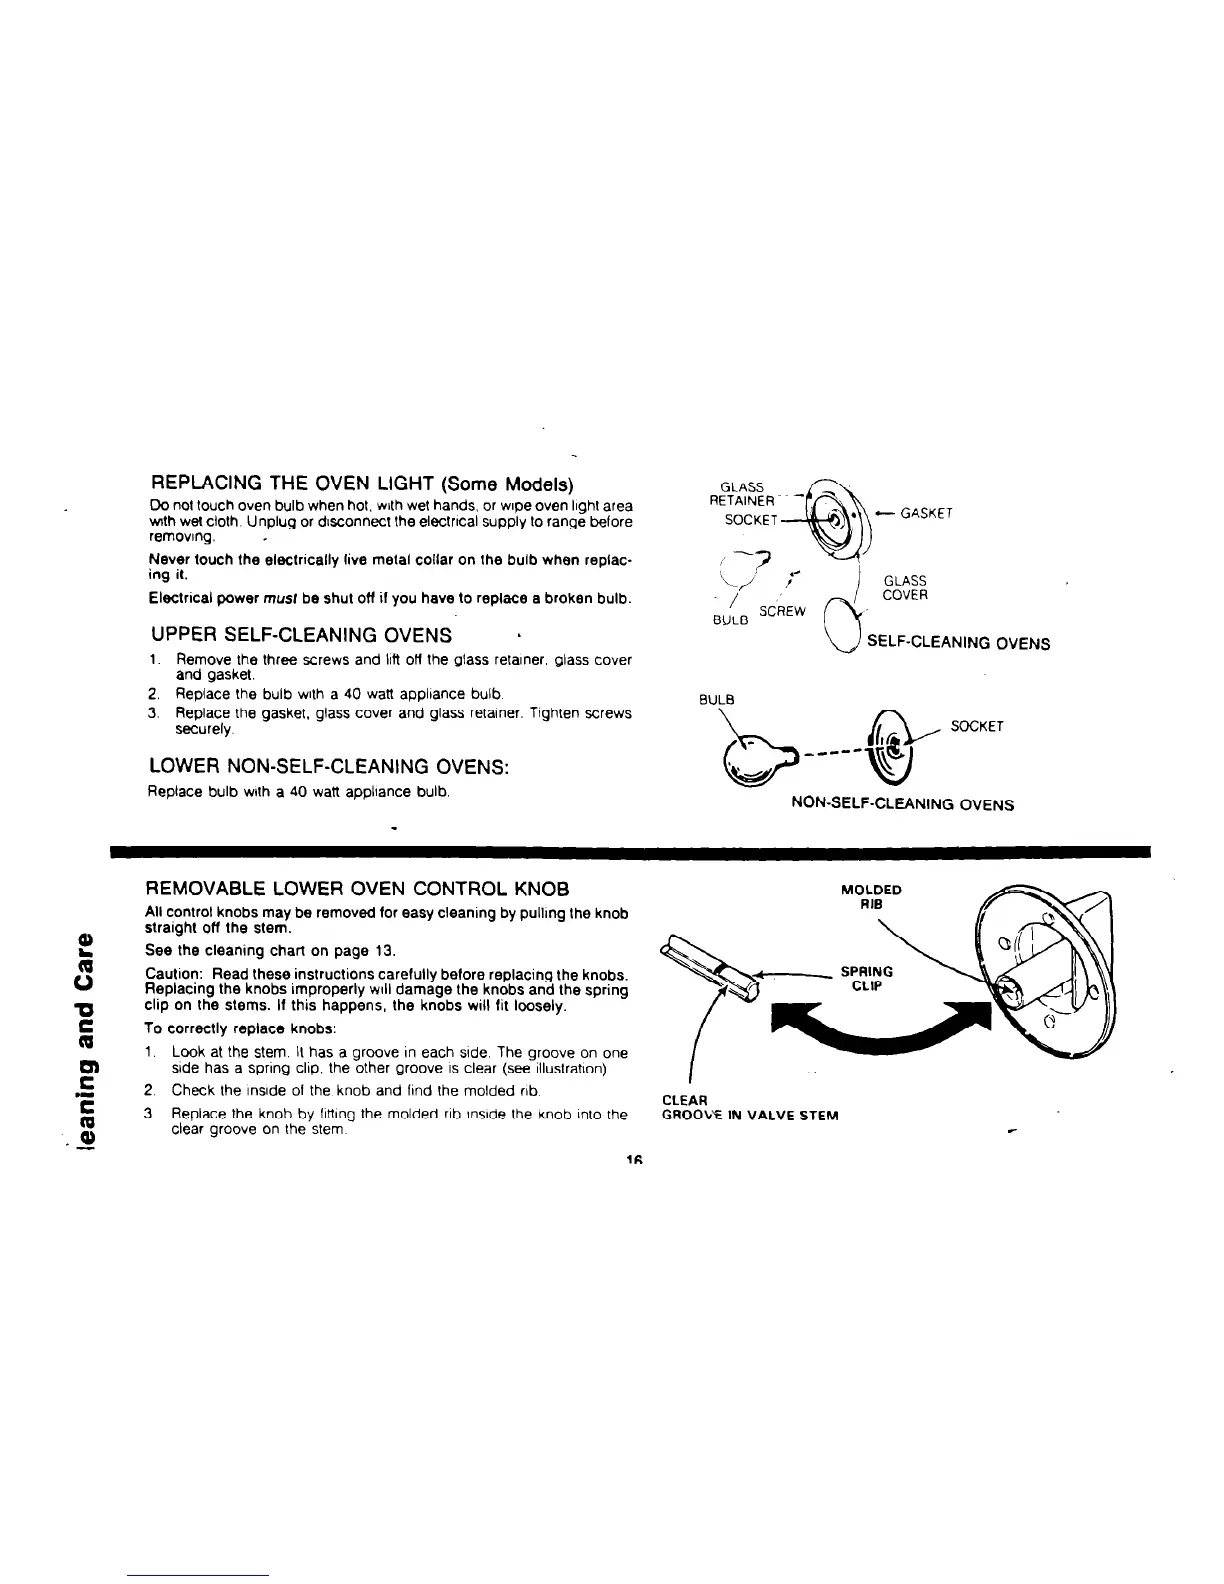
REPLACING THE OVEN LIGHT (Some Models)
Do not touch oven bulb when hot. with wet hands, or wrpe oven lrghl area
v&h wet cloth. Unplug or drsconnect the ekxtrtcal supply lo range before
removrng. -
Never touch the eleclncally live melal collar on Ihe bulb when replac-
ing il.
Electrical power musf be shut off if you have to replace a broken bulb.
UPPER SELF-CLEANING OVENS
h
1. Remove Ihe three screws and Ml off the glass retarner. glass cover
and gasket.
2. Replace the bulb wrlh a 40 watt applrance bulb.
3. Replace the gasket. glass cover and glass retarner. Tighten screws
securely.
LOWER NON-SELF-CLEANING OVENS:
Replace bulb with a 40 watt applrance bulb.
GLASS
RETAINER -
I
SOCKET
’ . -GASKET
-%b
c-? ,*
-/ ,/
I
GLASS
0
COVER
SCREW
,
BULB
SELF-CLEANING OVENS
BULB
SOCKET
_----
b
‘t&#J
i+
u
NON-SELF-CLEANING OVENS
REMOVABLE LOWER OVEN CONTROL KNOB
All control knobs may be removed for easy cleaning by pullrng the knob
L
straight off the stem.
See the cleaning chart on page 13.
3
Caution:
Read these instructions carefully before replacing the knobs.
Replacing the knobs improperly WIII damage the knobs and the spring
0
clip on the stems. If this happens, the knobs will fit loosely.
E
To correctly replace knobs:
1.
F
Look at the stem. II has a groove in each side. The groove on one
Me has a spnng ckp. the other groove IS clear (see rllustratron).
.I
2. Check Ihe rnsrde 01 the knob and lrnd the molded nb.
E
CLEAR
3. Replace the knob by lrttrng the molded rrb rnsrde the knob Inlo the
GROOL” IN VALVE STEM
-9
clear groove on the slem
16