52
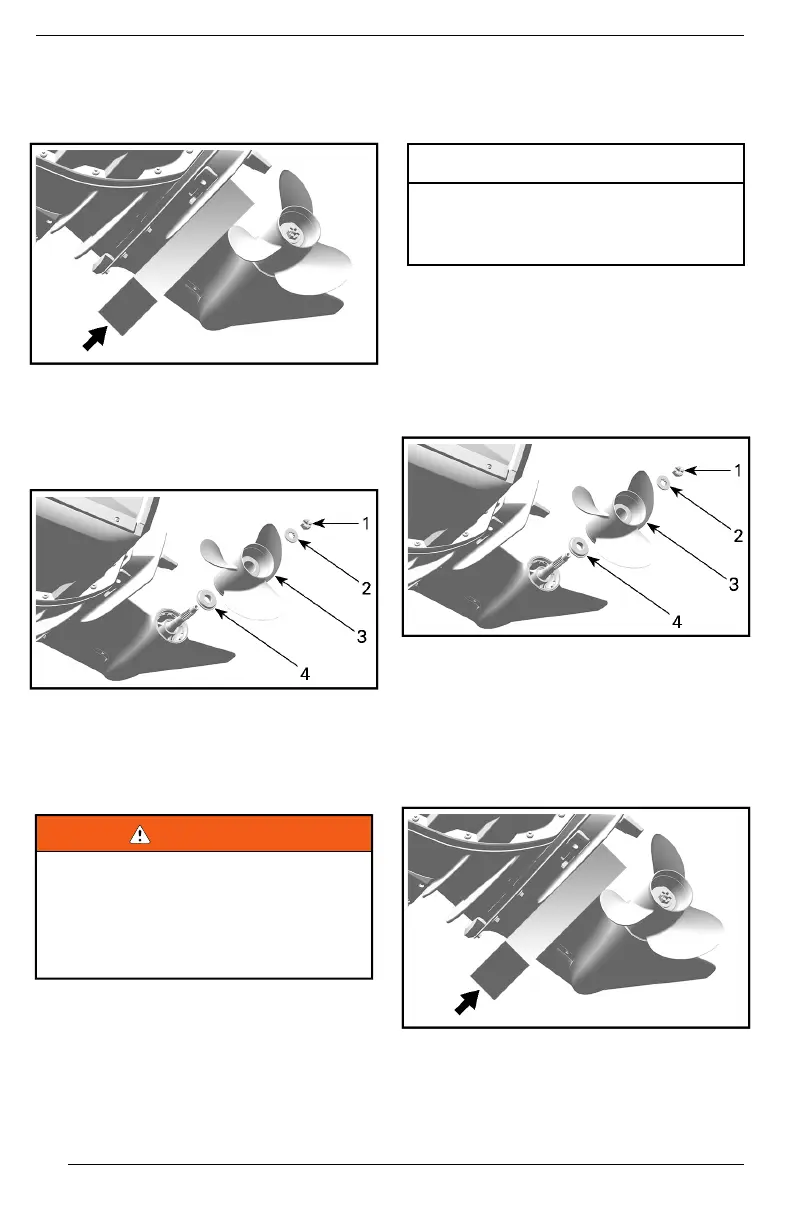
2. Wedge a block of wood between
the propeller blade and the anti--
ventilation plate.
3. Remove the slotted nut, and then
remove the block of wood.
4. Remove the spacer.
5. Remove the propeller.
6. Remove the thrust bushing.
1. Slotted nut
2. Spacer
3. Propeller
4. Thrust bushing
IInnssttaalllliinngg tthhee PPrrooppeelllleerr
WWAARRNNIINNGG
WWhheenn sseerrvviicciinngg tthhee pprrooppeelllleerr,, aall--
wwaayyss sshhiifftt tthhee oouuttbbooaarrdd ttoo tthhee
NNEEUUTTRRAALL ppoossiittiioonn,, ttuurrnn tthhee kkeeyy
sswwiittcchh OOFFFF,, aanndd rreemmoovvee tthhee kkeeyy
ssoo tthhee oouuttbbooaarrdd ccaannnnoott bbee ssttaarrtteedd
aacccciiddeennttaallllyy..
IIMMPPOORRTTAANNTT:
Rotax E-TEC
out-
board engines REQUIRE propeller
hardware kit, P/N 5012290. This kit
can be ordered from an authorized
BRP dealer.
1. Apply
Triple Guard
grease to the
entire propeller shaft before instal-
ling the propeller.
RReeqquuiirreedd PPrroodduucctt
TTrriippllee GGuuaarrdd ggrreeaassee
PP//NN 550088229988
2. Install the thrust bushing so that
the taper of the bushing matches
the taper of the shaft.
3. Align the splines of the propeller
with the splines of the propeller
shaft. Push the propeller until it is
seated on the thrust bushing.
4. Install the spacer.
1. Slotted nut
2. Spacer
3. Propeller
4. Thrust bushing
5. Wedge a block of wood between
the propeller blade and the anti--
ventilation plate.
6. Tighten the slotted nut to a torque
of 120 to 144 in·lb (13.6 to 16.3
MAINTENANCE PROCEDURES
 Loading...