2021 ROUSH Performance F-150 Service Manual
11
2021 ROUSH Performance F-150 Service Manual
8. Install the supplied connector onto the WHITE with
BLUE wire. Connect the mating electrical connectors
together. Engage the red locking tab.
9. Plug the 12V and 110V connectors into the trim
panel and leave loose. (The switch can be installed
next to the power port if the vehicle does not have
the 110V power source)
10. Determine a switch location. Remove the panel and
drill a 20 mm hole. Route the wires to the switch. The
switch is fastened using a lock washer, you must
unplug the switch and install from the front of the
panel then plug in the switch.
11. Remove the fuse block cover and kick panel.
12. Locate the fuse tap portion of the harness. Remove
fuse #2 from the fuse block (You may have to
remove the green fuse at the top to ease in removal/
installation). Insert fuse#2 into the fuse tap, and
insert the fuse tap into the fuse #2 location on the
block.
13. Secure the harness (CTUV740) up under the dash
using the supplied zip ties.
14. Remove the zip ties that cover the OE wiring harness
that runs the length of the vehicle.
15. Loosen the B-pillar trim piece by pulling just below
where the seat belt comes out. Do not remove.
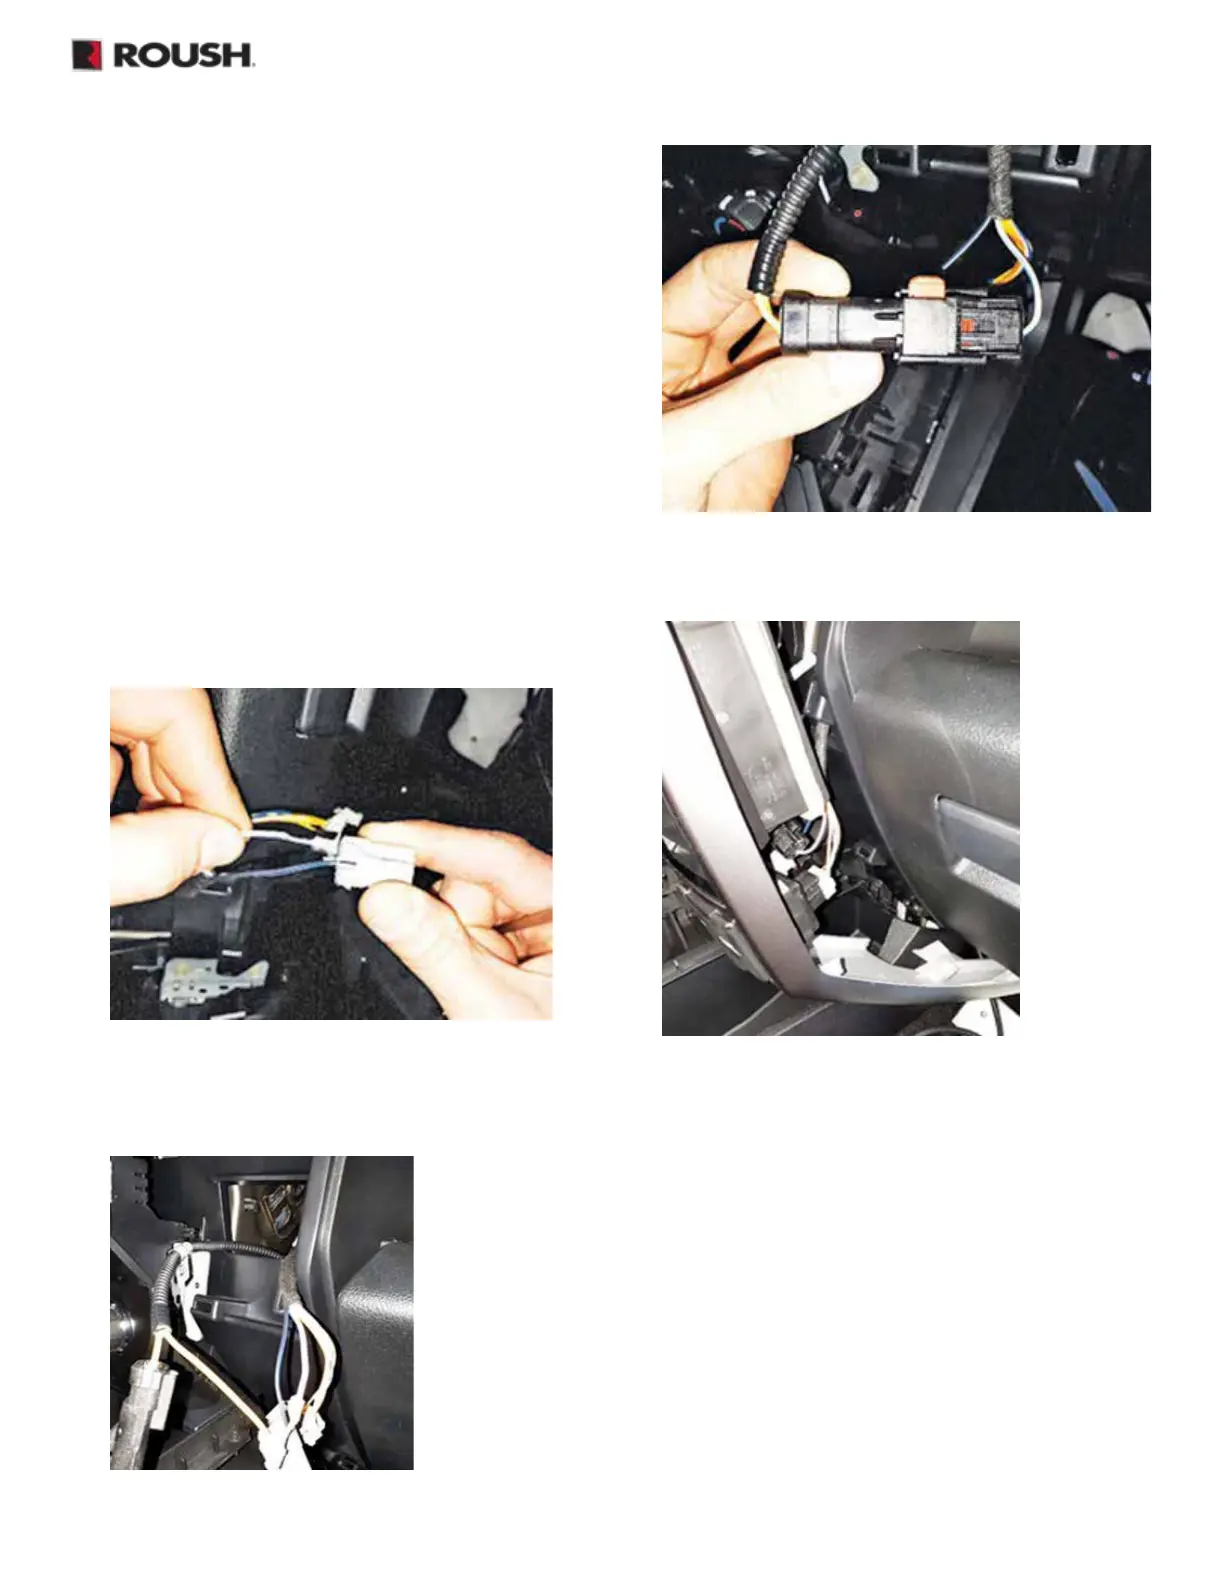
Installing the Active Exhaust Harness
NOTE: The active exhaust switch can be installed in
multiple different location. Wire lengths are longer than
needed for custom installations.
1. Remove the glove box.
2. Remove the passenger side trim panel.
3. Remove the passenger side rear pillar trim panel.
This is held in with clips.
4. Remove the two dash trim pieces by pulling rmly, a
plastic trim removal tool will help with this procedure
to not damage the trim. Remove the screws holding
the HVAC control plate to the dash.
5. Locate the connector for the 12V power outlet Using
a small pick, remove the red locking piece that is in
the end of the connector. Carefully lift the tab for the
WHITE with BLUE wire in the connector and remove
the terminal from the connector.
6. Locate the connector for the 12V power outlet Using
a small pick, remove the red locking piece that is in
the end of the connector. Carefully lift the tab for the
WHITE with BLUE wire in the connector and remove
the terminal from the connector.
7. Take the yellow lead from the active exhaust harness
and insert it into the spot in the 12V power outlet
connector that was de-pinned in the previous step.
Replace the red locking piece that was in the end of
the connector.