5 Once the system pressure has been
completely relieved, tighten the banjo bolt and
dispose of the rags safely.
6 Fuel pump -
removal and refitting
1
Warning: Refer to the
precautions contained in
Section 1 before proceeding.
Removal
1 Disconnect the battery negative (earth) lead
(refer to Chapter 5, Section 1).
2 Release the fuel system pressure as
described in Section 5.
3 Remove the floor carpet from the luggage
compartment.
4 Refer to Chapter 11 and remove the rear
seats.
5 Release the eight studs and remove the
seat squab backing from the body.
6 Release the two studs and remove the
luggage compartment backboard from the
body.
7 Remove the cover board over the spare
wheel, and remove the tool kit.
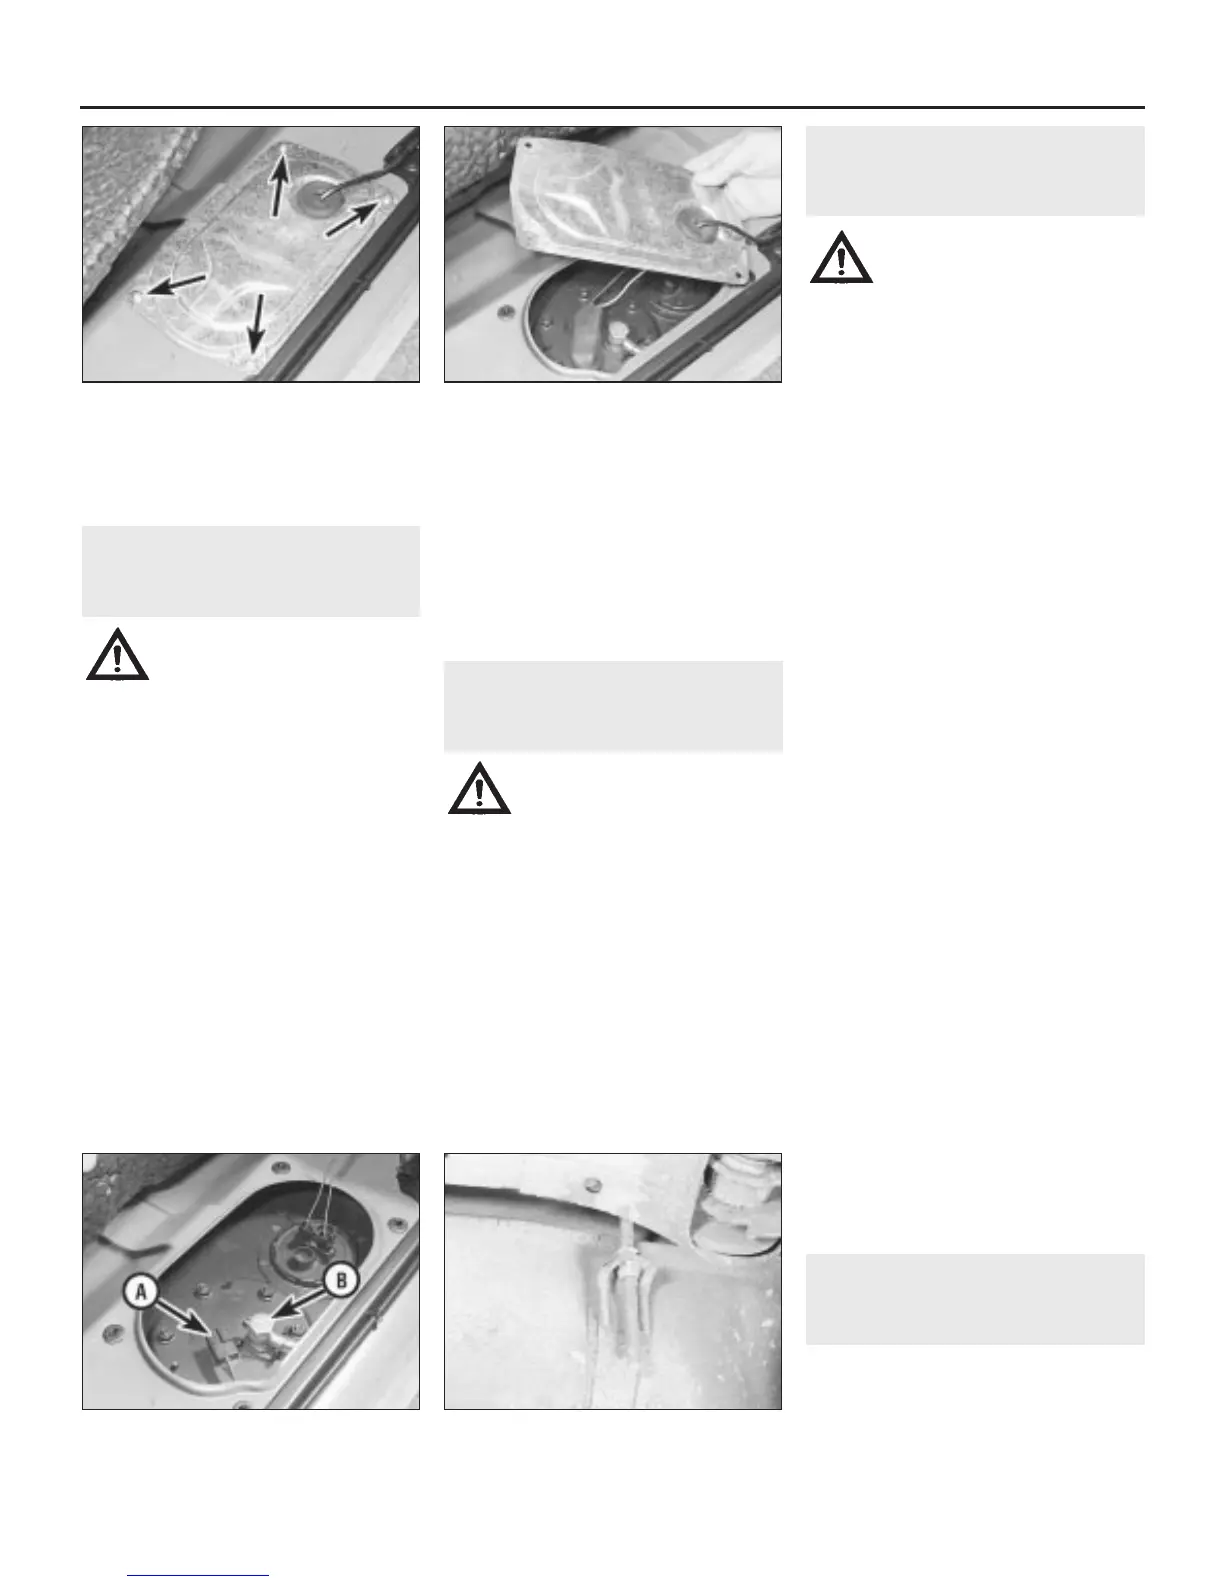
8 Undo the four screws and lift off the pump
access panel (see illustrations). Move the
panel to one side.
9 Disconnect the pump wiring multiplug, then
unscrew the fuel hose banjo union bolt and
recover the copper washers (see illustration).
10 Slacken the clip and disconnect the fuel
return hose.
11 Undo the pump retaining nuts, and
withdraw the pump from the tank. Remove
the seal from the pump flange.
Refitting
12 Refitting is a reversal of removal, but
renew the flange seal if it shows any sign of
deterioration.
7 Fuel gauge sender unit -
removal and refitting
1
Warning: Refer to the
precautions contained in
Section 1 before proceeding.
Removal
1 Follow the procedure given in Section 6,
paragraphs 1 to 8 inclusive, with the
exception of paragraph 2.
2 Disconnect the two leads at the sender unit.
3 Engage a screwdriver, flat bar or other tool
with the lugs of the locking ring, and turn the
ring anti-clockwise to release it.
4 Withdraw the locking ring, seal and sender
unit.
Refitting
5 Refitting is a reversal of removal, but renew
the seal if it shows any sign of deterioration.
8 Fuel tank - removal,
inspection and refitting
1
Warning: Refer to the
precautions contained in
Section 1 before proceeding.
Removal
1 Follow the procedure given in Section 6,
paragraphs 1 to 8 inclusive.
2 Disconnect the fuel pump wiring multiplug,
and the two leads at the fuel gauge sender unit.
3 Remove the fuel tank filler cap.
4 With sealed containers handy, undo the
drain plug at the base of the tank, and drain
the fuel into the containers. Recover the drain
plug sealing washer. When all the fuel has
drained, refit the plug, using a new sealing
washer if necessary.
5 Chock the front wheels, remove the rear
wheel trim and slacken the wheel nuts. Jack
up the rear of the car and support it on axle
stands. Remove the left-hand rear roadwheel.
6 Slacken the retaining clip and disconnect
the filler hose from the filler neck. Move the
hose aside.
7 Slacken the retaining clips and disconnect
the five breather hoses from the breather
pipes.
8 Refer to Section 13 and remove the exhaust
system rear and intermediate sections,
together with the rear heat shield.
9 Slacken the retaining clip and disconnect the
fuel return hose from the pipe on the side of the
tank. Plug the disconnected pipe and hose.
10 Undo the union connector and disconnect
the fuel feed hose from the pipe. Plug the
disconnected pipe and hose.
11 Support the tank on a jack with
interposed block of wood.
12 Slacken the two tank retaining strap
locknuts, release the hook bolts from the
body slots, and move the straps clear (see
illustration).
13 Lower the tank and remove it from under
the car.
14 If the tank is contaminated with sediment or
water, remove the sender unit as described in
Section 7, and swill the tank out with clean fuel. If
the tank is damaged, or leaks, it should be
repaired by a specialist, or renewed. Do not
under any circumstances solder or weld the tank.
Refitting
15 Refitting is a reversal of removal.
9 Unleaded petrol - general
information and usage
Note: The information given in this Chapter is
correct at the time of writing, and applies only
to petrols currently available in the UK. If
updated information is thought to be required,
check with a Rover dealer. If travelling abroad,
4A•4 Fuel and exhaust systems - single-point injection engines
8.12 Fuel tank retaining strap and locknut6.9 Fuel pump wiring multiplug connec-
tion (A) and fuel hose banjo union (B)
6.8b . . . and lift off the fuel pump access
panel
6.8a Undo the four screws (arrowed) . . .
1380 Rover 800 Series Remake


 To Next Page
 Loading...
