(a) Check the tension and condition of the
alternator (auxiliary) drivebelt - renew it if it
is worn or deteriorated (see Chapter 1).
(b) Ensure the alternator mounting bolts and
nuts are tight.
(c) Inspect the alternator wiring harness and
the electrical connections at the
alternator; they must be in good
condition, and tight.
(d) Check the relevant fuses in the fusebox
(see Chapter 12). If any are blown,
determine the cause, repair the circuit
and renew the fuse (the vehicle won’t
start and/or the accessories won’t work if
the fuse is blown).
(e) Start the engine and check the alternator
for abnormal noises - for example, a
shrieking or squealing sound may indicate
a badly worn bearing or brush.
(f) Make sure that the battery is fully-charged
- one bad cell in a battery can cause
overcharging by the alternator.
2 Using a voltmeter, check the battery
voltage with the engine off. It should be in
excess of 12 volts.
3 Start the engine and check the battery
voltage again. Increase engine speed until the
voltmeter reading remains steady; it should
now be approximately 13.5 to 14.5 volts.
4 Switch on as many electrical accessories (eg
the headlights, heated rear window and heater
blower) as possible, and check that the
alternator maintains the regulated voltage at
around 13 to 14 volts. The voltage may drop
and then come back up; it may also be
necessary to increase engine speed slightly,
even if the charging system is working properly.
5 If the voltage reading is greater than the
stated charging voltage, renew the voltage
regulator (see Section 18).
6 If the voltmeter reading is less than that
stated, the fault may be due to worn brushes,
weak brush springs, a faulty voltage regulator,
a faulty diode, a severed phase winding, or
worn or damaged slip rings. The brushes and
slip rings may be checked (see Section 18),
but if the fault persists, the alternator should
be renewed or taken to an auto-electrician for
testing and repair.
17 Alternator -
removal and refitting
1
4-cylinder engines
Removal
1 Disconnect the battery negative (earth) lead
(refer to Section 1 before doing this).
2 Remove the auxiliary drivebelt as described
in Chapter 1.
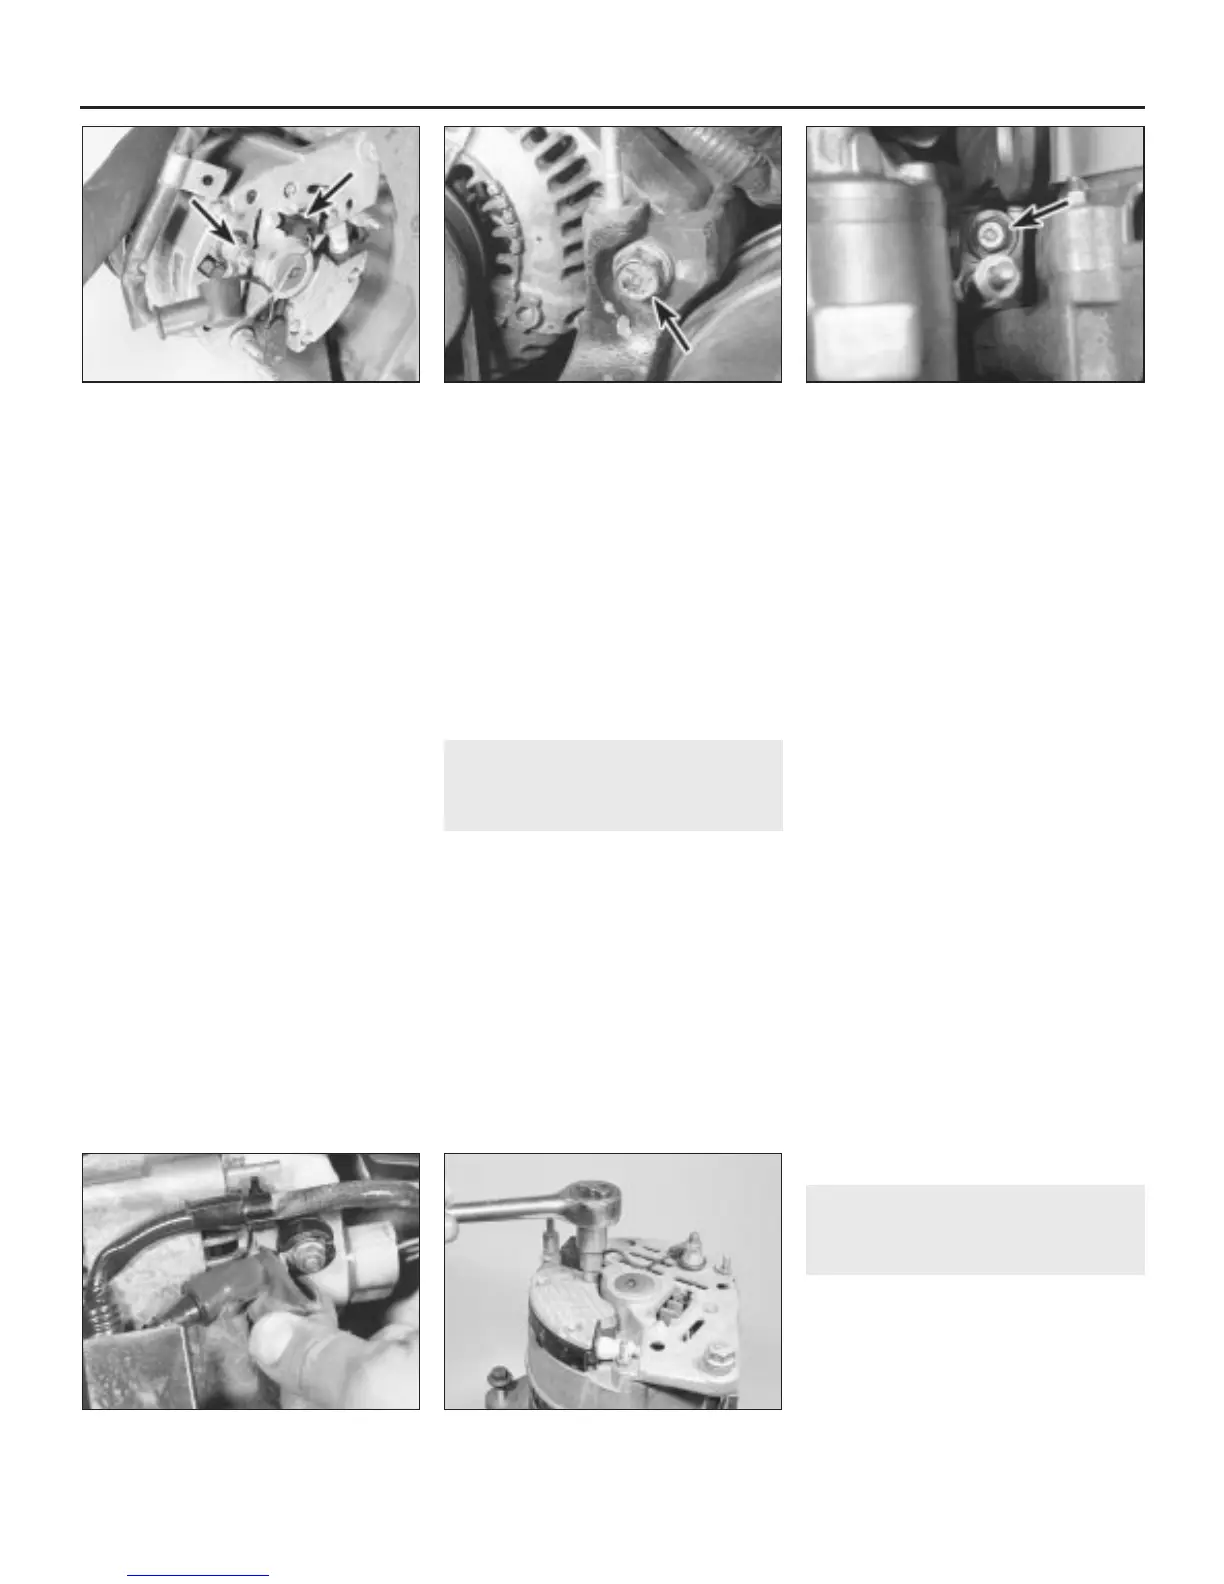
3 Undo the two nuts and remove the
alternator rear cover.
4 Disconnect the electrical leads at the rear of
the alternator noting their locations for
reconnection (see illustration).
5 On cars with a rear-mounted power
steering pump, remove the previously-
slackened pivot bolt and adjustment arm bolt,
then withdraw the alternator from the engine.
6 On cars with a front-mounted power
steering pump, undo the alternator upper and
lower mounting bolts, and remove the unit.
Refitting
7 Refitting is a reversal of removal. Refit and
adjust the drivebelt (Chapter 1), before
tightening the adjustment and mounting bolts.
V6 engines
Removal
8 Disconnect the battery negative (earth) lead
(refer to Section 1 before doing this).
9 Undo the three bolts and one nut securing
the power steering pump and alternator pulley
covers to the top of the engine. Move the
pipes and cables clear and lift off the covers.
10 Slacken the alternator side pivot bolt and
lower mounting nut, then turn the adjusting
bolt anti-clockwise to release the tension on
the drivebelt (see illustrations).
11 Slip the drivebelt off the alternator pulley.
12 Pull back the rubber cap and unscrew the
main terminal nut, then remove the washers and
lead from the terminal stud (see illustration).
13 Disconnect the wiring multiplug from the
rear of the alternator and release the wiring
harness from the support bracket.
14 Remove the alternator mounting bolts/
nuts and the adjusting bolt then remove the
unit.
Refitting
15 Refitting is a reversal of removal. Adjust
the drivebelt as described in Chapter 1,
before tightening the mounting bolts/nuts.
18 Alternator brushes and
voltage regulator - inspection
and renewal
3
1 Remove the alternator as described in
Section 17 then proceed as described below
the relevant sub-heading.
A127 alternator - 4-cylinder
engines
2 Undo the three small screws securing the
regulator and brushbox assembly to the rear
of the alternator (see illustration).
5•10 Engine electrical systems
18.2 Undo the regulator and brushbox
retaining screws
17.12 Pull back the rubber cap and
unscrew the main terminal nut
17.10b . . . and adjusting bolt (arrowed)17.10a V6 engine alternator side pivot bolt
(arrowed) . . .
17.4 Typical alternator wiring connections
(arrowed) on 4-cylinder engines
1380 Rover 800 Series Remake


 To Next Page
 Loading...
