before condemning the valve to ensure that
the brake assemblies themselves, or adverse
road conditions, are not causing this
condition. In the event of a valve internal
failure, brake fluid will be seen seeping from
the vent plug on the front of the valve which is
covered by a plastic strap. Repair or overhaul
of the valve is not possible, and the unit must
be renewed as a complete assembly if faulty.
Removal
4 Remove the master cylinder reservoir filler
cap, place a piece of polythene over the filler
neck, and seal it tightly with an elastic band.
This will minimise hydraulic fluid loss during
subsequent operations.
5 Place rags beneath the valve to collect any
hydraulic fluid that may escape when the pipe
unions are undone. If any hydraulic fluid is
spilled on the car paintwork, wash it off
immediately with copious amounts of cold
water.
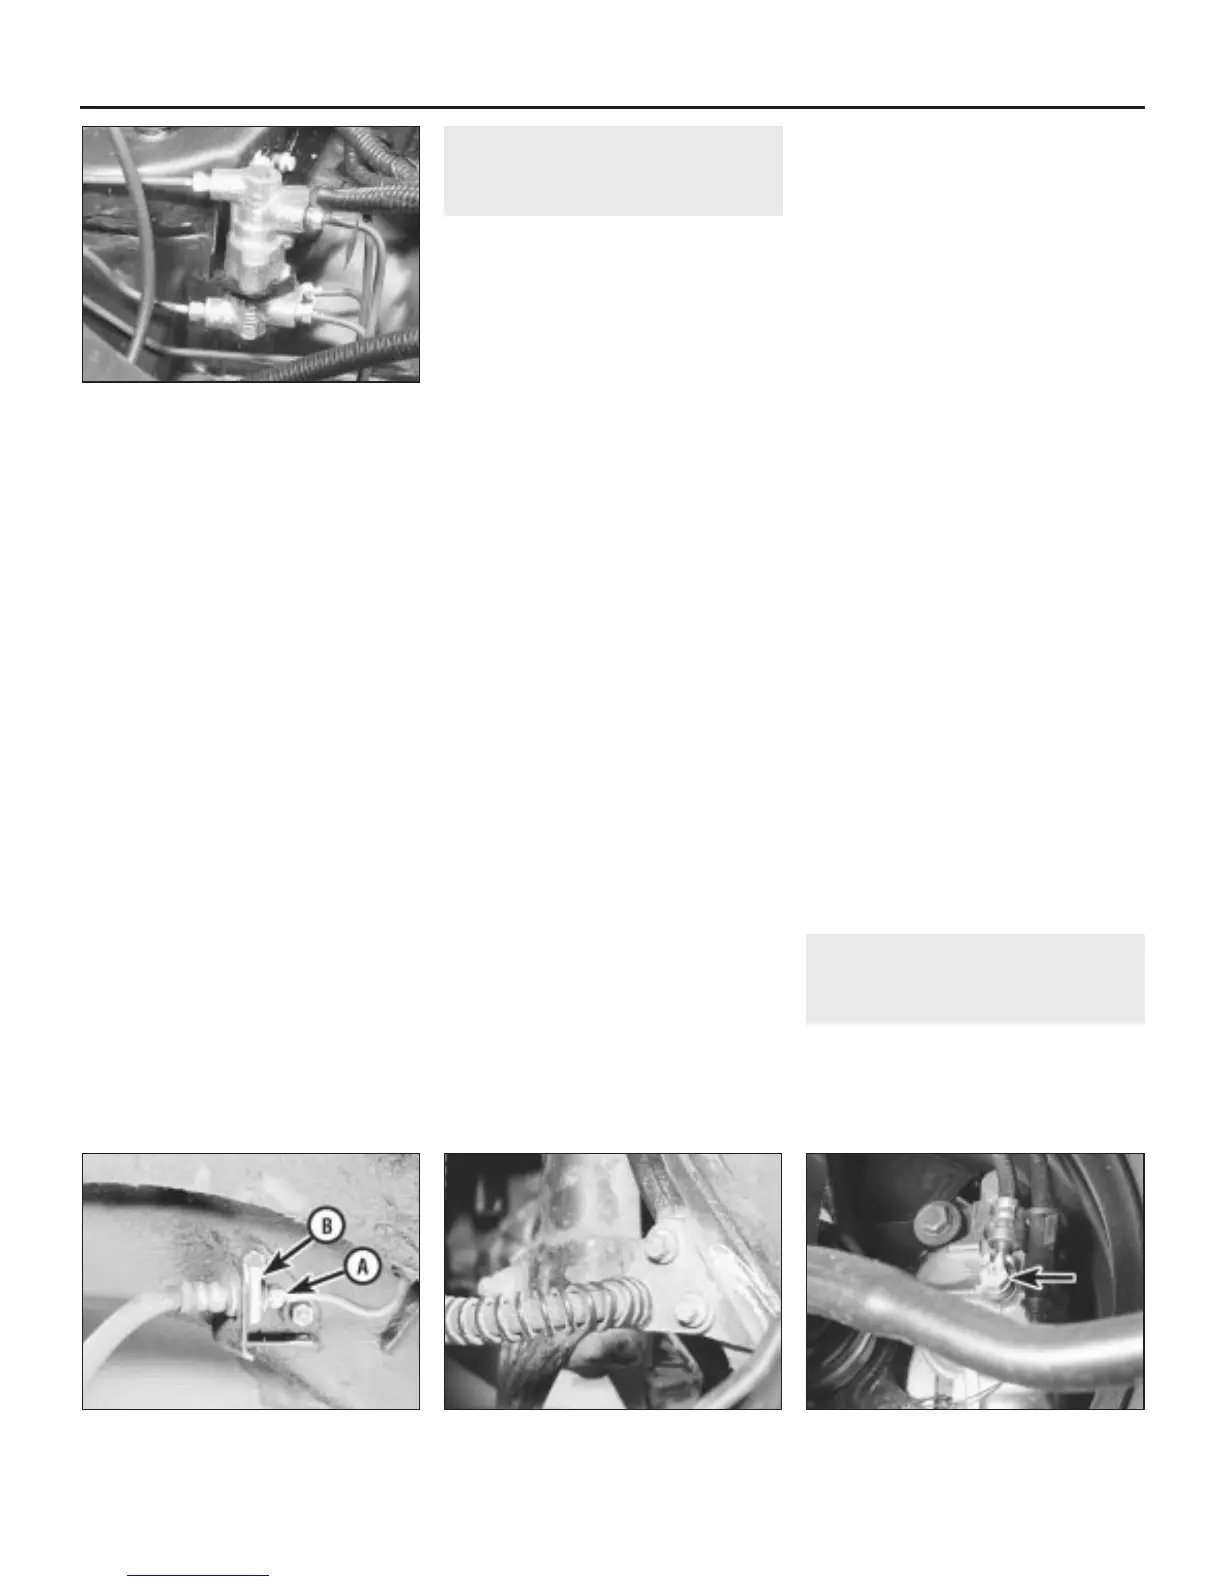
6 Identify the locations of each of the brake
pipe unions, unscrew the union nuts and
carefully withdraw the pipes clear of the valve
(see illustration). Tape over the pipe ends
and valve orifices to prevent dirt ingress.
7 Undo the two bolts securing the valve
mounting bracket to the inner wing, and
remove the valve assembly.
Refitting
8 Refitting is a reversal of removal. Bleed the
hydraulic system as described in Section 2 on
completion.
15 Hydraulic pipes and hoses -
inspection, removal and
refitting
3
Note: Before starting work, refer to the
warning at the beginning of Section 2
concerning the dangers of hydraulic fluid.
Inspection
1 Jack up the front, then the rear of the car in
turn, and securely support it on axle stands so
that the pipes and hoses under the
wheelarches and on the suspension
assemblies can be inspected.
2 First check for signs of leakage at the pipe
unions. Examine the flexible hoses for signs of
cracking, chafing or deterioration of the
rubber.
3 The brake pipes must be examined
carefully and methodically. They must be
cleaned off and checked for signs of dents,
corrosion or other damage. Corrosion should
be scraped off and, if the depth of pitting is
significant, the pipes renewed. The pipes are
however protected by a plastic sleeve, and
any corrosion that does occur is likely to be
near the pipe unions where the sleeve
protection ends.
4 Renew any defective brake pipes and/or
hoses.
Removal
5 If any section of pipe or hose is to be
removed, first unscrew the master cylinder
reservoir filler cap and place a piece of
polythene over the filler neck. Secure the
polythene with an elastic band, ensuring that
an airtight seal is obtained. This will minimise
hydraulic fluid loss when the pipe or hose is
removed.
6 As the front-to-rear brake pipes run inside
the car, it will be necessary to determine the
route of the pipe, then remove any interior trim
panels as necessary for access (see Chapter
11). Once this is done, the union nuts at each
end can be unscrewed, the pipe and union
pulled out, and the pipe removed from the car
or underbody clips as applicable. Where the
union nuts are exposed, unprotected from the
full force of the weather, they can sometimes
be quite tight. As only an open-ended spanner
can be used, burring of the flats on the nuts is
not uncommon when attempting to undo
them. For this reason, a self-locking wrench is
often the only way to separate a stubborn
union.
7 To remove a flexible hose, wipe the unions
and brackets free of dirt and undo the union
nut at the brake pipe end.
8 Next extract the hose retaining clip, and lift
the end of the hose out of its bracket (see
illustration).
9 If a front hose is being removed, undo the
two bolts securing the hose support bracket
to the steering knuckle (see illustration). At
the rear, a single bolt secures the support
bracket to the shock absorber strut.
10 Undo the banjo bolt securing the hose to
the brake caliper, recover the two copper
washers, one on each side of the union, and
remove the hose (see illustration). Use new
copper washers when refitting.
11 Brake pipes can be obtained individually,
or in sets, from Rover dealers or larger
accessory shops, cut to length and with the
end flares and union nuts in place. The pipe is
then bent to shape, using the old pipe as a
guide, and is ready for fitting to the car.
Refitting
12 Refitting the pipes and hoses is a reversal
of removal. Make sure that the hoses are not
kinked when in position, and will not chafe
any suspension or steering component with
suspension movement. Ensure also that the
brake pipes are securely supported in their
clips. After refitting, remove the polythene
from the reservoir and bleed the hydraulic
system as described in Section 2.
16 Brake pedal -
removal and refitting
1
Removal
1 From inside the car, release the turnbuckles
and lift out the trim panel over the clutch,
brake and accelerator pedals.
9•12 Braking system
15.10 Front brake hose-to-caliper banjo
union bolt (arrowed)
15.9 Front brake hose support bracket on
the steering knuckle
15.8 Flexible brake hose rigid pipe union
nut (A) and hose retaining clip (B)
14.6 Pressure-reducing valve mountings
and pipe attachments
1380 Rover 800 Series Remake


 To Next Page
 Loading...
