embedded in the tread, before they penetrate
the tyre to cause deflation. If removal of a nail
reveals that the tyre has been punctured, refit
the nail, so that its point of penetration is
marked. Then immediately change the wheel,
and have the tyre repaired by a tyre dealer. Do
not drive on a tyre in such a condition. If in any
doubt as to the possible consequences of any
damage found, consult your local tyre dealer
for advice.
8 General tyre wear is influenced to a large
degree by driving style - harsh braking and
acceleration, or fast cornering, will all produce
more rapid tyre wear. Interchanging of tyres
may result in more even wear; however, it is
worth bearing in mind that if this is completely
effective, the added expense is incurred of
replacing simultaneously a complete set of
tyres, which may prove financially restrictive
for many owners.
9 Front tyres may wear unevenly as a result of
wheel misalignment. The front wheels should
always be correctly aligned according to the
settings specified by the vehicle
manufacturer.
10 Don’t forget to check the spare tyre for
condition and pressure.
11 Legal restrictions apply to many aspects
of tyre fitting and usage, and in the UK this
information is contained in the Motor Vehicle
Construction and Use Regulations. It is
suggested that a copy of these regulations is
obtained from your local police, if in doubt as
to current legal requirements with regard to
tyre type and condition, minimum tread depth,
etc.
5 Power steering fluid level
check
1
1 The power steering fluid reservoir is located
on the right-hand side of the engine
compartment next to the cooling system
expansion tank.
2 For the fluid level check on 4-cylinder
models, the power steering system must be
cold; on V6 models, it may be either hot or
cold.
3 Use a clean rag to wipe the filler cap and
the surrounding area, to prevent foreign
matter from entering the system. Unscrew
and remove the filler cap.
4 Check that the fluid level is up to the “MAX”
mark on the dipstick. On V6 engine models,
there is a scale on both sides of the dipstick,
one for hot checking and one for cold
checking.
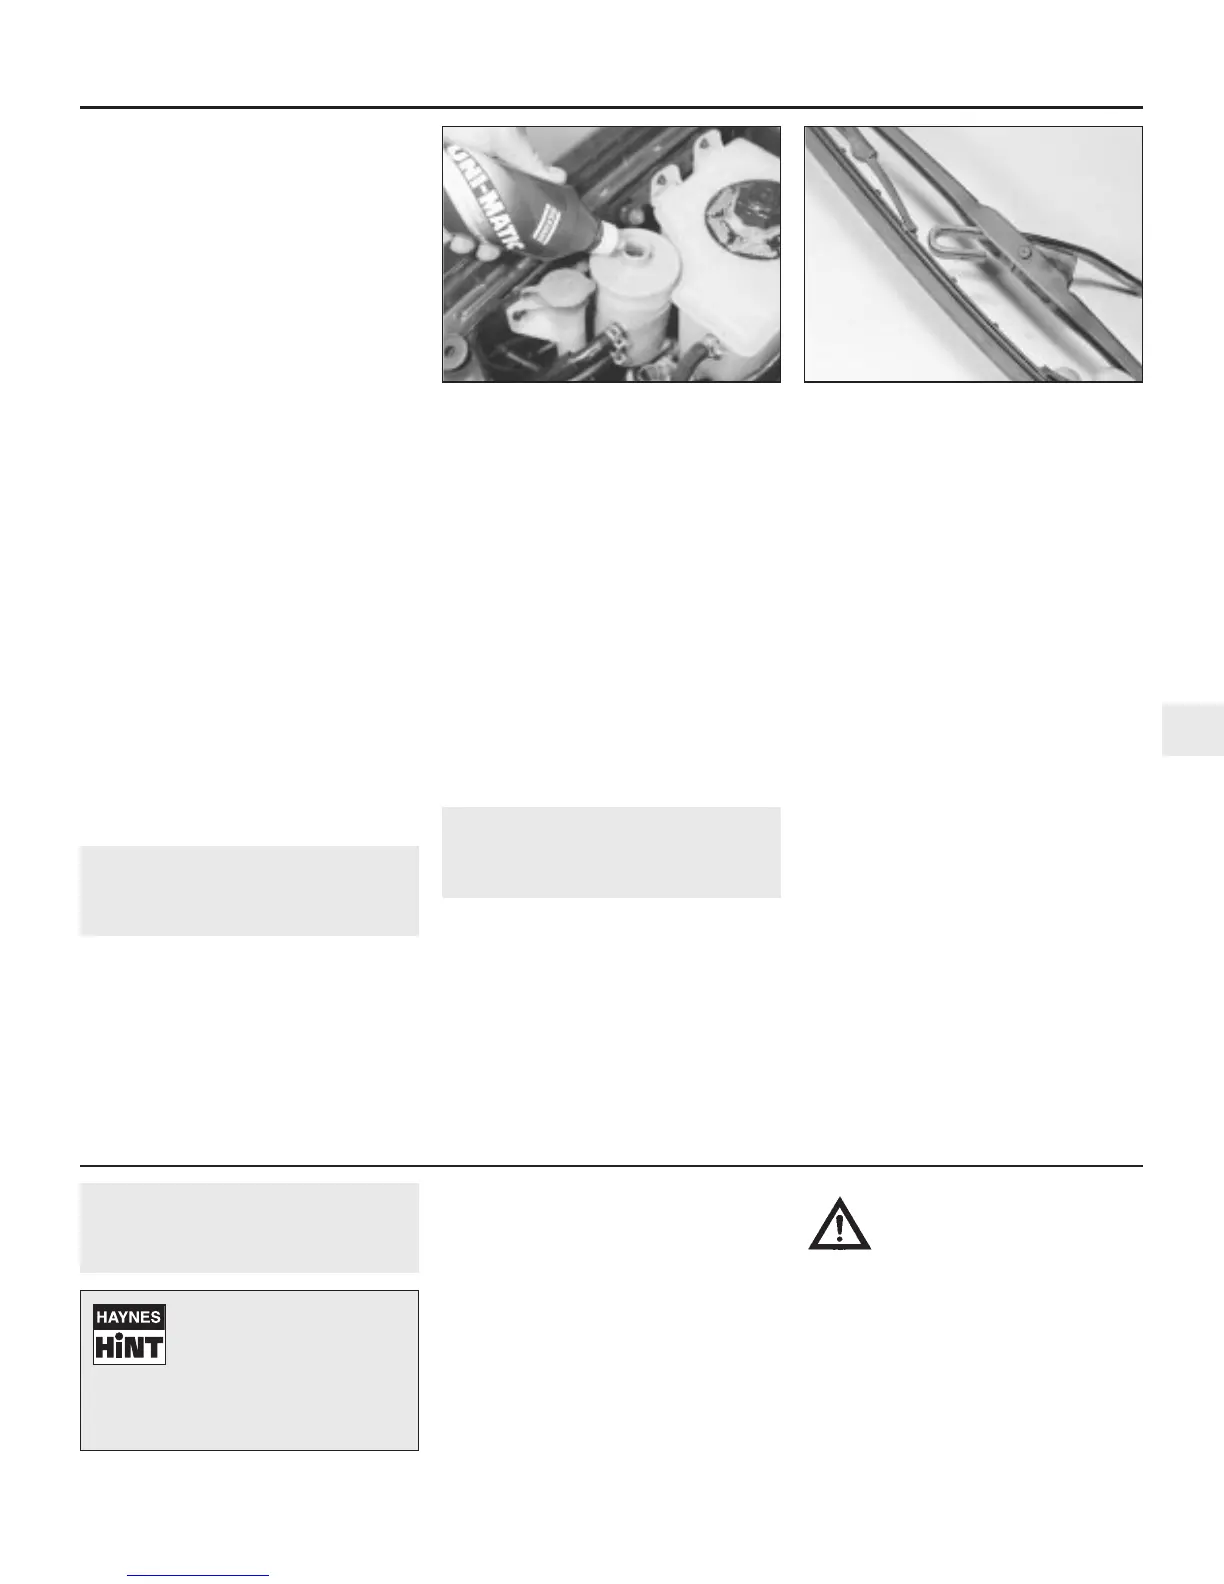
5 Top-up the level to the “MAX” mark, using
the grade of fluid specified at the beginning of
this Chapter (see illustration). Be careful not
to introduce dirt into the system, and do not
overfill. The need for frequent topping-up
indicates a leak, which should be
investigated.
6 Refit the filler cap.
6 Windscreen/tailgate and
headlight washer system
and wiper blade check
1
1 The windscreen and tailgate wiper and
blade assembly should be inspected at the
specified intervals for damage, loose
components, and cracked or worn blade
elements.
2 Road film can build up on the wiper blades
and affect their efficiency, so they should be
washed regularly with a mild detergent solution.
3 The action of the wiping mechanism can
loosen bolts, nuts and fasteners, so they
should be checked and tightened, as
necessary, at the same time as the wiper
blades are checked.
4 If the wiper blade elements are cracked,
worn or warped, or no longer clean
adequately, they should be replaced with new
ones.
5 Switch on the ignition, and the windscreen
wipers, then park the wipers vertically on the
windscreen while they are still running. Lift the
wiper arm and blade away from the glass.
6 To remove the wiper blade, depress the
catch on the blade attachment, then withdraw
the blade assembly off the arm (see
illustration).
7 The tailgate wiper blade is removed in the
same way, but it is not necessary to park it in
the centre of the glass prior to removal.
8 If the metal part of the wiper blade is in
good condition, it may be possible to renew
the rubber insert separately. The insert can be
obtained from a car accessory shop and,
according to type, it may need to be cut to the
correct length before sliding into the clips.
9 Refit the wiper blade assembly using a
reversal of the removal procedure, making
sure that it fully engages with the spring clip.
10 Check that the washer jets direct the fluid
onto the upper part of the
windscreen/tailgate, and if necessary adjust
the small sphere on the jet with a pin. Note
that the headlight washer jets are of the fixed
type and cannot be adjusted.
Weekly Checks 1•11
6.6 Remove the windscreen wiper blade
by depressing the catch on the blade, then
withdraw the blade assembly off the arm
5.5 Topping up the power steering fluid
reservoir
1
1380 Rover 800 Series Remake
Every 6000 miles or 6 months, whichever occurs first
7 Engine oil and filter change
1
1 Make sure that you have all the necessary
tools before you begin this procedure.
You should also have plenty of rags
or newspapers handy, for mopping up any
spills.
2 To avoid any possibility of scalding, and to
protect yourself from possible skin irritants
and other harmful contaminants in used
engine oils, it is advisable to wear gloves
when carrying out this work.
3 Access to the underside of the vehicle is
greatly improved if the vehicle can be lifted on
a hoist, driven onto ramps, or supported by
axle stands.
Warning: Do not work under a
vehicle which is supported only
by an hydraulic or scissor-type
jack, or by bricks, blocks of
wood, etc.
4 If this is your first oil change, get under the
vehicle and familiarise yourself with the
position of the engine oil drain plug location in
the sump. The engine and exhaust
components will be warm during the actual
work, so try to anticipate any potential
problems while the engine and accessories
are cool.
5 The oil should preferably be changed when
Frequent oil changes are the
best preventive
maintenance the home
mechanic can give the
engine, because ageing oil becomes
diluted and contaminated, which leads
to premature engine wear.
 Loading...