the firing order, which is essential for proper
engine operation. Gain access to the leads
and disconnect them as described above for
the spark plug check and renewal.
20 Check inside the boot for corrosion, which
will look like a white crusty powder. Clean this
off as much as possible; if it is excessive, or if
cleaning leaves the metal connector too badly
corroded to be fit for further use, the lead
must be renewed. Push the lead and boot
back onto the end of the spark plug. The boot
should fit tightly onto the end of the plug - if it
doesn’t, remove the lead and use pliers
carefully to crimp the metal connector inside
the boot until the fit is snug.
21 Using a clean rag, wipe the entire length
of the lead to remove built-up dirt and grease.
Once the lead is clean, check for burns,
cracks and other damage. Do not bend the
lead sharply, because the conductor might
break.
22 Inspect the remaining spark plug (HT)
leads, ensuring that each is securely fastened
at the distributor cap and spark plug when the
check is complete. If any sign of arcing,
severe connector corrosion, burns, cracks or
other damage is noticed, obtain new spark
plug (HT) leads, renewing them as a set. If
new spark plug leads are to be fitted, remove
and refit them one at a time, to avoid mix-ups
in the firing order.
23 Refer to Chapter 5 and remove the
distributor cap then thoroughly clean it inside
and out with a dry lint-free rag.
24 Examine the HT lead segments inside the
cap. If they appear badly burned or pitted
renew the cap. Also check the carbon brush
in the centre of the cap, ensuring that it is free
to move and stands proud of its holder. Make
sure that there are no sign of cracks or black
“tracking” lines running down the inside of the
cap, which will also mean renewal if evident.
Refit the cap as described in Chapter 5 on
completion.
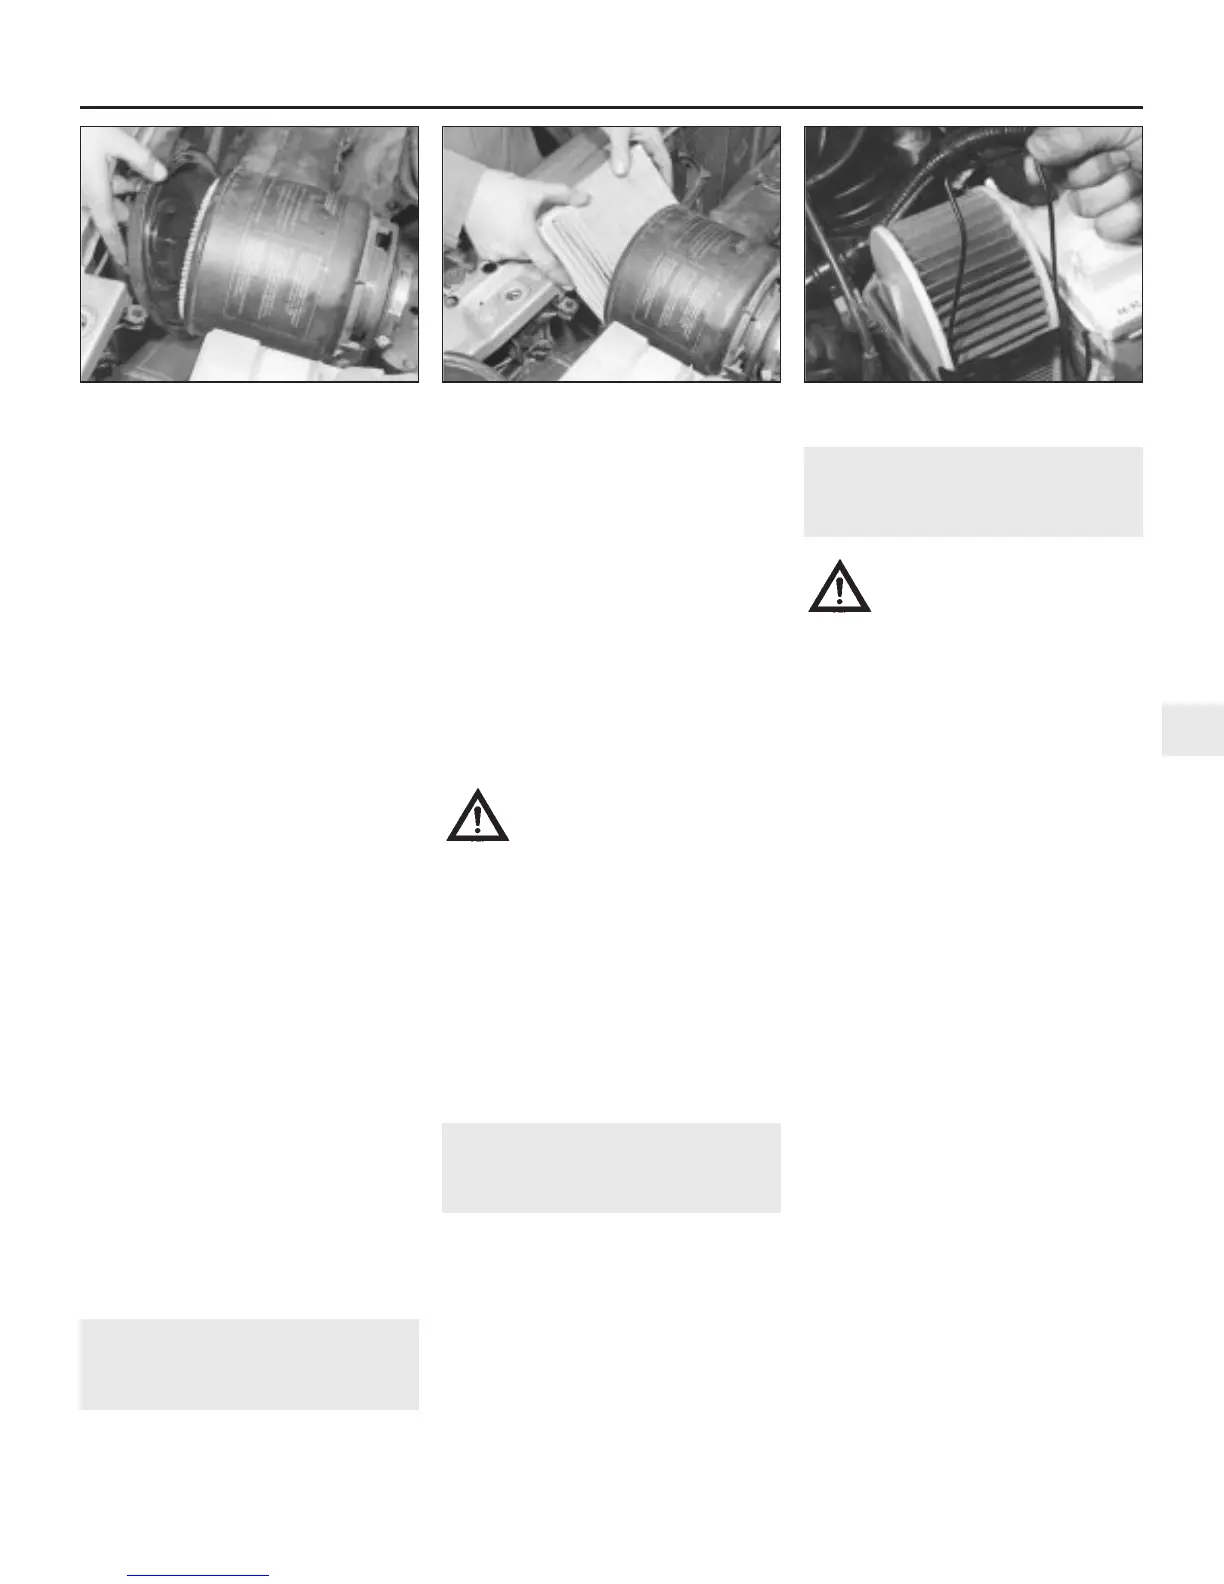
12 Air cleaner element renewal
1
1 The air cleaner filter element is located in
the air cleaner assembly mounted on the left-
hand side of the engine compartment. Undo
the retaining screws and/or release the clips,
and lift the air cleaner cover, disconnecting
the vacuum hose where fitted. Lift the element
out of the housing, together with its support
frame on V6 engines, and wipe out the
housing (see illustrations). Check that no
foreign matter is visible, either in the air intake
or in the housing.
2 If carrying out a routine service, the element
must be renewed regardless of its apparent
condition. If you are checking the element for
any other reason, inspect its lower surface; if
it is oily or very dirty, renew the element. If it is
only moderately dusty, it can be re-used by
blowing it clean from the upper to the lower
surface with compressed air.
Warning: Wear eye protection
when using compressed air!
Because it is a pleated-paper
type filter, it cannot be washed
or re-oiled. If it cannot be cleaned
satisfactorily with compressed air, discard
and renew it.
Caution: Never drive the vehicle with the
air cleaner filter element removed.
Excessive engine wear could result, and
backfiring could even cause a fire under
the bonnet.
3 Refitting is the reverse of the removal
procedure. Ensure that the element and cover
are securely seated, so that unfiltered air
cannot enter the engine.
13 Electrical system check
1
1 Check the operation of all external lights
and indicators (front and rear).
2 Check for satisfactory operation of the
instrument panel, its illumination and warning
lights, the switches and their function lights.
3 Check the horn(s) for satisfactory operation.
4 Check all other electrical equipment for
satisfactory operation.
5 Check all electrical wiring in the engine
compartment for correct routing, and for
any signs of physical or heat-damage or
chafing.
14 Battery check, maintenance
and charging
2
Warning: Certain precautions
must be followed when
checking and servicing the
battery. Hydrogen gas, which is
highly flammable, is always present in the
battery cells, so keep lighted tobacco and
all other open flames and sparks away
from the battery. The electrolyte inside the
battery is actually dilute sulphuric acid,
which will cause injury if splashed on your
skin or in your eyes. It will also ruin clothes
and painted surfaces. When disconnecting
the battery, always detach the negative
(earth) lead first and connect it last!
Note: Before disconnecting the battery, refer
to Section 1 of Chapter 5.
General
1 A routine preventive maintenance
programme for the battery in your vehicle is
the only way to ensure quick and reliable
starts. Before performing any battery
maintenance, make sure that you have the
proper equipment necessary to work safely
around the battery.
2 There are also several precautions that
should be taken whenever battery
maintenance is performed. Before servicing
the battery, always turn the engine and all
accessories off, and disconnect the lead from
the negative terminal of the battery - see
Chapter 5, Section 1.
3 The battery produces hydrogen gas, which
is both flammable and explosive. Never create
a spark, smoke, or light a match around the
battery. Always charge the battery in a well-
ventilated area.
4 Electrolyte contains poisonous and
corrosive sulphuric acid. Do not allow it to get
in your eyes, on your skin, or on your clothes.
Never ingest it. Wear protective safety glasses
when working near the battery. Keep children
away from the battery.
5 Note the external condition of the battery. If
the positive terminal and lead clamp on your
vehicle’s battery is equipped with a plastic
Every 12 000 miles 1•15
12.1c Lift the element out of the housing,
together with its support frame on V6 engines
12.1b . . . and element on 4-cylinder
engines with single-point fuel injection
12.1a Removing the air cleaner cover . . .
1
1380 Rover 800 Series Remake
 Loading...