36 Brake fluid renewal
3
The procedure is similar to that for the
bleeding of the hydraulic system as described
in Chapter 9, except that the brake fluid
reservoir should be emptied by syphoning,
and allowance should be made for the old
fluid to be removed from the circuit when
bleeding a section of the circuit.
37 Manual transmission oil
renewal
1
1 Raise the vehicle and support it securely on
axle stands making sure that it is level.
2 Place a container beneath the drain plug,
which is located below the driveshaft inner
constant velocity joint on the same side as the
filler plug (see illustration). Undo the plug
using a square key, and allow the oil to drain.
If a key is not available, the 3/8 inch square
drive end of a socket bar will suffice.
3 Refit the plug after draining, using a new
sealing washer if necessary, then refill with
fresh oil as described in Section 20.
38 Coolant renewal
1
Warning: Do not allow antifreeze
to come in contact with your
skin or painted surfaces of the
vehicle. Flush contaminated
areas immediately with plenty of water.
Don’t store new coolant, or leave old
coolant lying around, where it’s accessible
to children or pets - they’re attracted by its
sweet smell. Ingestion of even a small
amount of coolant can be fatal! Wipe up
garage-floor and drip-pan spills
immediately. Keep antifreeze containers
covered, and repair cooling system leaks
as soon as they’re noticed.
Warning: Never remove the
expansion tank filler cap when
the engine is running, or has
just been switched off, as the
cooling system will be hot, and the
consequent escaping steam and scalding
coolant could cause serious injury.
Coolant draining
Warning: Wait until the engine is
cold before starting this
procedure.
1 To drain the system, first remove the
expansion tank filler cap (see Section 3).
Move the heater temperature control lever to
the fully hot position.
2 If additional working clearance is required,
raise the front of the vehicle and support it
securely on axle stands.
3 Undo the retaining bolts and remove the
undertray from beneath the radiator.
4 Place a container beneath the left-hand
side of the radiator. Slacken the hose clip and
carefully ease the bottom hose off the radiator
outlet. Allow the coolant to drain into the
container.
5 Additionally, on V6 engines, slacken the
two cylinder block drain plugs, on the front
and rear sides of the engine, and drain the
cylinder block (see illustration). Use two
containers for this operation, or open the drain
plugs one at a time.
System flushing
6 With time, the cooling system may
gradually lose its efficiency, as the radiator
core becomes choked with rust, scale
deposits from the water, and other sediment.
To minimise this, as well as using only good-
quality antifreeze and clean soft water, the
system should be flushed as follows
whenever any part of it is disturbed, and/or
when the coolant is renewed.
7 With the coolant drained, refit the bottom
hose and where applicable tighten the drain
plugs, then refill the system with fresh water.
Refit the expansion tank filler cap, start the
engine and warm it up to normal operating
temperature, then stop it and (after allowing it
to cool down completely) drain the system
again. Repeat as necessary until only clean
water can be seen to emerge, then refill finally
with the specified coolant mixture.
8 If only clean, soft water and good-quality
antifreeze has been used, and the coolant has
been renewed at the specified intervals, the
above procedure will be sufficient to keep
clean the system for a considerable length of
time. If, however, the system has been
neglected, a more thorough operation will be
required, as follows.
9 First drain the coolant, then disconnect the
radiator top and bottom hoses. Insert a
garden hose into the top hose, and allow
water to circulate through the radiator until it
runs clean from the bottom outlet.
10 To flush the engine, insert the garden
hose into the thermostat water outlet, and
allow water to circulate until it runs clear from
the bottom hose. If, after a reasonable period,
the water still does not run clear, the radiator
should be flushed with a good proprietary
cleaning agent.
11 In severe cases of contamination,
reverse-flushing of the radiator may be
necessary. To do this, remove the radiator
(Chapter 3), invert it, and insert the garden
hose into the bottom outlet. Continue flushing
until clear water runs from the top hose outlet.
A similar procedure can be used to flush the
heater matrix.
12 The use of chemical cleaners should be
necessary only as a last resort. Normally,
regular renewal of the coolant will prevent
excessive contamination of the system.
Coolant filling
13 With the cooling system drained and
flushed, ensure that all disturbed hose unions
are correctly secured, and that the radiator
drain plug is securely tightened. Refit the
radiator undershield if it was removed for
access, and lower the vehicle to the ground.
14 Prepare a sufficient quantity of the
specified coolant mixture allow for a surplus,
so as to have a reserve supply for topping-up.
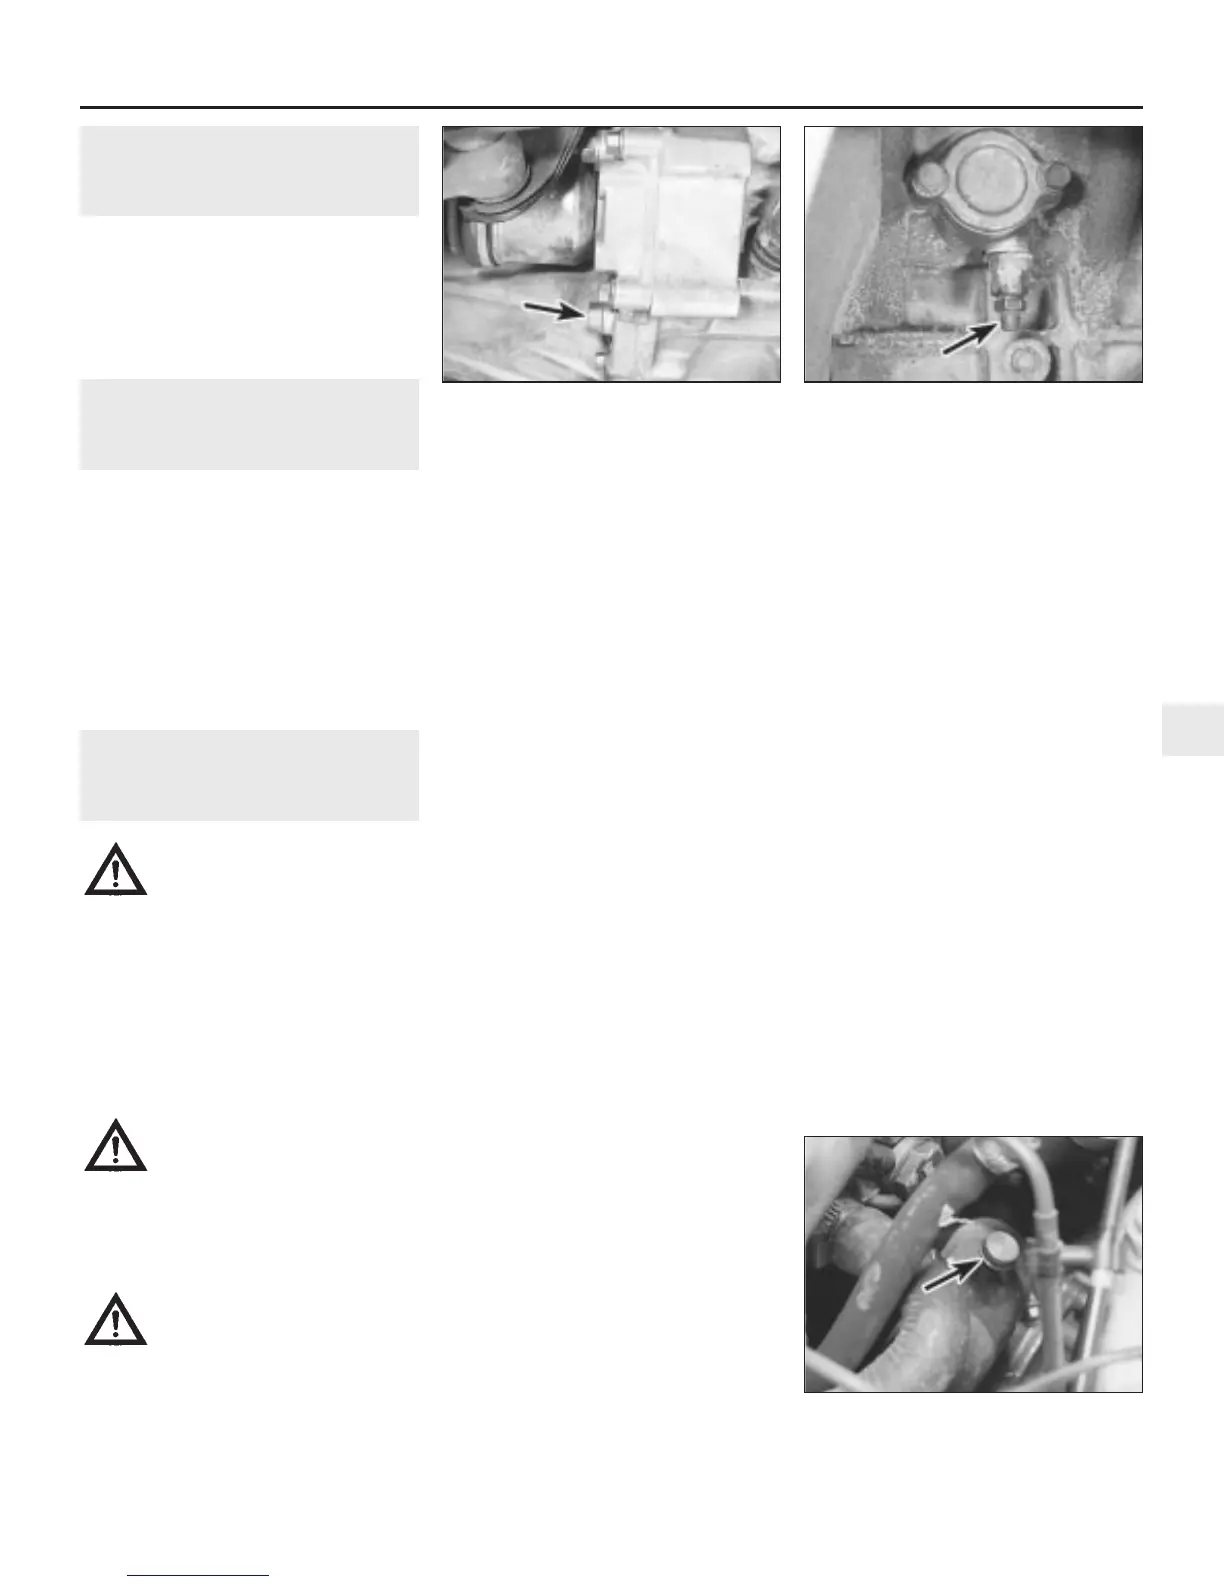
15 Slacken the cooling system bleed screw
which, on early 4-cylinder engines, is located
on the hose connecting the main coolant pipe
to the water pump at the rear of the engine
and, on V6 engines, just below the throttle
body (see illustrations). Later (1992 onward)
4-cylinder engines don’t have a bleed screw.
16 Slowly fill the system through the
Every 24 000 miles 1•25
38.15a Cooling system bleed screw
location (arrowed) on early 4-cylinder
engines . . .
38.5 V6 engine cylinder block drain plug
(arrowed)
37.2 Manual transmission oil drain plug
location (arrowed)
1
1380 Rover 800 Series Remake
 Loading...