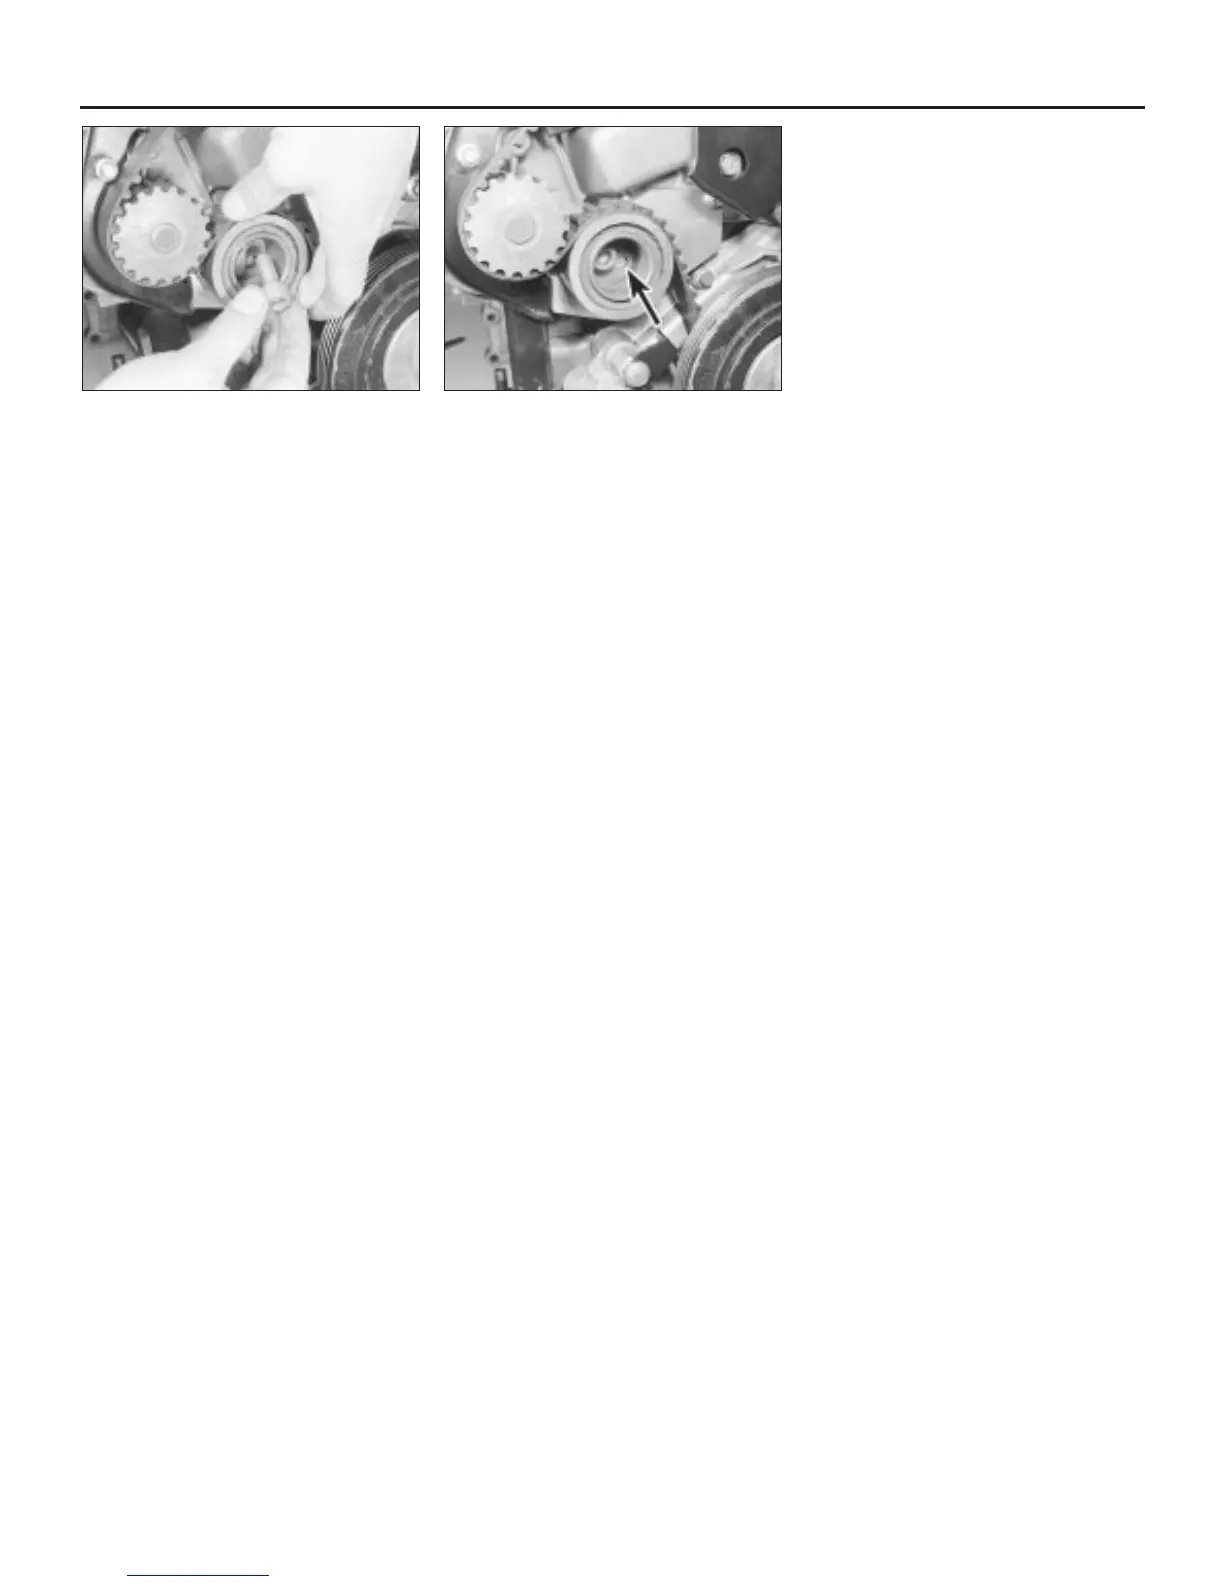
14 Using an Allen key, undo the timing belt
tensioner retaining bolt, and remove the
tensioner (see illustration).
15 Slip the belt off the sprockets, and
remove it from the engine.
16 If the timing belt is to be re-used, mark its
running direction with an arrow in chalk, and
store it on its edge while it is off the engine.
17 Check the belt for any sign of cracks or
splits, particularly around the roots of the
teeth. Renew the belt if wear is obvious, if
there are signs of oil contamination, or if the
belt has exceeded its service interval (see
Chapter 1). Also renew the sprockets if they
show any signs of wear or chipping of the
teeth.
18 Check the tensioner and sprockets as
described in Section 9.
19 Before refitting, check that the crankshaft
is still at the 90º BTDC position, and that the
timing marks on the two sprockets are still
aligned.
Refitting and adjustment
20 Engage the timing belt with the teeth of
the crankshaft sprocket, and then pull the belt
vertically upright on its straight, right-hand
run. Keep it taut, and engage it over the
exhaust camshaft sprocket, then the inlet
camshaft sprocket.
21 Check that none of the sprockets have
moved, then feed the belt around the idler
pulley and engage it with the teeth of the
water pump sprocket.
22 Fit the timing belt tensioner and secure
with the retaining bolt, tightened finger-tight
only at this stage.
23 Engage an Allen key with the hexagonal
adjusting hole in the tensioner, and turn the
tensioner body until there is moderate tension
on the belt (see illustration). Hold the
tensioner in this position, and tighten the
retaining bolt.
24 Remove the locking pin (if used) from the
transmission adaptor plate, and turn the
crankshaft one complete turn clockwise,
followed by one complete turn anti-clockwise,
and re-align the timing marks.
25 Check that it is just possible to deflect the
belt, using moderate hand pressure, by
19.0 mm at a point midway between the
crankshaft and exhaust camshaft sprockets.
Re-adjust the tension if necessary by
slackening the tensioner retaining bolt, and
repositioning the tensioner body with the Allen
key. Recheck the tension again after turning
the crankshaft one turn clockwise, then one
turn anti-clockwise. It must be emphasised
that this is only an approximate setting, and
the tension should be checked by a dealer,
using the Rover tension gauge, at the earliest
opportunity.
26 Refit the timing belt bottom cover, turn the
crankshaft to align the pulley timing mark with
the edge of the bottom cover, and make a
final check that the camshaft sprocket timing
marks are still aligned.
27 Refit the timing belt upper and lower
covers.
28 Refit the engine mounting to its bracket,
lower the engine and secure the mounting to
the body with the through-bolt and special
nut.
29 Refer to Chapter 1 and refit the auxiliary
drivebelt.
30 Refit the power steering pipe support
brackets, the wheelarch access panel, and
the roadwheel.
31 Lower the car to the ground, tighten the
wheel nuts fully, and reconnect the battery.
Later “M” series engines
Removal
32 Proceed as described in paragraphs 1 to
9 above.
33 Undo the four bolts and remove the timing
belt centre cover.
34 Using a socket or spanner on the
crankshaft pulley, turn the crankshaft in an anti-
clockwise direction until the notches on the
camshaft sprockets are facing each other and
aligned horizontally. Insert a dowel rod or drill
through the hole in the transmission adaptor
plate, near to the lower edge of the cylinder
block on the front-facing side of the engine
(see illustration 7.12). The dowel or drill will
then engage with a corresponding hole in the
flywheel. If the dowel won’t engage, turn the
crankshaft through 180º and try again. With the
dowel rod engaged and the camshaft notches
aligned, the crankshaft is at 90º BTDC, with
No 1 piston on its compression stroke.
Temporarily remove the dowel rod.
35 Refer to Chapter 5, and remove the starter
motor.
36 Using a socket and long handle, slacken
the crankshaft pulley centre retaining bolt.
Lock the flywheel ring gear, through the
starter motor aperture, using a large
screwdriver or similar tool to prevent the
crankshaft rotating as the pulley bolt is
undone. This operation will probably have
moved the timing marks on the camshafts out
of alignment, so re-align them, and fit the
crankshaft dowel rod as described previously.
37 Remove the centre retaining bolt from the
crankshaft pulley, then unscrew the four
additional pulley bolts and remove the pulley.
38 Undo the bolts and remove the timing belt
bottom cover.
39 Using an Allen key, undo the timing belt
tensioner retaining bolt, and remove the ten-
sioner.
40 Slip the belt off the sprockets, and
remove it from the engine.
41 Check the timing belt, sprockets and
tensioner as described in paragraphs 16 to
18.
42 Before refitting, check that the crankshaft
is still at the 90º BTDC position, and that the
timing marks on the two sprockets are still
aligned.
Refitting and adjustment
43 Engage the timing belt with the teeth of
the crankshaft sprocket, and then pull the belt
vertically upright on its straight, right-hand
run. Keep it taut, and engage it over the
exhaust camshaft sprocket, then the inlet
camshaft sprocket.
44 Check that none of the sprockets have
moved, then feed the belt around the idler
pulley and engage it with the teeth of the
water pump sprocket.
45 Fit the timing belt tensioner and secure
with the retaining bolt, tightened finger-tight
only at this stage.
46 Refit the timing belt bottom cover.
47 Remove the dowel rod from the
crankshaft.
48 Refit the crankshaft pulley and secure
with the centre bolt and four additional bolts,
tightened to the specified torque. Hold the
crankshaft using the same procedure as for
removal to tighten the centre bolt.
49 Engage an Allen key with the hexagonal
adjusting hole in the tensioner, and turn the
tensioner body until there is moderate tension
on the belt. Hold the tensioner in this position,
and tighten the retaining bolt.
50 Turn the crankshaft one complete turn
clockwise, followed by one complete turn
anti-clockwise, and re-align the timing marks.
51 Check that it is just possible to deflect the
belt, using moderate hand pressure, by
19.0 mm at a point midway between the
crankshaft and exhaust camshaft sprockets.
Re-adjust the tension if necessary by
slackening the tensioner retaining bolt, and
repositioning the tensioner body with the Allen
key. Recheck the tension again after turning
2A•8 4-cylinder engine – in-car engine repair procedures
7.23 Tensioner hexagonal adjusting hole
(arrowed)
7.14 Removing the timing belt tensioner
1380 Rover 800 Series Remake
 Loading...