through filters or the crankcase ventilation
system. It may get into the oil, and from there
into the bearings. Metal chips from machining
operations and normal engine wear are often
present. Abrasives are sometimes left in
engine components after reconditioning,
especially when parts are not thoroughly
cleaned using the proper cleaning methods.
Whatever the source, these foreign objects
often end up embedded in the soft bearing
material, and are easily recognized. Large
particles will not embed in the material, and
will score or gouge the shell and journal. The
best prevention for this cause of bearing
failure is to clean all parts thoroughly, and to
keep everything spotlessly-clean during
engine assembly. Frequent and regular engine
oil and filter changes are also recommended.
5 Lack of lubrication (or lubrication
breakdown) has a number of inter-related
causes. Excessive heat (which thins the oil),
overloading (which squeezes the oil from the
bearing face) and oil leakage (from excessive
bearing clearances, worn oil pump or high
engine speeds) all contribute to lubrication
breakdown. Blocked oil passages, which
usually are the result of misaligned oil holes in
a bearing shell, will also starve a bearing of oil,
and destroy it. When lack of lubrication is the
cause of bearing failure, the bearing material
is wiped or extruded from the shell’s steel
backing. Temperatures may increase to the
point where the steel backing turns blue from
overheating.
6 Driving habits can have a definite effect on
bearing life. Full-throttle, low-speed operation
(labouring the engine) puts very high loads on
bearings, which tends to squeeze out the oil
film. These loads cause the shells to flex,
which produces fine cracks in the bearing
face (fatigue failure). Eventually, the bearing
material will loosen in pieces, and tear away
from the steel backing. Short-distance driving
leads to corrosion of bearings, because
insufficient engine heat is produced to drive
off condensed water and corrosive gases.
These products collect in the engine oil,
forming acid and sludge. As the oil is carried
to the engine bearings, the acid attacks and
corrodes the bearing material.
7 Incorrect shell refitting during engine
assembly will lead to bearing failure as well.
Tight-fitting shells leave insufficient bearing
running clearance, and will result in oil
starvation. Dirt or foreign particles trapped
behind a bearing shell result in high spots on
the bearing, which lead to failure. Do not
touch any shell’s bearing surface with your
fingers during reassembly; there is a risk of
scratching the delicate surface, or of
depositing particles of dirt on it.
19 Engine overhaul -
reassembly sequence
1 Before reassembly begins ensure that all
new parts have been obtained and that all
necessary tools are available. Read through
the entire procedure to familiarise yourself
with the work involved, and to ensure that all
items necessary for reassembly of the engine
are at hand. In addition to all normal tools and
materials, jointing and thread locking
compound will be needed in some areas
during engine reassembly. In all other cases,
provided the relevant mating surfaces are
clean and flat, new gaskets will be sufficient to
ensure joints are oil-tight. Do not use any kind
of silicone-based sealant on any part of the
fuel system or inlet manifold, and never use
exhaust sealants upstream of the catalytic
converter.
2 In order to save time and avoid problems,
engine reassembly can be carried out in the
following order (as applicable).
(a) Crankshaft and main bearings.
(b) Engine adaptor plate or rear oil seal
carrier.
(c) Pistons and connecting rods.
(d) Oil pump.
(e) Sump.
(f) Flywheel/driveplate.
(g) Cylinder head(s).
(h) Camshafts and hydraulic tappets.
(i) Timing sprockets, tensioners and belt.
(j) Engine external components.
3 Ensure that everything is clean prior to
reassembly. As mentioned previously, dirt and
metal particles can quickly destroy bearings
and result in major engine damage. Use clean
engine oil to lubricate during reassembly.
20 Piston rings - refitting
3
1 Before installing new piston rings, check
the end gaps. Lay out each piston set with a
piston/connecting rod assembly, and keep
them together as a matched set from now on.
2 Insert the top compression ring into the first
cylinder, and square it up with the cylinder
walls by pushing it in with the top of the
piston. The ring should be near the bottom of
the cylinder, at the lower limit of ring travel.
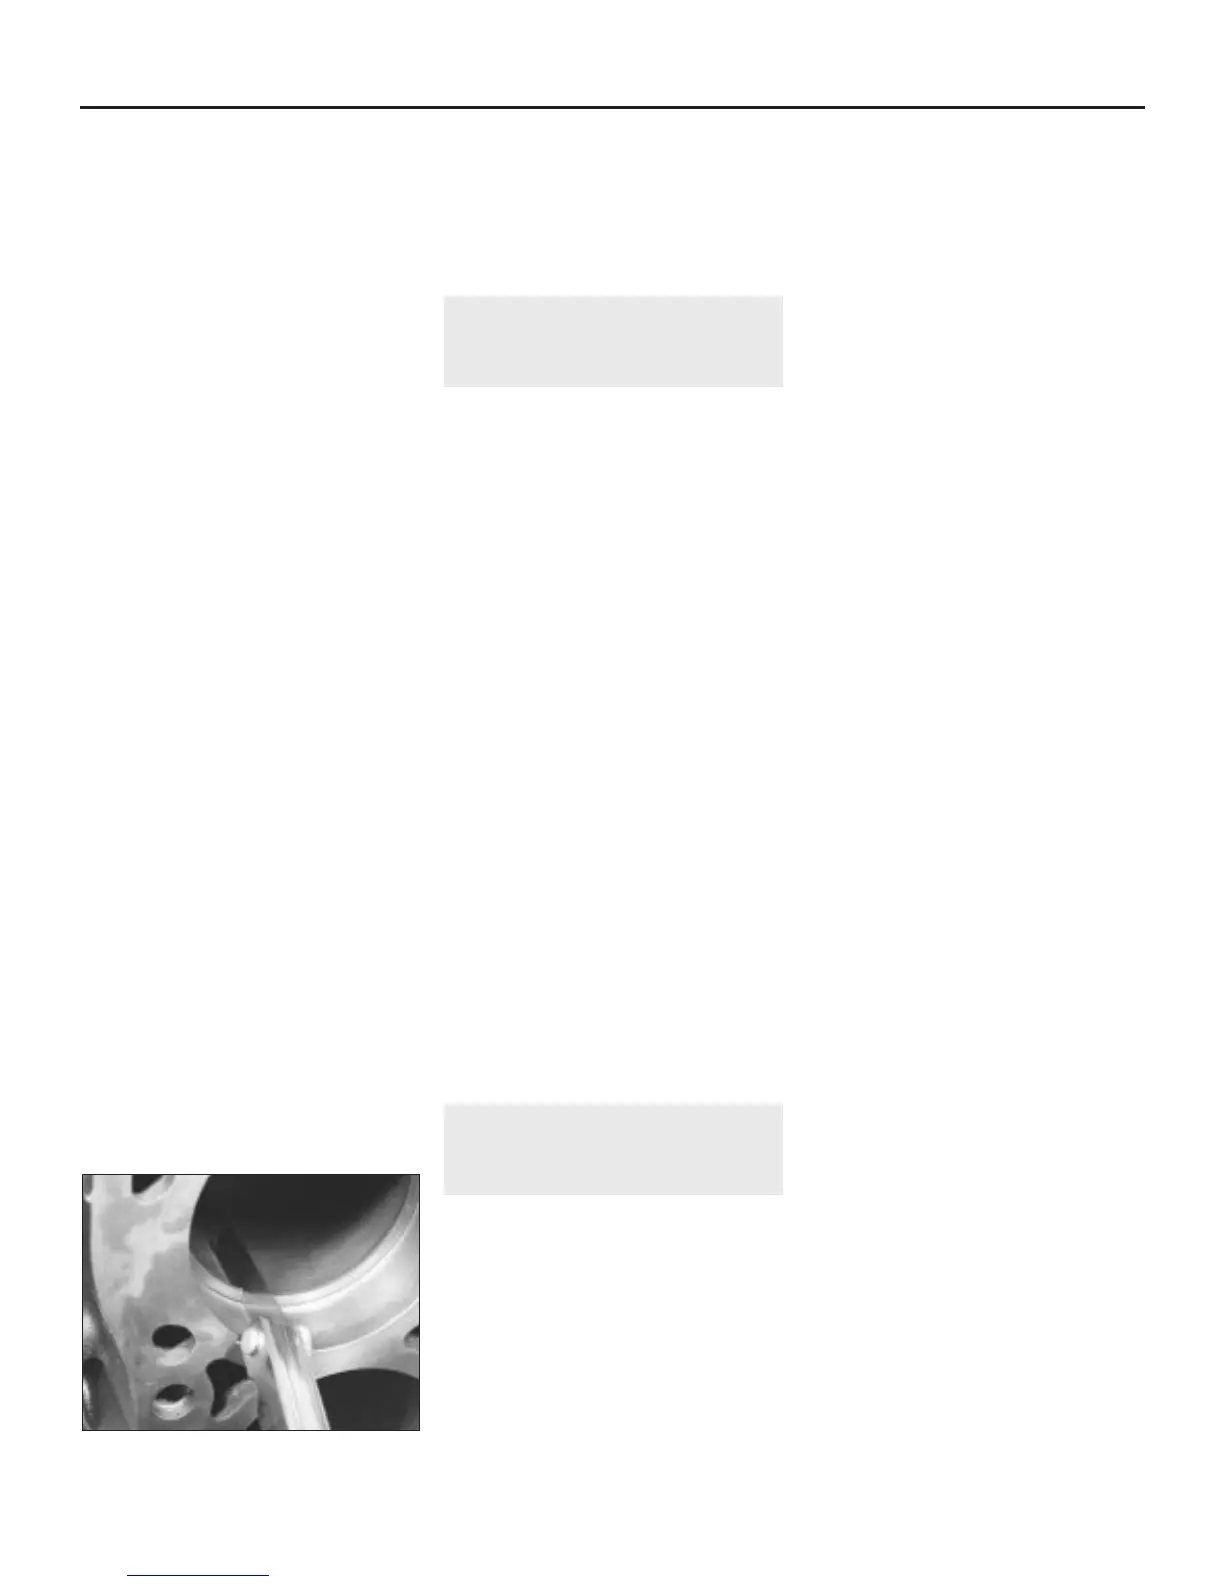
3 To measure the end gap, slip feeler gauges
between the ends of the ring, until a gauge
equal to the gap width is found (see
illustration). The feeler gauge should slide
between the ring ends with a slight amount of
drag. Compare the measurement to the value
given in the Specifications Section of this
Chapter; if the gap is larger or smaller than
specified, double-check to make sure you
have the correct rings before proceeding. If
you are assessing the condition of used rings,
have the cylinder bores checked and
measured by a Rover dealer or similar engine
reconditioning specialist, so that you can be
sure of exactly which component is worn, and
seek advice as to the best course of action to
take.
4 If the end gap is still too small, it must be
opened up by careful filing of the ring ends
using a fine file. If it is too large, this is not as
serious, unless the specified limit is exceeded,
in which case very careful checking is
required of the dimensions of all components,
as well as of the new parts.
5 Repeat the procedure for each ring that will
be installed in the first cylinder, and for each
ring in the remaining cylinders. Remember to
keep rings, pistons and cylinders matched up.
6 Refit the piston rings as follows. Where the
original rings are being refitted, use the marks
or notes made on removal, to ensure that
each ring is refitted to its original groove and
the same way up. New rings generally have
their top surfaces identified by markings
(often an indication of size, such as “STD”, or
the word “TOP”) - the rings must be fitted with
such markings uppermost. Note: Always
follow the instructions printed on the ring
package or box - different manufacturers may
require different approaches. Do not mix up
the top and second compression rings, as
they usually have different cross-sections.
7 The oil control ring (lowest one on the
piston) is usually installed first. It is composed
of three separate elements. Slip the
spacer/expander into the groove. If an anti-
rotation tang is used, make sure it is inserted
into the drilled hole in the ring groove. Next,
install the lower side rail. Don’t use a piston
ring installation tool on the oil ring side rails,
as they may be damaged. Instead, place one
end of the side rail into the groove between
the spacer/expander and the ring land, hold it
firmly in place, and slide a finger around the
piston while pushing the rail into the groove.
Next, install the upper side rail in the same
manner.
8 After the three oil ring components have
been installed, check that both the upper and
lower side rails can be turned smoothly in the
ring groove.
9 The second compression (middle) ring is
installed next, followed by the top
compression ring - ensure their marks are
uppermost, and be careful not to confuse
them. Don’t expand either ring any more than
necessary to slide it over the top of the piston.
10 When all the rings are in place set the ring
gaps as follows:
4-cylinder “M” series engines - set the
compression ring gaps at 90º to each
other, and away from the thrust side of
2C•16 Engine removal and general engine overhaul procedures
20.3 Measuring piston ring end gap
1380 Rover 800 Series Remake


 To Next Page
 Loading...
