Warning: DO NOT attempt to
remove the expansion tank filler
cap, or to disturb any part of the
cooling system, while it or the
engine is hot, as there is a very great risk
of scalding. If the expansion tank filler cap
must be removed before the engine and
radiator have fully cooled down (even
though this is not recommended) the
pressure in the cooling system must first
be released. Cover the cap with a thick
layer of cloth, to avoid scalding, and slowly
unscrew the filler cap until a hissing sound
can be heard. When the hissing has
stopped, showing that pressure is
released, slowly unscrew the filler cap
further until it can be removed; if more
hissing sounds are heard, wait until they
have stopped before unscrewing the cap
completely. At all times, keep well away
from the filler opening.
Warning: If the engine is hot, the
electric cooling fan(s) may start
rotating even if the engine is not
running, so be careful to keep
hands, hair and loose clothing well clear
when working in the engine compartment.
Heating system
The heating system consists of a blower fan
and heater matrix (radiator) located in the
heater unit, with hoses connecting the heater
matrix to the engine cooling system. Hot
engine coolant is circulated through the
heater matrix. When the heater temperature
control on the facia is operated, a flap door
opens to expose the heater box to the
passenger compartment. When the blower
control is operated, the blower fan forces air
through the unit according to the setting
selected.
Air conditioning system
See Section 14.
2 Antifreeze -
general information
Warning: Do not allow antifreeze
to come in contact with your
skin, or with the painted
surfaces of the vehicle. Rinse off
spills immediately with plenty of water.
Antifreeze is highly toxic if ingested. Never
leave antifreeze lying around in an open
container, or in puddles on the floor;
children and pets are attracted by its
sweet smell, and may drink it. Check with
local authorities about disposing of used
antifreeze - many have collection centres
which will see that antifreeze is disposed
of safely.
The cooling system should be filled with a
water/ethylene glycol-based antifreeze
solution, of a strength which will prevent
freezing down to -25ºC, or lower if the local
climate requires it. Antifreeze also provides
protection against corrosion, and increases
the coolant boiling point.
The cooling system should be maintained
according to the schedule described in
Chapter 1. If antifreeze is used that is not to
Rover’s specification, old or contaminated
coolant mixtures are likely to cause damage,
and encourage the formation of corrosion and
scale in the system. Use distilled water with
the antifreeze, if available - if not, be sure to
use only soft water. Clean rainwater is
suitable.
Before adding antifreeze, check all hoses
and hose connections, because antifreeze
tends to leak through very small openings.
Engines don’t normally consume coolant, so if
the level goes down, find the cause and
correct it.
The exact mixture of antifreeze-to-water
which you should use depends on the relative
weather conditions. On all V6 engines, and
4-cylinder engines equipped with air
conditioning, the mixture should contain
approximately 50% antifreeze. On 4-cylinder
engines without air conditioning, approxi-
mately a 33% antifreeze mixture is
recommended. Antifreeze concentrations
greater than 55% for V6 engines or 60% for
4-cylinder engines are not recommended as
the efficiency of the cooling system may be
impaired. Consult the mixture ratio chart on
the antifreeze container before adding
coolant. Hydrometers are available at most
automotive accessory shops to test the
coolant. Use antifreeze which meets the
vehicle manufacturer’s specifications.
3 Cooling system hoses -
disconnection and renewal
1
Note: Refer to the warnings given in Section 1
of this Chapter before starting work.
1 If the checks described in Chapter 1
reveal a faulty hose, it must be renewed as
follows.
2 First drain the cooling system (see Chap-
ter 1); if the antifreeze is not due for renewal,
the drained coolant may be re-used, if it is
collected in a clean container.
3 To disconnect any hose, use a pair of pliers
to release the spring clamps (or a screwdriver
to slacken screw-type clamps), then move
them along the hose clear of the union.
Carefully work the hose off its stubs. The
hoses can be removed with relative ease
when new - on an older car, they may have
stuck.
4 If a hose proves stubborn, try to release it
by rotating it on its unions before attempting
to work it off. Gently prise the end of the hose
with a blunt instrument (such as a flat-bladed
screwdriver), but do not apply too much force,
and take care not to damage the pipe
stubs or hoses. Note in particular that the
radiator hose unions are fragile; do not use
excessive force when attempting to remove
the hoses.
5 When refitting a hose, first slide the clamps
onto the hose, then work the hose onto its
unions. If the hose is stiff, use soap (or
washing-up liquid) as a lubricant, or soften it
by soaking it in boiling water, but take care to
prevent scalding.
6 Work each hose end fully onto its union,
then check that the hose is settled correctly
and is properly routed. Slide each clip along
the hose until it is behind the union flared end,
before tightening it securely.
7 Refill the system with coolant (see Chap-
ter 1).
8 Check carefully for leaks as soon as
possible after disturbing any part of the
cooling system.
4 Thermostat -
removal, testing and refitting
1
Note: Refer to the warnings given in Section 1
of this Chapter before starting work.
4-cylinder engines
Removal
1 Partially drain the cooling system
(approximately 2.5 litres), using the procedure
described in Chapter 1.
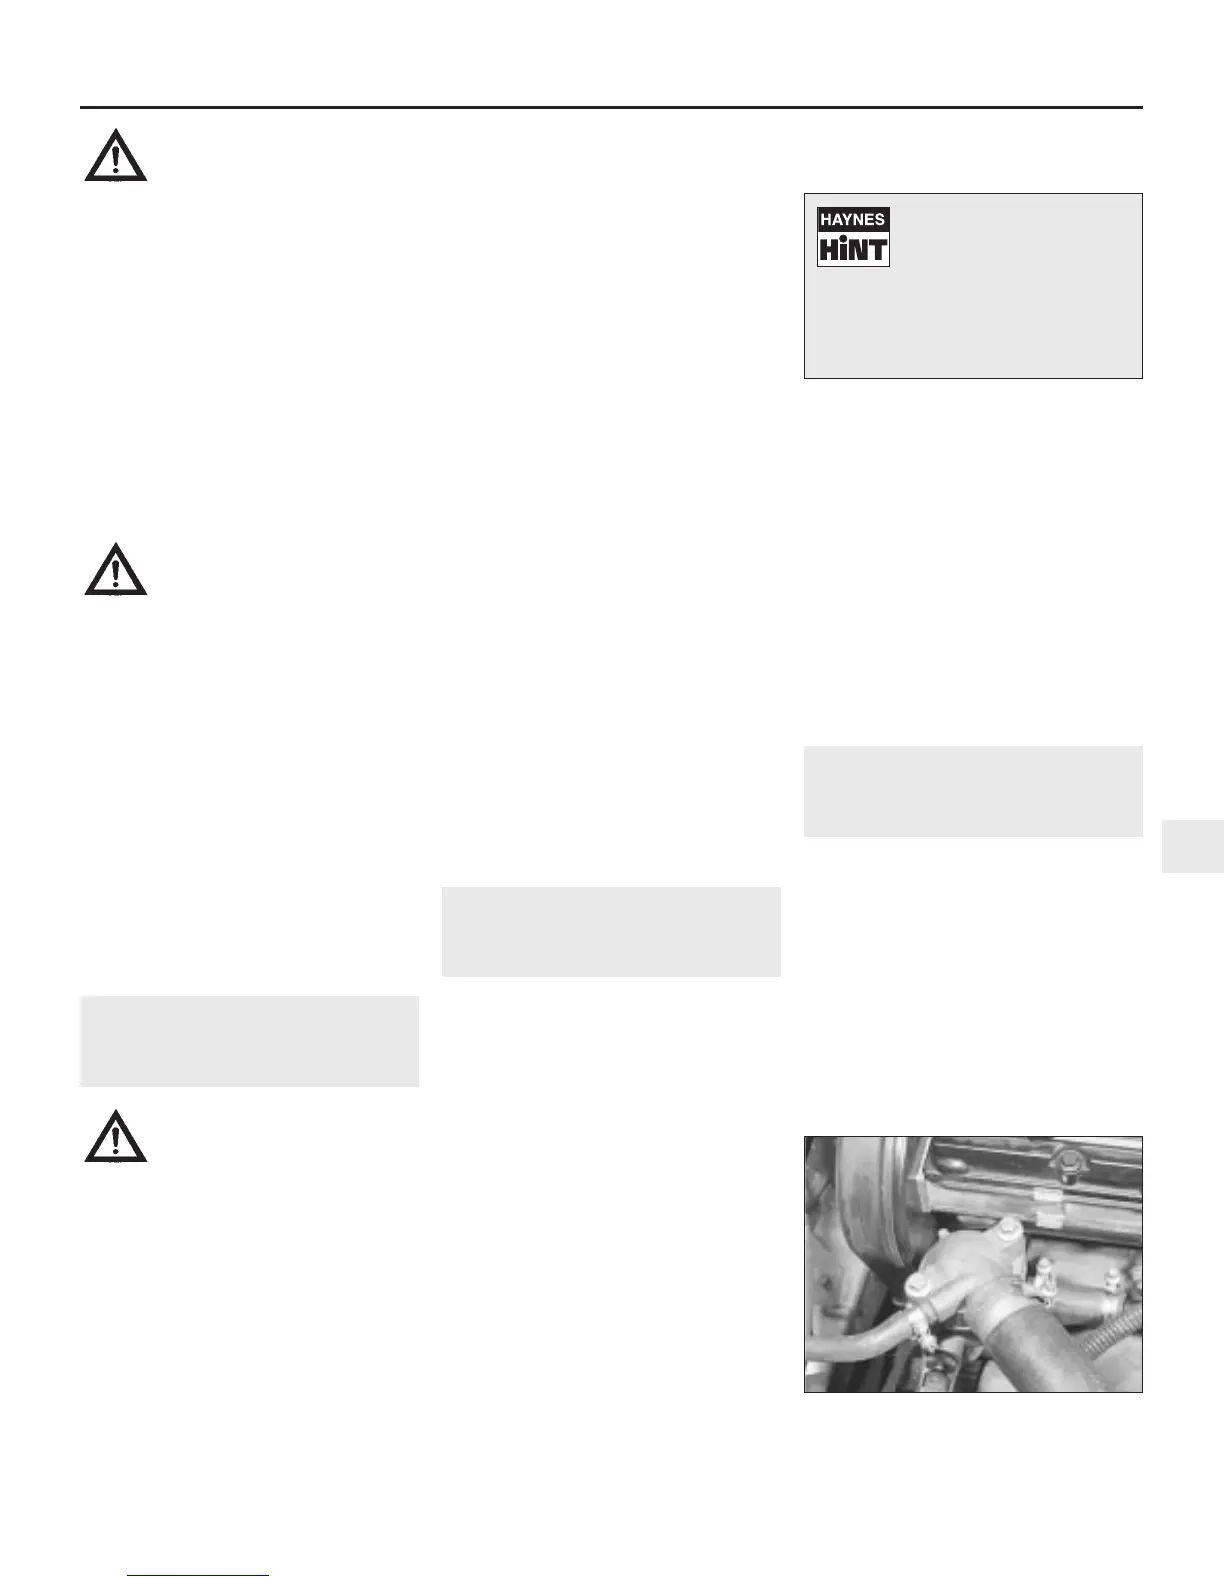
2 Slacken the clips and detach the radiator
top hose and expansion tank hose from the
water outlet elbow on the thermostat housing
(see illustration).
3 Undo the two bolts and remove the water
Cooling, heating and air conditioning systems 3•3
4.2 Detach the radiator top hose and
expansion tank hose from the water outlet
elbow
3
1380 Rover 800 Series Remake
If all else fails, cut the
coolant hose with a sharp
knife, then slit it so that it
can be peeled off in two
pieces. While expensive, this is
preferable to buying a new radiator.
Check first, however, that a new hose
is readily available.


 To Next Page
 Loading...
