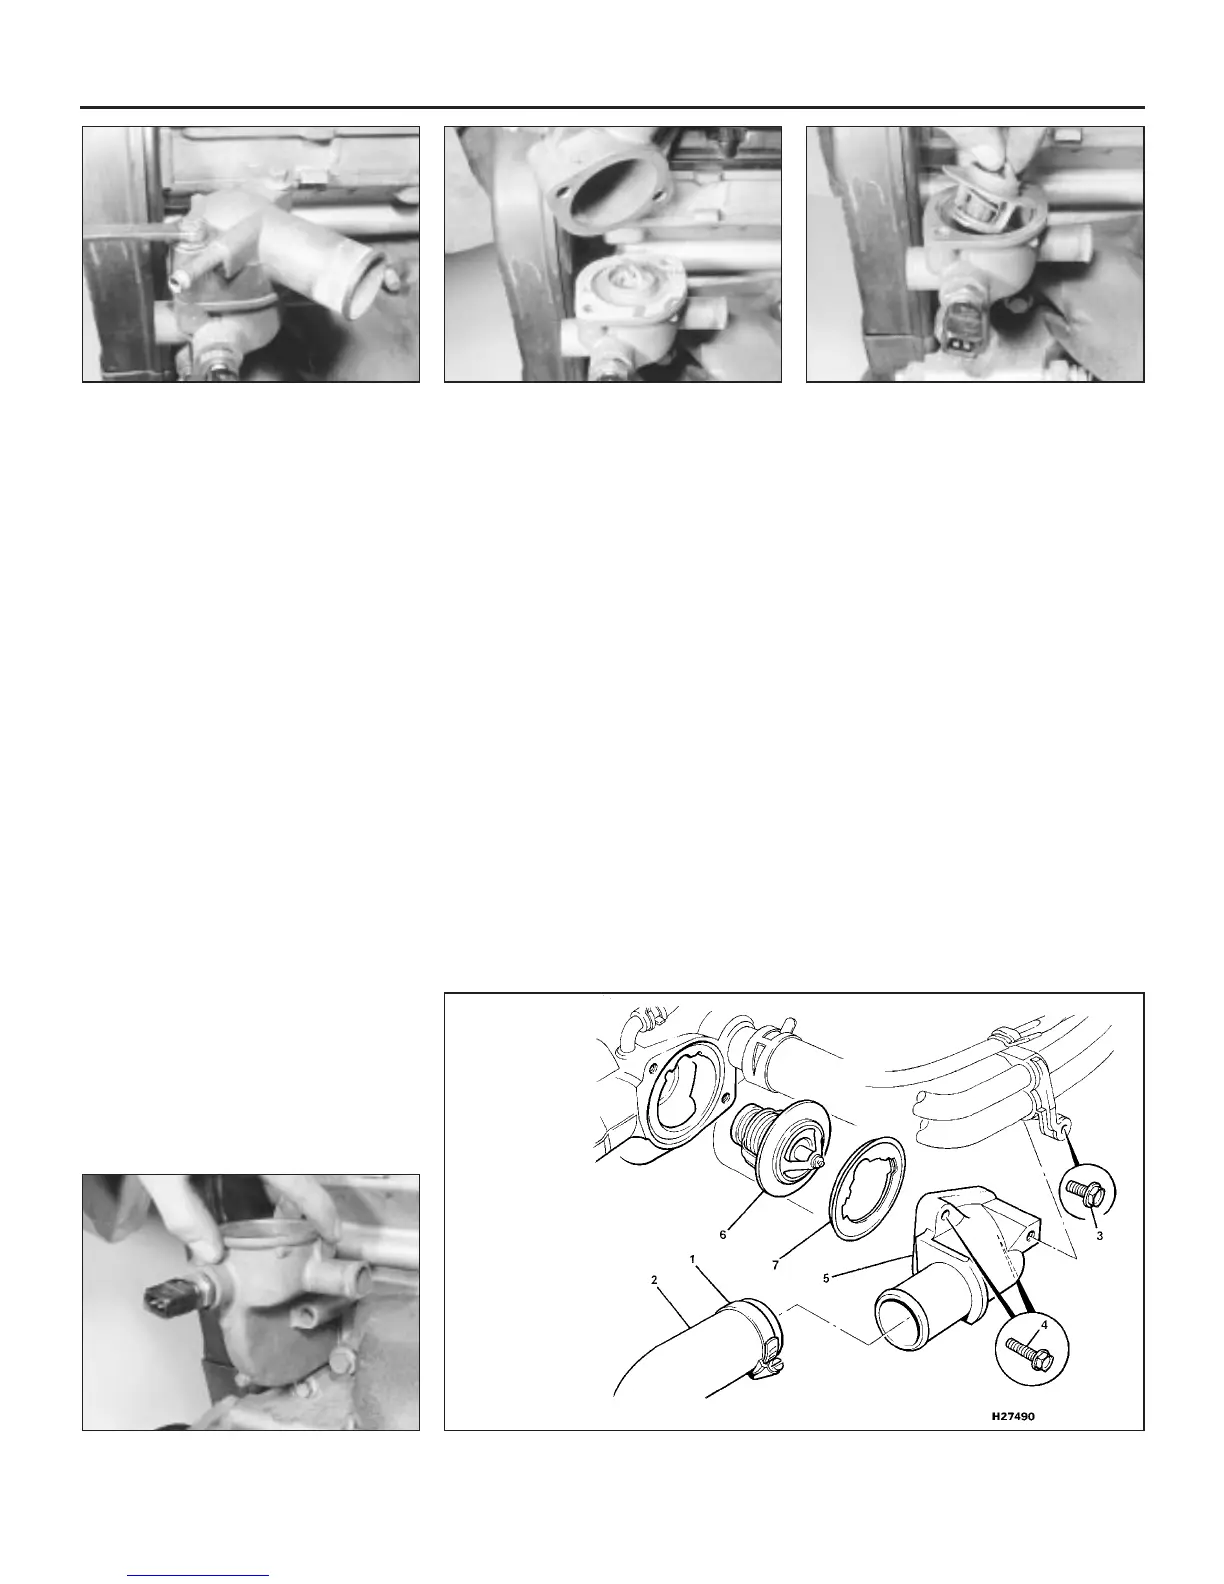
outlet elbow (see illustrations). Remove the
gasket.
4 Withdraw the thermostat from its seat in the
housing (see illustration).
5 To remove the housing, disconnect the
coolant temperature sensor wiring
multiplug(s). A single sensor is fitted to early
engines; two are fitted to later engines.
6 Slacken the retaining clips, and disconnect
the heater pipe connecting hose from the side
of the housing.
7 Undo the two bolts, and remove the
thermostat housing and gasket from the
cylinder head (see illustration).
Testing
8 Before assuming the thermostat is to blame
for a cooling system problem, check the
coolant level, where applicable the auxiliary
drivebelt tension and condition (see Chap-
ter 1) and temperature gauge operation.
9 If the engine seems to be taking a long time
to warm up (based on heater output or
temperature gauge operation), the thermostat
is probably stuck open. Renew the
thermostat.
10 If the engine runs hot, use your hand to
check the temperature of the radiator top
hose. If the hose isn’t hot, but the engine is,
the thermostat is probably stuck closed,
preventing the coolant inside the engine from
escaping to the radiator - renew the
thermostat.
Caution: Don’t drive the vehicle without a
thermostat. The lack of a thermostat will
slow warm-up time. The engine
management system’s ECU will then stay
in warm-up mode for longer than
necessary, causing emissions and fuel
economy to suffer.
11 If the radiator top hose is hot, it means
that the coolant is flowing and the thermostat
is open. Consult the “Fault diagnosis” section
at the front of this manual to assist in tracing
possible cooling system faults.
12 If the thermostat remains in the open
position at room temperature, it is faulty, and
must be renewed as a matter of course.
13 To test it fully, suspend the (closed)
thermostat on a length of string in a container
of cold water, with a thermometer beside it;
ensure that neither touches the side or bottom
of the container.
14 Heat the water, and check the
temperature at which the thermostat begins to
open, or is fully open. Compare this value with
the figures given in the Specifications, then
remove the thermostat and allow it to cool
down; check that it closes fully.
15 If the thermostat does not open and close
as described, if it sticks in either position, or if
it does not open at the specified temperature,
it must be renewed.
Refitting
16 Refitting is a reversal of removal, bearing
in mind the following points:
(a) Position the unit with its support legs
across the heater outlet pipe.
(b) Clean away all traces of old gasket from
the mating faces, and use a new gasket,
lightly smeared with jointing compound.
(c) Tighten the water outlet elbow retaining
bolts to the specified torque.
(d) Top up the cooling system with reference
to Chapter 1.
V6 engines
Removal
17 Refer to Chapter 4, Part D, and remove
the air cleaner components as necessary for
access to the thermostat housing.
18 Partially drain the cooling system
(approximately 2.5 litres), using the procedure
described in Chapter 1.
19 Undo the bolt securing the hose support
bracket to the thermostat housing and move
the hoses aside (see illustration).
20 Slacken the clip and detach the radiator
hose from the thermostat housing.
3•4 Cooling, heating and air conditioning systems
4.19 Thermostat and housing components on V6 engines4.7 Removing the thermostat housing
4.4 Withdraw the thermostat from the
housing
4.3b . . . and remove the water outlet
elbow
1380 Rover 800 Series Remake
4.3a Undo the two retaining bolts . . .
1 Bottom hose clip
2 Bottom hose
3 Hose support
bracket bolt
4 Thermostat
housing bolt
5 Thermostat
housing
6 Thermostat


 To Next Page
 Loading...
