ENGINE K SERIES 1.8 VVC
Technical Academy
01-34-RG-W-Ver:1 Page 25 of 28
• Make sure the piston is pushed fully to the top of the bore and that the rack teeth are
aligned to the control shaft teeth, positioning the HCU and seal plate to the camshaft
carrier, and making sure that the rack and control shaft teeth are engaged, then fit and
finger tight the 3 bolts.
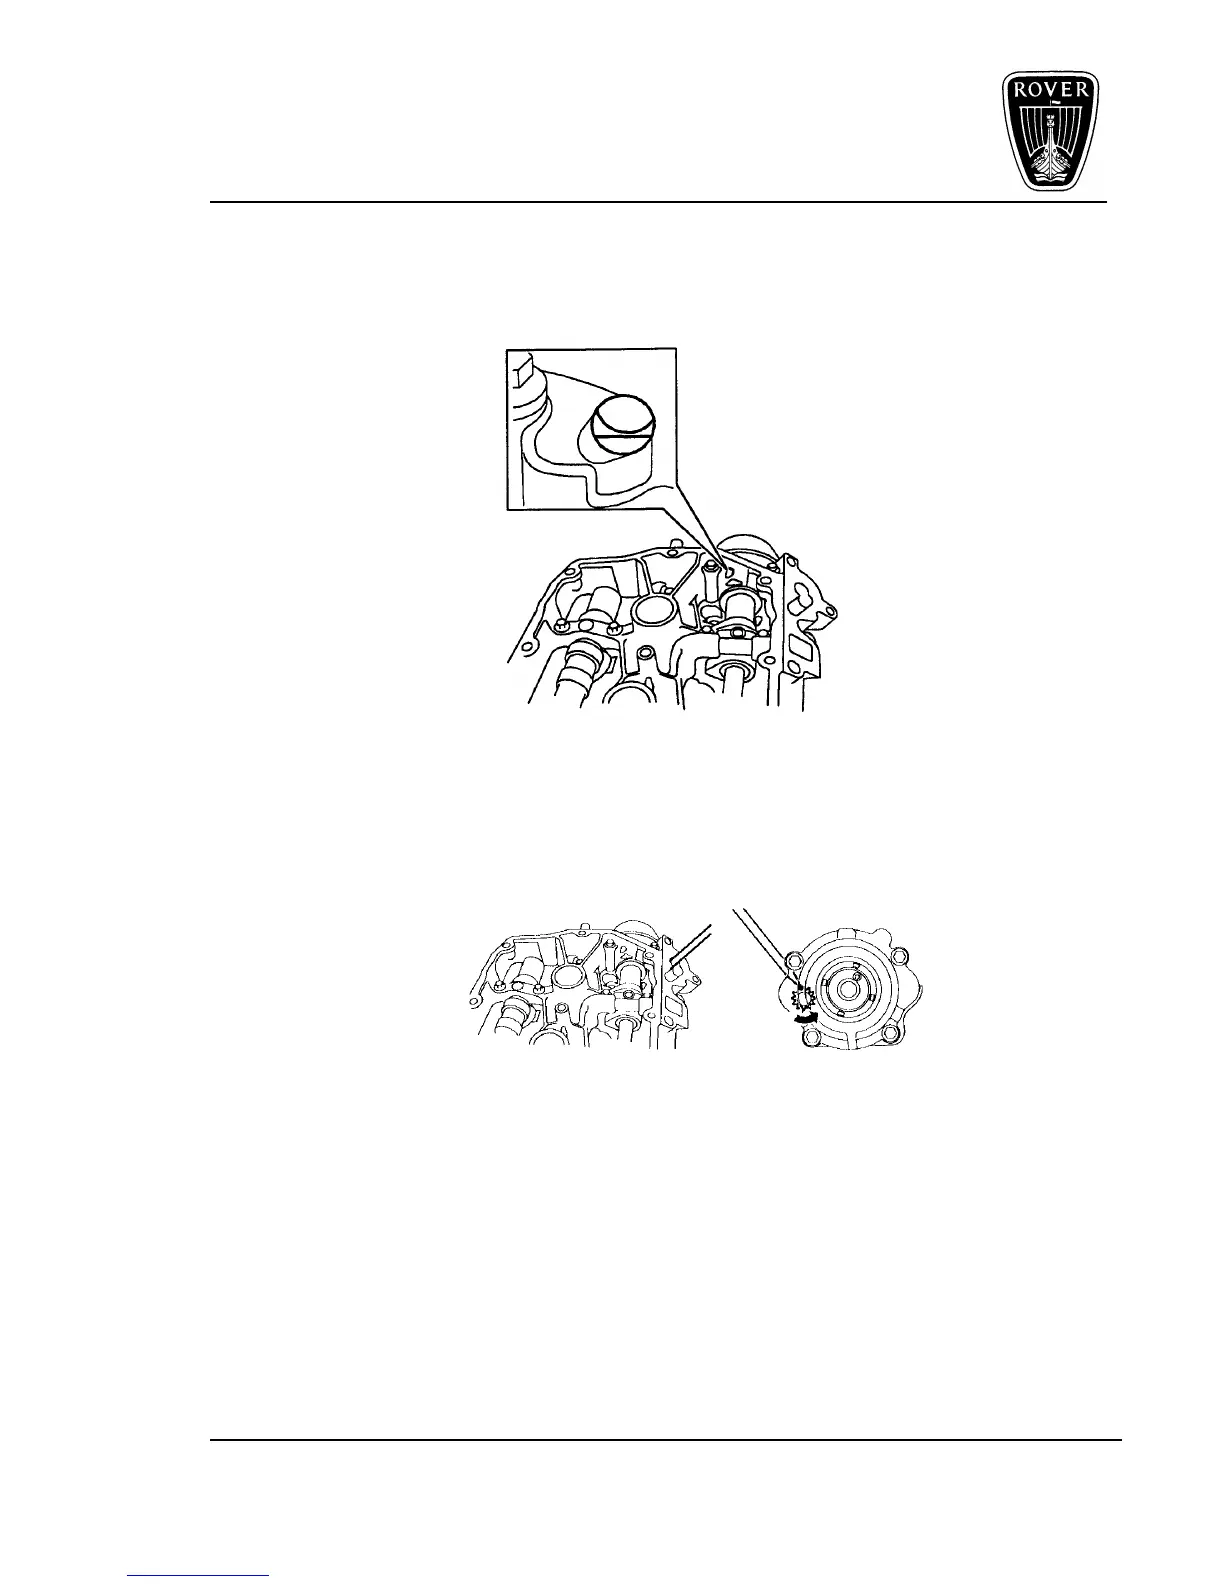
Figure 29
• Check that the timing slots in front and rear VVC control sleeves are visible through the
holes in the camshaft carrier as shown in figure 30.
NOTE: If the timing slots are not visible, remove the HCU and carry out the following;
Figure 30
• Using a screwdriver, rotate the control shaft as far as possible in an anti-clockwise
direction, figure 31, as viewed from the front of the carrier, noting that the slots should
be visible in both VVC control sleeves.
• Push the piston to the top of the bore, then refit the HCU to the carrier, screwing in the 3
bolts finger tight and recheck that the slots are now visible. If the slots are still not
visible, repeat the procedure again.
• Apply low pressure air to the oil temperature transmitter port to fully extend the rack.
• Visually check that the rack is fully extended and the timing slots are no longer visible
through the inspection holes in the carrier, then tighten the 3 bolts to 25Nm.
 Loading...