8 9
1830007702_DG8624U1_110x154_41/19 Page
8
1830007702_DG8624U1_110x154_41/19 Page
9
EN
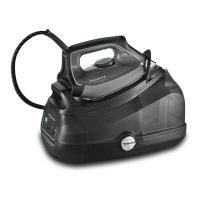
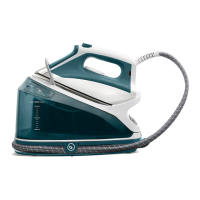
DESCRIPTION
1. Iron handle
2. Steam trigger
3. Iron temperature control dial
4. Base unit
5. Precision tip
6. Safety lock (to hold the iron onto the
base unit)
7. Water tank
8. Tank filling shutter
9. Calc collector
10. Cork handle*
11. Precision shot button*
12. Iron rest
13. Iron temperature control light
14. Steam cord
15. Steam cord storage clip
16. a: Button
b:
button
c: Eco mode
indicator light
d: Water tank
indicator light
e: Anti-calc
indicator light
* according to model
PREPARATION
USE
1 • Add the power cord to
your steam generator.
• The power cord for your steam generator
is not directly connected to the steam
generator when you open your package.
You’ll find the cord separately in the
package.
• Before using your steamer for the first
time, make sure you plug the power cord
into the hole on the underside of the
unit - fig. 2.
• Make sure it is correctly inserted - fig. 1, fig. 2.
• Once installed, do not remove it
-
fig. 3.
2 • Safety lock
• Your steam station is equipped with a
safety lock that holds the iron on to the
base unit in order to facilitate transport
and storage:
• Pull up – fig. 4.
• Push down – fig. 5.
The safety lock allows you to carry your
steam station by the iron handle:
- place the iron on the iron rest of the steam
station and lock it into place (you will hear
an audible “click” sound) – fig. 4.
- Hold the iron by its handle in order to
transport your steam station - fig. 6.
3 • Preparing your steam
station
• Place the steam station on a flat, stable,
horizontal and heat-resistant surface.
• Fill the tank with untreated tap water,
taking care not to exceed the maximum
level - fig. 8-9-10-11.
• Take the electrical cord in your hand and
remove the steam cord from its housing-
fig.12-13.
• Plug your steam station into a 120 volt
electric outlet - fig.14.
4 • Switching on your steam
station
• Press on the on / off button - fig. 15, The
ON button begins flashing.
• When starting, and regularly while it is
being used, your steam station’s electric
pump injects water into the boiler. It makes
a noise but this is quite normal.
•
The steam station and the iron are ready for
use when the ON button light is on and the
iron light goes out.
5 • Using your steam station
• Place the iron’s temperature control -
fig. 16
to the type of fabric to be ironed
(see table below).
• The iron temperature control light turns
on. Important: whenever you start using
your iron and whenever you reduce
the temperature during use, the iron is
ready for use when its indicator light
goes out and when the green light
located on the control panel comes on
and remains on.
• During use, when you increase the
temperature of the iron, you can start
ironing immediately.
Type of fabric
SeTTing
TemperaTure
S
ynTheTicS
(Polyester, Acetate, Acrylic, Polyamide)
•
Silk / Wool
••
c
oTTon
/ l
inen
•••
• ECO Mode: Your steam station
has an ECO mode function
which uses less power whilst
still guaranteeing a sufficient
steam output for you to iron
your garments properly.
In order to use this function, once the
thermostat of your iron has been correctly
set (see table above), press on the ECO
button located on the control panel.
The ECO mode can be used on all types
of fabrics, nevertheless for very thick or
very creased fabrics we recommend that
you deactivate ECO mode (by pressing
the MAX button) to guarantee the best
results.
•
During ironing the iron indicator light
switches on and off according to heating
requirements but this has no effect on use.
• To obtain steam, press on the steam
trigger beneath the iron handle and keep
it pressed - fig. 18. The steam
will stop
when you release the trigger.
•
Always spray starch on the reverse side of
the fabric to be ironed.
• Steam boost:
In order to activate
automatically 3 shots of steam, please
press the trigger 3 times
- fig.21.
*
Precision shot button: In order to activate the
precision shot button, press the button on top
of the handle fig. 22. (depending on models)
Recommendations: To prime the steam
circuit, either before using the iron for
the first time, or if you have not used the
steam function for a few minutes, press
the steam trigger several times in a row
– fig.18, holding the iron away from your
clothes. This will enable any cold water
to be removed from the steam circuit.
Iron temperature control setting: Your
iron is quick to heat up so start with
fabrics to be ironed at a low temperature
and finish with those which need higher
temperatures. Mixed fibre fabrics: set
the ironing temperature to the setting
for the most delicate fabric. For delicate
fabrics (•), press the steam trigger (under
the handle of the iron) intermittently to
avoid any water droplets appearing with
the steam. If you set your thermostat
to “min”, the iron will not become hot.
During initial use, you may notice some
fumes, a harmless odour and a slight
release of particles. This phenomenon,
which has no effect on use, will quickly
disappear.
When taking a break from ironing,
never place the iron on a metal rest
plate, which could damage the iron
rest plate of the unit. It is equipped with
non-slip pads and has been designed
to withstand high temperatures.
 Loading...