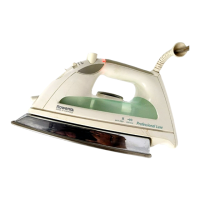
Do you have a question about the Rowenta SMART STEAM and is the answer not in the manual?
Pilot light signals heating, shut-off, and readiness.
Buttons and levers for steam output, bursts, and spray functions.
Essential parts like filling inlet, precision tip, anti-calc, and anti-drip systems.
Initial steps to take before using the appliance for the first time.
Remove the protective cover from the soleplate.
Adjust the steam lever to the appropriate setting for steam ironing.
Open the water tank filler flap when the iron is unplugged.
Add water to the iron's water tank.
Do not fill the water tank beyond the MAX indicator.
Securely close the water tank filler flap.
Position the iron upright and plug it into the power outlet.
Pilot light signals the iron is in the heating process.
Pilot light off indicates the iron is ready for use and steam.
Auto Off indicator blinks when the iron is cooling down.
Move the iron to reactivate it after auto-shutoff.
Auto Off indicator stops blinking when iron reheats.
Adjust the steam lever to the appropriate setting for steam ironing.
Optimizes heat/steam; Eco mode saves energy and water.
Adjust the steam lever to the no-steam position for dry ironing.
Press the designated button to activate the spray function.
Position the steam lever to NORMAL for burst of steam.
The pilot light indicates the iron is heating for steam bursts.
Pilot light off means the iron is ready for steam bursts.
Press the steam button for one second to release steam.
Allow a 2-second interval between successive steam bursts.
Position the steam lever to NORMAL for vertical steaming.
Pilot light indicates the iron is heating for vertical steaming.
Pilot light off means the iron is ready for vertical steam.
Hold iron vertically, press steam button for 1 sec.
Hold iron horizontally for 2 sec after 3 bursts to regenerate steam.
Maintain a 20cm distance from the garment during vertical steaming.
Do not direct vertical steam towards people or animals.
Always place the iron on its heel when plugged in.
Never leave the iron resting on its soleplate when it is plugged in.
Allow the iron to cool for one hour after unplugging before cleaning.
Clean the cooled soleplate with a damp cloth or sponge.
Avoid detergents, sharp, or abrasive items; use recommended kit.
Do not pour water directly onto the main body of the iron.
Disconnect the iron from the power source before storing.
Set the steam lever to no steam to prevent residual water leakage.
Ensure the iron has cooled for one hour after unplugging before storing.
Drain any remaining water from the tank into a sink.
Wrap the cord around the heel and store the iron in an upright position.
Never store the iron in a horizontal position to prevent damage or leaks.
Clean the anti-calc valve every two weeks for optimal performance.
Ensure the water tank is empty before proceeding with valve cleaning.
Adjust the steam lever to the no-steam position for this maintenance task.
Carefully remove the anti-calc valve from its housing.
Soak valve in lemon juice or vinegar for 4 hours; avoid touching the end.
Rinse the valve thoroughly under running tap water.
Reinsert the anti-calc valve; it is essential for the iron's function.
Perform the self-cleaning operation every two weeks for best results.
Position the steam lever to NORMAL for the self-cleaning process.
Fill the water tank up to the MAX fill line for self-cleaning.
Connect the iron to the power outlet to start the self-cleaning cycle.
The pilot light indicates the iron is heating during self-cleaning.
Pilot light off means the iron is ready for the self-cleaning cycle.
Disconnect the iron from the power source once self-cleaning is complete.
Hold the iron over a sink for the self-cleaning process.
Remove the anti-calc valve before performing self-cleaning.
Gently shake the iron over the sink for one minute during the process.
Reinsert the anti-calc valve into its correct position.
Connect the iron to power to heat the soleplate for drying.
Let the iron heat for 2 minutes to dry the soleplate.
Disconnect the iron from the power source after drying.
Allow the iron to cool for one hour after unplugging.
Clean the cooled soleplate with a damp cloth or sponge.
Avoid detergents, sharp, or abrasive items; use recommended kit.
Water dripping from soleplate holes or brown stains appearing on linen.
Soleplate emitting particles, being dirty, or becoming scratched.
Problems with low/no steam output or the spray function not working.
Steam or water leaks occurring immediately after filling the tank.
| Soleplate Material | Stainless steel |
|---|---|
| Steam Output | 40 g/min |
| Water Tank Capacity | 300 ml |
| Vertical Steam | Yes |
| Anti-Drip System | Yes |
| Auto Shut-Off | Yes |
| Power | 2400 W |
| Self-cleaning | Yes |
| Anti-calc System | Yes |
