This document describes the Rowenta Perfect Steam steam generator iron.
Function Description
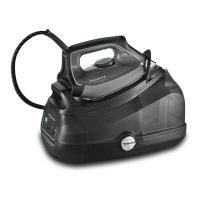
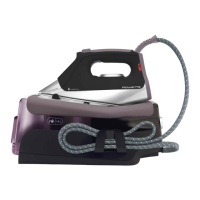
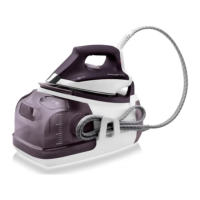
The Rowenta Perfect Steam is an electrical appliance designed for domestic ironing. It functions as a steam generator iron, producing steam to facilitate ironing garments. The device includes a boiler that heats water to generate steam, which is then delivered to the iron's soleplate. It features a "Perfect Steam" system, indicating its primary function of providing effective steam for ironing. The appliance is equipped with a safety lock to secure the iron to the base unit, making it easier to transport and store. It also includes an ECO mode for energy-efficient operation.
Important Technical Specifications
- Water Tank Capacity: 1.4 L removable water tank.
- Power Supply: Operates on an electrical installation with a voltage between 220V and 240V (alternating current only). It must be plugged into an earthed electrical socket.
- Safety Systems:
- A pressure release valve to prevent excessive pressure, releasing excess steam in case of malfunction.
- A thermal fuse to prevent overheating.
- Scale Management: Depending on the model, it may include a "Calc Away System" scale collector or a "boiler rinse" cap for descaling.
- Soleplate: Microsteam 400 soleplate.
- Control Panel: Features a steam ready light, ECO button, Restart button, "Calc Away System" or "boiler rinse" indicator, and a "water tank empty" light.
- Iron Temperature Control: A dial on the iron allows adjustment of the soleplate temperature according to fabric type.
Usage Features
Preparation:
- Safety Lock: The iron can be locked onto the base unit for transport by pulling up the safety lock (fig. 1) and pushing down to release (fig. 2). To transport, place the iron on the iron rest, push the safety lock down until it clicks, and then hold the iron by its handle (fig. 3).
- Water Usage: Designed for use with untreated tap water. If water is very hard, mix 50% tap water with 50% distilled water. In coastal regions with high salt content, use only distilled water. Avoid rainwater or water with additives (starch, perfume, water from other household appliances) as these can affect steam properties and cause stains.
- Setting up the Steam Generator: Place the unit on a flat, stable, heat-resistant surface. Remove the 1.4L water tank (fig. 4), fill it with water up to the maximum level (fig. 5), and slide it back until it clicks. Unwind the electrical power cord completely and remove the steam cord from its housing (fig. 6). Plug the steam generator into an earthed mains socket (fig. 7).
Operation:
- Switching On: Press the on/off switch (fig. 8). The green light on the control panel will flash, indicating the boiler is heating. An electric pump injects water into the boiler, which is normal and may produce a noise. The steam generator and iron are ready when the steam indicator light is on and the iron light goes out. Initial use may produce harmless fumes and a slight smell.
- Control Panel:
- Flashing green light (fig. 8): Boiler heating.
- Continuous green light (fig. 10): Steam ready.
- Flashing red light (fig. 13): Water tank empty.
- Flashing orange "Calc Away System" or "boiler rinse" indicator (fig. 15 or fig. 21): Collector/boiler needs rinsing.
- Ironing with Steam: Set the iron's temperature control dial (fig. 9) according to the fabric type (refer to the fabric table). The iron temperature control light will turn on. The iron is ready when its indicator light goes out and the green light on the control panel is continuous. For steam, press the steam trigger under the handle (fig. 11). Steam stops when the trigger is released.
- ECO Mode: Press the ECO button on the control panel to activate. This mode uses less power while providing sufficient steam. For very thick or creased fabrics, deactivate ECO mode for optimal results.
- Dry Ironing: Do not press the steam trigger.
- Refilling Water Tank: If the red "water tank empty" light flashes (fig. 13), the tank is empty. Remove the water tank (fig. 14), refill it up to the max level (fig. 5), and reinsert it until it clicks. Press the "Restart" button on the control panel to turn off the red light.
- Vertical Steam Ironing: Set the iron temperature to maximum. Hang the garment on a hanger and gently smooth the fabric. Press the steam trigger intermittently, moving the iron from top to bottom (fig. 12). Avoid directing steam towards people or animals.
Storage:
- Turn off the appliance and unplug it.
- Place the iron on the iron rest.
- Lower the safety lock over the iron until it clicks, securing the iron to the base unit (fig. 1).
- Fold the steam cord in two and store it in its housing. Wrap the electrical cord and secure it with the Velcro strap.
- Allow the steam generator to cool for at least one hour before storing, especially in a cupboard or confined space.
Maintenance Features
Cleaning the Generator:
- Never place the iron or base unit under running tap water.
- Do not use cleaning or descaling products on the soleplate or boiler.
- Soleplate: Clean the cooled soleplate with a damp cloth or non-abrasive sponge.
- Base Unit: Periodically clean the plastic parts of the appliance with a soft cloth.
Descaling the Steam Generator:
- Never use descaling products (vinegar, industrial descalers) to rinse the boiler, as they can damage it.
- Before emptying the boiler, allow the appliance to cool completely for at least 2 hours to avoid burns.
Models with Scale Collector ("Calc Away System"):
- The orange "Calc Away System" indicator (fig. 15) flashes when the collector needs rinsing.
- Ensure the steam generator is unplugged and completely cold for at least two hours.
- Remove the scale collector cover (fig. 16).
- Completely unscrew and remove the collector from the base unit (fig. 17). It will contain accumulated scale.
- Rinse the collector under running water to remove scale (fig. 18).
- Reinsert the collector into its housing and screw it in completely to ensure a tight seal (fig. 19).
- Replace the scale collector cover (fig. 20).
- The next time you use the generator, press the "Restart" button to turn off the orange light.
- In addition to regular maintenance, a complete boiler rinse is recommended every 6 months or every 25 uses.
- To perform a complete rinse: ensure the generator is cold and unplugged for over 2 hours. Place it on the edge of a sink with the iron on its heel. Remove the collector cover and unscrew the collector (fig. 16-17). Hold the generator tilted and fill the boiler with 1/4 liter of tap water using a jug (fig. 24). Shake the base unit for a few moments (fig. 25) and empty it completely into the sink (fig. 26). Repeat this process twice for best results. Screw back and tighten the boiler rinse cap with a coin (fig. 27). Replace the boiler rinse cap cover (fig. 28).
Models without Scale Collector ("Boiler Rinse"):
- The orange "Boiler rinse" light (fig. 21) flashes when the boiler needs draining. You can continue ironing, but remember to rinse the boiler before next use.
- Ensure the steam generator is unplugged and completely cold for at least two hours.
- Place the steam generator on the edge of a sink with the iron on its heel.
- Unscrew the boiler rinse cap cover a quarter turn anti-clockwise (fig. 22).
- Using a coin, gently unscrew the boiler rinse cap (fig. 23).
- Hold the steam generator tilted and fill the boiler with 1/4 liter of untreated tap water using a jug (fig. 24).
- Shake the base unit for a few moments (fig. 25) and empty it completely into the sink (fig. 26). Repeat this process twice for best results.
- Screw back and tighten the boiler rinse cap with a coin (fig. 27).
- Replace the boiler rinse cap cover (fig. 28).
- The next time you use the generator, press the "Restart" button to turn off the orange light.
Regular descaling helps maintain steam performance over time. The steam generator will not function without the scale collector/boiler rinse cap (depending on the model).