+12VDCCTRL IN CTRLOUT MUTE STATUS
RS232
ID No.
SOURCE 1 8ECRUOS7ECRUOS6ECRUOS5ECRUOS4ECRUOS3ECRUOS2ECRUOS
61ECRUOS51ECRUOS41ECRUOS31ECRUOS21ECRUOS11ECRUOS01ECRUOS9ECRUOS
61ENOZ51ENOZ41ENOZ31ENOZ21ENOZ11ENOZ01ENOZ9ENOZ
7ENOZ6ENOZ5ENOZ4ENOZ3ENOZ2ENOZ1ENOZ ZONE 8
RAVRAVRAVRAVRAVRAVRAVRAV
RAVRAVRAVRAVRAVRAVRAVRAV
LACOLLACOLLACOLLACOLLACOLLACOLLACOLLACOL
XIFXIFXIFXIFXIFXIFXIFXIF
XIFXIFXIFXIFXIFXIFXIFXIF
ETOMERETOMERETOMERETOMERETOMERETOMERETOMERETO
MER
POOLPOOLPOOLPOOLPOOLPOOLPOOLPOOL
POOLPOOLPOOLPOOLPOOLPOOLPOOLPOOL
XIMXIMXIMXIMXIMXIMXIMXIM
LLLLLLLL
LLLLLLLL
RRRRRRRR
RRRRRRRR
TUO-ERPTUO-ERPTUO-ERPTUO-ERPTUO-ERPTUO-ERPTUO-ERPTUO-ERP
TUO-ERPTUO-ERPTUO-ERPTUO-ERPTUO-ERPTUO-ERPTUO-ERPTUO-ERP
AC100-240V
0.5A 50-60Hz
1 2345678
1 2345678
ALL
REMOTE SOURCES
REMOTE SOURCES IR INPUT
FUSE: T5AL 250V
0
1
A2
A1
A0
MIRTMIRTMIRTMIRTMIRTMIRTMIRTMIRT
MIRTMIRTMIRTMIRTMIRTMIRTMIRTMIRT
ETHERNET
A2
0
0
0
0
1
1
1
1
A1
0
0
1
1
0
0
1
1
A0
0
1
0
1
0
1
0
1
ID No.
1
2
3
4
5
6
7
8
Remote Technologies Incorporated
Model
AD
S N
P N
20-210178-21
Made In Taiwan
CONFORMSTO ANSI/ULSTD. 60065
CERTIFIEDTO CAN/CSASTD. C22.2
No.60065-03
MAC 00:15:26:04:60:00
POWER
ZONE 9
ZONE 1
ZONE 10
ZONE 2
ZONE 11
ZONE 3
ZONE 12
ZONE 4
ZONE 13
ZONE 5
ZONE 14
ZONE 6
ZONE 15
ZONE 7
ZONE 16
ZONE 8
Model
Audio Distribution Matrix
AD-16x
CHAPTER 3 | INSTALLATION AND OPERATION
POWER
Insert the included AC power cord into the input receptacle on the AD-16x.
When the AC power cord is connected to a power source, press the Power
button to turn the AD-16x on and off.
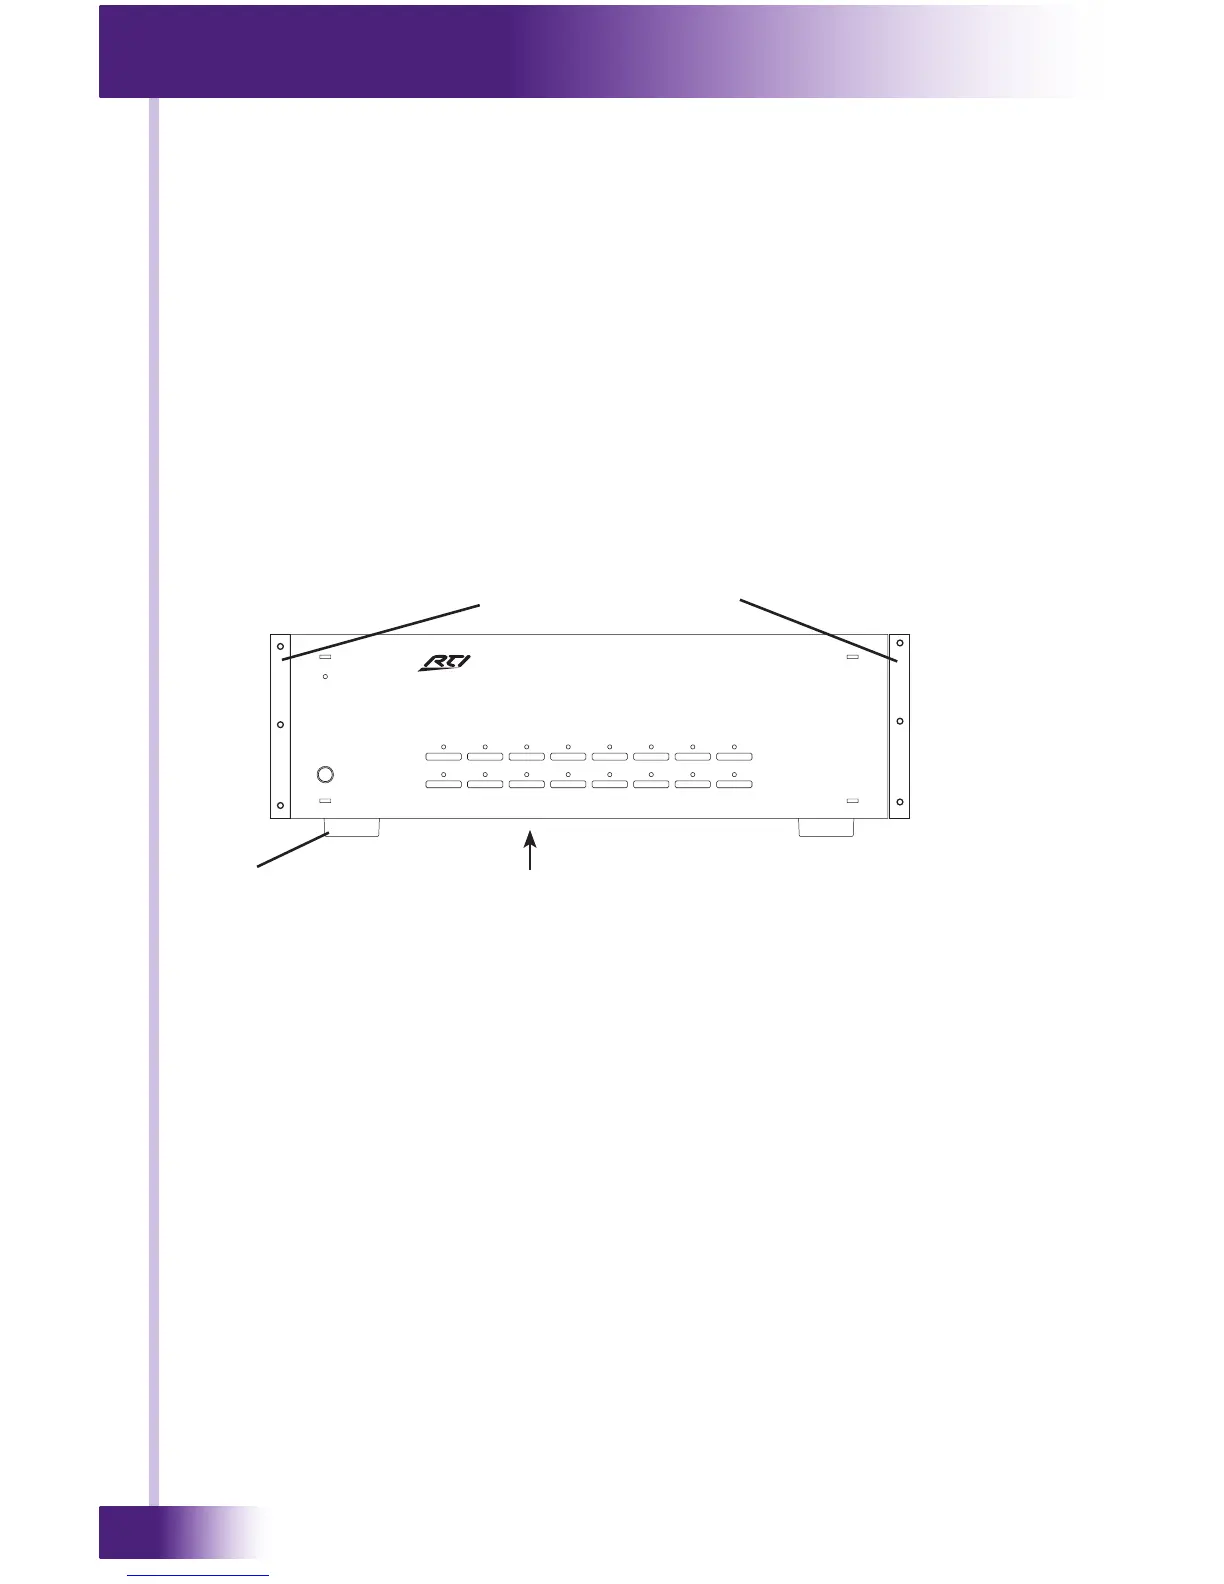
FREE STANDING INSTALLATION
The AD-16x comes with four removable feet that allow the unit to be placed on
a at surface. To maintain proper ventilation and cooling, do not install the AD-
16x on a at surface without the feet.
RACK MOUNT INSTALLATION
The AD-16x can be mounted in a component rack using the included rack
mounting ears. Align the rack mounting ears with the screw holes located on
the sides of the AD-16x near the front. Fasten the rack ears to the AD-16x
using three screws (supplied). Remove feet before mounting in a rack.
NOTE: To maintain proper ventilation, it is recommended that you leave a rack
space above and below the AD-16x.
Foot
Rack Mounting Ears