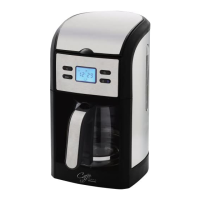
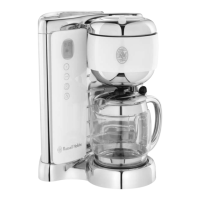
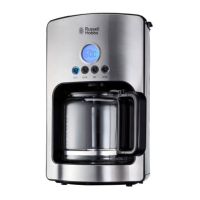
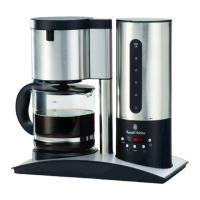
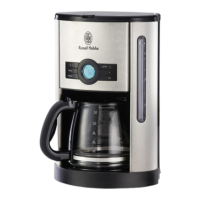
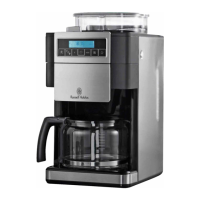
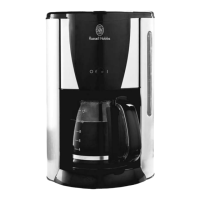
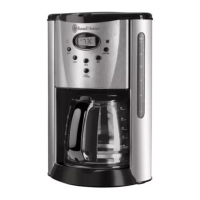
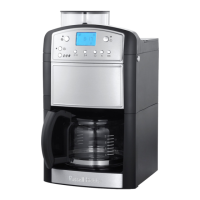
This document describes the Russell Hobbs coffee maker, a device designed for brewing coffee from either ground coffee or whole beans. It features an integrated coffee mill, allowing users to grind fresh beans for each brew.
Function Description:
The coffee maker is designed to brew coffee automatically. Users can select between using pre-ground coffee or whole beans. When using whole beans, the integrated coffee mill grinds them before brewing. The device includes a reservoir for water, a filter holder for coffee grounds, and a glass carafe to collect the brewed coffee. A hotplate keeps the carafe warm after brewing. The coffee maker also features a programmable timer for delayed brewing and a brew strength selection.
Important Technical Specifications:
- Capacity: The water reservoir and carafe have a capacity up to 10 cups.
- Power: The device uses a 13A BS1362 fuse in a 13A BS1363 plug.
- Display: Features a digital display showing the time and various settings (e.g., brew strength, cup quantity, carbon filter indicator).
- Carbon Filter: Includes a carbon filter to reduce chemicals in the water, lasting for approximately 70 brewing cycles.
- Clock: A 24-hour clock with "h" (hour) and "min" (minute) buttons for setting the time and timer.
- Brew Strength Settings: Offers light, medium, and dark coffee strength options.
- Cup Quantity Settings: Buttons for 2-10 cups (for bean grinding duration) and 2-4 cups (for brew strength feature).
- Grind Setting: Adjustable grind setting from fine to coarse for coffee beans.
Usage Features:
- Preparation: Place the coffee maker on a stable, level, heat-resistant surface. Ensure the cable is routed safely.
- Filling: Remove the carafe, open the reservoir lid using the grip, and fill the reservoir with water (at least 2 cups, not above the 10-mark) using the carafe to avoid overfilling. Close both the reservoir and carafe lids.
- Ground Coffee: Press the drawer release button to open the drawer, place filter-ground coffee into the filter (two rounded teaspoons per cup suggested), close the drawer, and replace the carafe on the hotplate.
- Coffee Beans: Remove the lid from the coffee mill, fill it with coffee beans, and replace the lid. Turn the coffee mill setting to the desired grind (fine to coarse). Close the drawer and replace the carafe on the hotplate.
- Switch On: Plug the coffee maker into a power socket.
- Brewing Now:
- Select coffee strength (light, medium, dark) using the dedicated button.
- If using coffee beans, use the 2-10 button to set the number of cups, which determines the mill's operating time.
- For less than 6 cups, press the 2-4 button to activate the brew strength feature (display shows "2-4"). This feature works only for 2 or 4 cups.
- Press the appropriate button (beans or ground coffee) to start brewing. The light next to the button will illuminate.
- The mill will operate if using beans, then coffee will drip into the carafe.
- The hotplate will keep the coffee warm after brewing. It's recommended to make a fresh pot after about an hour due to flavour changes.
- Brewing Later (Timer Function):
- Set the current time using the "h" and "min" buttons. The clock is 24-hour.
- To set the timer: Press and hold the timer button for 3 seconds until its light flashes. Release the button.
- Set the desired start time using the "h" and "min" buttons.
- Select coffee strength and cup quantity as described above.
- Press the appropriate button for ground coffee or beans.
- If no buttons are pressed within 10 seconds, the timer setting will revert to normal.
- To activate the timer, press and release the timer button. The light will stop flashing and glow steadily.
- Quick Cup Feature: The carafe can be removed during brewing for a quick cup. A non-drip valve prevents dripping. Replace the carafe within 20 seconds to prevent the filter holder from overflowing.
- Switching Off: The coffee maker does not switch off automatically. Press the appropriate button (beans or ground coffee) to turn it off. The light next to the button will go out. Unplug the device and allow it to cool for at least 10 minutes before refilling or cleaning.
Maintenance Features:
- Cleaning:
- Unplug and cool the coffee maker before cleaning.
- Discard coffee grounds into a bin (not the sink).
- Clean the carafe, filter, and filter holder in warm soapy water, then rinse thoroughly.
- Wipe external surfaces with a damp cloth.
- Clean the inside of the coffee mill with a pastry brush.
- To clean the coffee mill more thoroughly, press the hole marked "↓" with a cocktail stick and slide the cover forward. Clean the inside, then slide the cover back.
- Do not put any part of the coffee maker in a dishwasher.
- Do not immerse the coffee maker in water or other liquids.
- Avoid harsh or abrasive cleaning agents.
- Descaling:
- Regular descaling is essential to prevent scale build-up, which can cause overheating and lengthen brewing time.
- Descale monthly in hard water areas, or more frequently if brewing time increases.
- Use a proprietary descaler suitable for plastic-bodied products, following its instructions.
- After descaling, operate the coffee maker twice with fresh water (no coffee) to remove chemical residues.
- Carbon Filter Replacement:
- The carbon filter lasts for 70 brewing cycles. The display will show an indicator when replacement is needed.
- To replace: Open the reservoir lid, pull out the carbon filter holder, open its bottom, remove the old filter, and insert a fresh one. Close the holder, turn the tab towards the coffee mill, and push the holder into the matching space in the reservoir floor. Close the reservoir lid.
- After replacement, press and release the carbon filter button to remove the indicator from the display.
- Replacement carbon filters (part number 189980) can be ordered from Customer Service.
- The coffee machine can operate without a carbon filter if a replacement is not available.
Important Safeguards:
- Use and store out of reach of children.
- Do not immerse the coffee maker in liquid or use it in wet environments.
- Avoid touching hot surfaces (carafe, hotplate).
- Keep the coffee maker and cable away from worktop edges.
- Do not operate with an external timer or remote control system.
- Unplug when not in use, before moving, or cleaning.
- Do not add water above the 10-mark.
- Ensure the carafe is on the hotplate before switching on.
- Allow 10 minutes cooling before refilling to avoid spitting.
- Do not use the carafe in a microwave oven.
- Do not attempt to adjust the metal band around the carafe.
- Keep the coffee maker and cable away from other hotplates or burners.
- Use only supplied accessories.
- Do not use if damaged or malfunctioning.
- If the cable is damaged, return the coffee maker to avoid hazards.
- Do not reheat coffee in the coffee maker.
- Clean the filter holder, filter, and carafe after each use to prevent spoilage.