Do you have a question about the Russell Hobbs EASY STORE PRO RHC1100 and is the answer not in the manual?
Guide for selecting correct fabric temperatures using label markings.
Instructions on how to properly fill the iron's water reservoir.
Steps for powering on the iron and understanding auto shut-off features.
How to use the iron for effective steam ironing.
Using the cool spray mist function for fabrics.
Applying bursts of steam for stubborn wrinkles.
Instructions for dry ironing without steam.
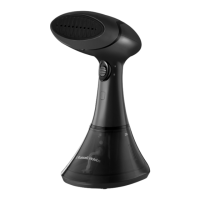
How to use the iron for vertical steaming of garments.
Proper procedure for cleaning, draining, and storing the iron.
Procedure for self-cleaning the iron to remove residues.
General instructions for cleaning the exterior and soleplate.
Detailed terms and conditions of the product warranty.
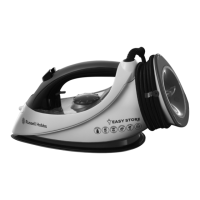
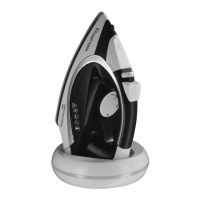
This document describes the Russell Hobbs Easy Store Pro Iron, model RHC1100, a household appliance designed for ironing clothes and fabrics. It provides comprehensive instructions for its safe and effective use, covering various ironing modes, maintenance, and warranty information.
The Russell Hobbs Easy Store Pro Iron is primarily designed to remove wrinkles from fabrics using heat and, optionally, steam. It features a soleplate that heats up to various temperatures, controlled by a dial, to suit different fabric types. The iron can be used for dry ironing, steam ironing, cool spray mist, and a burst of steam function, offering versatility for a wide range of garments and textiles. Its auto shut-off feature enhances safety by automatically turning off the heating element when the iron is left motionless for a certain period, either on its soleplate, side, or upright. The self-clean function helps maintain the iron's performance by flushing out mineral residues from the steam system. The "Easy Store Pro" designation highlights its convenient storage capabilities, particularly the integrated cord wrap around the heel.
Before using the iron for the first time, it is recommended to fill the water tank with clean water, empty it to remove any manufacturing residues, and then refill it. The iron may emit an odor and a small amount of vapor initially as the heating element cures; this is normal. To prime the steam and spray mist pumps, press the burst of steam and cool spray mist buttons several times. Finally, iron an old piece of dampened cotton fabric or linen to clean the soleplate.
Always check the textile care symbols on items to be ironed. It's advisable to iron fabrics needing low temperatures first, then those requiring medium temperatures, and finish with those needing high temperatures. The temperature setting guide on the iron corresponds to dots on fabric labels: one dot for cool (nylon, acrylics, polyester, synthetics), two dots for warm (wool, polyester mixtures, silk), and three dots for hot (cotton, linen). If a fabric label indicates "do not iron," the item should not be ironed. If the fabric label instructions differ from the guide, always follow the label.
The iron can be filled with tap water. However, in hard water areas, distilled water (not chemically descaled or softened) should be used. When purchasing distilled water, ensure it is marked as suitable for irons. To fill, first unplug the iron from the wall power outlet and set the steam control to "no steam." Lift the water inlet cover, hold the iron with the soleplate horizontal, and fill slowly to allow air to escape, preventing airlocks and overflow. Do not fill past the 'max' mark to avoid spillage during use. Any spillage should be wiped up immediately.
To switch on, turn the temperature control dial to 'nylon' and set the steam control to "no steam." Sit the iron on its heel, plug the power cord into the wall power outlet, and switch it on. The red light will illuminate. Turn the temperature control dial to align the desired setting with the marker on the tank. The light will switch off once the iron reaches the set temperature and will cycle on and off as the thermostat maintains the temperature.
If you need to reduce the iron's temperature, be aware that this can take some time as the iron needs to dissipate heat. It's best to organize your ironing tasks to minimize the need for temperature reductions.
For steam ironing, the temperature control dial must be set above the "5" mark to ensure the iron is within the steam temperature range. Ensure the water tank is full. Move the steam control to the desired setting. Once the light switches off, you can begin ironing. The steam control is variable, allowing you to choose a position between "no steam" and "high steam" to suit your requirements. When steam ironing at the lower end of the steam temperature range, it's preferable to use a low steam setting to reduce water droplet incidence.
The cool spray mist function works with both dry and steam ironing, provided there is water in the tank. It's recommended to test this feature on a hidden part of the fabric first, as water spotting can affect some materials. To use, check that the tank has water, lift the iron off the fabric, aim the spray nozzle at the fabric, and press the cool spray mist button. You may need to press it 2 or 3 times to pump water through the system.
The burst of steam function is effective for both dry and steam ironing, as long as there is water in the tank and the temperature control dial is set above the "5" mark. Ensure the water tank is full and the temperature dial is set correctly. Wait until the light switches off. Press the burst of steam button; you might need to press it 2 or 3 times to pump water through the system. Allow 3-4 seconds between bursts for the iron's temperature to recover.
If you intend to dry iron only, there is no need to fill the water tank. Move the steam control to "no steam," set the temperature control dial to the desired setting, and wait until the light switches off before commencing ironing.
Vertical steaming is useful for removing wrinkles from hanging clothes, curtains, and furnishing fabrics. Ensure the water tank is full and turn the temperature control dial to 'max'. Wait until the light switches off. Before steaming, check that there is nothing behind the fabric that could be damaged by steam or heat, and ensure pockets, turn-ups, and cuffs are empty. Hold the iron with the soleplate vertical, close to (but not touching) the fabric, and press the burst of steam button. You may need to press it 2 or 3 times to pump water through the system. Allow 3 seconds between bursts for temperature recovery.
For safety, the iron features an auto shut-off function. If the iron remains motionless, the heating element will switch off after 30 seconds if it's lying on its soleplate or side, and after 8 minutes if it's sitting upright. The red light will blink continuously until the iron is moved. To reactivate, lift the iron, tilt it forward, and then sit it upright. No settings are lost during auto shut-off.
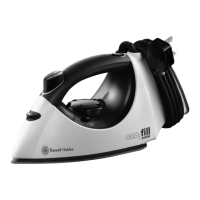
After use, turn the temperature control dial to 'nylon' and move the steam control to "no steam." Unplug the iron. Lift the water inlet cover, hold the iron over a sink, turn it upside down, and drain the water from the tank. Be cautious as the water may be hot. Sit the iron on its heel and allow it to cool down completely. Once cold, wipe off any moisture and close the water inlet cover. The cord can be wrapped around the heel of the iron for storage; insert the plug into the plug storage receptacle and wind the cord towards the right to secure the last section. Store the iron on its heel to prevent corrosion and damage to the soleplate.
To prevent residue buildup, use the Self Clean button regularly, at least monthly in normal water areas, and more frequently in hard water areas. You will need a sink or a large bowl to catch the water and steam expelled from the soleplate.
Always unplug the iron when not in use and before cleaning. Allow the iron to cool down completely before cleaning and storing. Wipe outer surfaces with a damp cloth, using a little dishwashing liquid if necessary. To remove spots or burnt-on fabrics, iron a damp cotton or linen cloth with the iron hot, taking care not to scratch the soleplate. Never immerse the iron in water or any other liquid. Do not use harsh or abrasive cleaning agents, solvents, or scourers on the soleplate, as these will damage its coating.
The manual emphasizes several important safeguards, including not immersing the iron, cord, or plug in water, avoiding touching hot surfaces, and ensuring the iron is attended while plugged in. It also highlights that the appliance is not intended for use by persons (including children) with reduced physical, sensory, or mental capabilities unless supervised. The iron should always be unplugged during filling, emptying, and when not in use. It should not be operated with a damaged cord/plug or if it has been dropped or is leaking. Repairs should only be performed by the manufacturer or a qualified person. The appliance and power cord should be kept away from children and individuals with reduced capacities, and the power cord should not present a tripping hazard. For added safety, electrical appliances should be connected to a power outlet protected by a residual current device (RCD / 'Safety Switch'). The iron is intended for household and similar applications.
| Soleplate Material | Ceramic |
|---|---|
| Steam Output | 45g/min |
| Vertical Steam | Yes |
| Anti-Drip System | Yes |
| Anti-Calc System | Yes |
| Self-Cleaning Function | Yes |