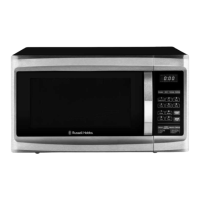
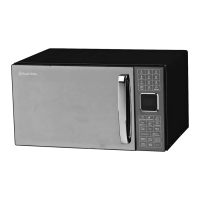
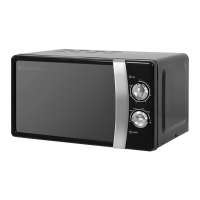
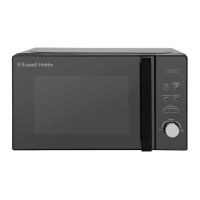
This document provides instructions and warranty information for the Russell Hobbs 20L Compact Digital Microwave, model RHMO10.
Function Description:
The Russell Hobbs 20L Compact Digital Microwave is designed for heating and cooking food using microwave energy. It features a digital display, multiple power levels, defrost functions (by weight and time), and an auto-cooking menu for various food types. The appliance is intended for household use and similar applications such as staff kitchen areas, farmhouses, hotels, motels, and bed and breakfast environments. It is not designed for industrial or laboratory use, or for commercial purposes.
Important Technical Specifications:
- Capacity: 20 Litres
- Power Levels: 5 (10%, 30%, 50%, 80%, 100% / full power)
- Maximum Cooking Time: 95 minutes
- Weight: Approximately 11.5 kg
- Installation Clearances:
- Minimum height above the microwave oven: 30 cm
- Minimum clearance between the microwave oven and adjacent walls: 20 cm (one side must be open)
- Minimum installation height on countertop: 85 cm
- Rear surface against a wall.
- Safety Features: Built-in safety switches to ensure power is off when the door is open, child lock function.
Usage Features:
- Control Panel: Includes buttons for Power, Weight/Time Defrost, Clock/Pre-Set, Stop/Clear, Start/+30Sec/Confirm, and a Timer/Weight/Auto Menu dial.
- Screen Display: Shows cooking time, power, action indicators, and clock time.
- Clock Setting: A 24-hour clock can be set using the Clock/Pre-Set button and the Timer/Weight/Auto Menu dial. The clock colon flashes when set. If not set, the clock will not function when powered.
- Microwave Cooking:
- Power Selection: Press the Power button repeatedly or turn the Timer/Weight/Auto Menu dial to select power levels (P100, P80, P50, P30, P10).
- Time Setting: Turn the Timer/Weight/Auto Menu dial to set the desired cooking time after selecting power.
- Start/Confirm: Press the Start/+30Sec/Confirm button to begin cooking or confirm settings.
- Pausing Cooking: Open the door to pause; close and press Start/+30Sec/Confirm to resume.
- Stopping/Clearing: Press Stop/Clear once to stop, twice to clear settings.
- Quick Start Function: Press Start/+30Sec/Confirm to add 30 seconds of cooking time at full power. This can be pressed multiple times up to 95 minutes. This function does not work for defrost, auto menu, or multi-stage cooking.
- Defrost Function:
- dEF1 (By Weight): Press Weight/Time Defrost once, then turn the Timer/Weight/Auto Menu dial to select the weight (e.g., 400g for poultry). Press Start/+30Sec/Confirm to start. Turn food over halfway through the cycle.
- dEF2 (By Time): Press Weight/Time Defrost twice, then turn the dial to set the time. Defrosting power is fixed at 30%.
- General Defrosting Tips: Microwaves penetrate about 4cm into food. Turn thick foods regularly for even defrosting. For food over 500g, turn at least twice. Consume defrosted food as soon as possible.
- Auto Cooking Function (A-1 to A-8):
- Turn the Timer/Weight/Auto Menu dial to select an auto menu option (A-1 to A-8).
- Press Start/+30Sec/Confirm.
- Turn the Timer/Weight/Auto Menu dial to choose the food weight from pre-set options.
- Examples include Reheat (A-1), Vegetables (A-2), Fish (A-3), Meat (A-4), Pasta (A-5), Potato (A-6), Pizza (A-7), and Soup (A-8), each with specific weight options and power levels.
- Multi Sequence Cooking Function: Allows setting up to two different cooking stages with different power levels and times for one dish. Auto menu and defrost functions cannot be part of multi-stage cooking.
- Pre-Set Cooking Function: Allows programming the microwave to start cooking at a pre-set time. Requires setting the clock, cooking menu, and time. Supports a maximum of two cooking stages (single stage for auto menu). Defrost function cannot be used with pre-set cooking.
- Checking Functions:
- During cooking, press Power to display current power for 2-3 seconds.
- In pre-set state, press Clock/Pre-Set to check the start time (flashes for 2-3 seconds).
- During cooking, press Clock/Pre-Set to check the current time (displayed for 2-3 seconds).
- Child Lock Function: To activate, press and hold Stop/Clear for 3 seconds in standby mode (a beep sounds, and a rectangle illuminates on display). To cancel, press and hold Stop/Clear for 3 seconds (a beep sounds, lock is released).
- General Information:
- Start/+30Sec/Confirm must be pressed to continue cooking if the door is opened.
- Settings are cancelled if Start/+30Sec/Confirm is not pressed within 1 minute.
- Buttons beep when pressed correctly.
- Buzzer sounds five times when cooking is finished.
- Food Arrangement: Thicker food bits should be placed around the outside of the dish, thinner parts towards the center, spread evenly. Avoid overlapping food.
- Cooking Time: Start with short cooking times and monitor progress. Ensure food is thoroughly cooked.
- Standing Time: Allow food to rest after cooking for completion and cooling.
Maintenance Features:
- Cleaning:
- Always switch off and unplug before cleaning.
- Wipe interior surfaces (including the waveguide cover on the right-hand side) with a sponge or soft damp cloth and mild detergent.
- Wipe exterior with a damp cloth and dry thoroughly.
- Do not let water enter ventilation openings.
- Do not use harsh or abrasive cleaners.
- Clean the control panel with a soft, damp cloth; avoid detergents, abrasives, or spray-on cleaners.
- Wash the glass turntable and turntable ring in warm soapy water, rinse, and dry thoroughly.
- Wipe the bottom of the oven interior with a soft damp cloth.
- Odour Removal: Combine 1 cup of water with the juice of 1 lemon (or 1 tbsp white vinegar) in a deep microwave-safe bowl, microwave for 5 minutes at 100% power, then wipe the interior with a dry soft cloth.
- Do not immerse the microwave oven in water.
- Wipe steam from the oven door with a soft cloth.
- Failure to maintain cleanliness can lead to deterioration and hazardous conditions.
- Waveguide Cover: Do not remove the large plastic piece from the right-hand side of the cavity wall. Keep it clean by wiping with a damp cloth. Do not place it in a dishwasher.
- Turntable Installation: Ensure the glass plate, turntable ring assembly, and turntable shaft are correctly installed for all cooking modes. Never place the glass turntable upside down. Do not use if the turntable or ring assembly cracks or breaks. Do not place food directly on the glass tray.
- Materials to Use/Avoid:
- Microwave Safe: Glass plate, turntable ring assembly, turntable shaft, heat-resistant glass, heat-resistant ceramics, microwave-safe plastic dishes, kitchen paper/paper towels, plastic wrap, microwave-safe thermometers.
- Use with Caution (Shielding only): Small amounts of aluminium foil (at least 2.5cm from oven walls) for shielding thin sections of meat/poultry.
- Avoid: Non heat-resistant glass, metal trays/tins, metal racks, aluminium foil & foil containers (except for shielding as specified), browning dishes directly on glass turntable (can cause breakage if too hot), cracked/chipped dinnerware/glassware, metal trim on dinnerware/glassware, metal twist ties, paper bags, recycled paper products (unless labelled microwave safe), plastic foam, wood, ceramic containers with metallic inlays.
- Special Considerations: Eggs in shells and whole hard-boiled eggs should not be heated. Foods with non-porous skins (potatoes, apples, egg yolks, chicken wings, squash, sausages) must be pierced. Liquids can overheat beyond boiling point; stir before and halfway through heating, allow to stand, use extreme care. Do not heat liquids/food in narrow-necked or sealed containers.
- Problem Solving: The manual provides a detailed troubleshooting guide for common issues like the microwave not working, not heating, sparking, heat spots, condensation, paint damage, light not working, too noisy, door not shutting/locking, and turntable not rotating, along with potential reasons and solutions.
- Spare Parts: Images of the turntable coupling, turntable ring, and glass turntable are provided, indicating these are available as spare parts.