12
• To minimise slender foods, such as carrots or celery, from falling over in the feed chute, cut
food into several pieces and pack the feed chute with the food.
• Apply light pressure on the pusher for soft foods (berries and tomatoes) and slightly more
pressure for hard foods (onions and potatoes).
• Do not process foods that are too frozen or hard. Make sure that the tip of a knife can be
inserted into the food before processing.
• If hard food, such as a piece of carrot, becomes wedged or stuck on the blade, stop the
multi processor and unplug, then remove the blade. Gently remove the food from the
blade.
• When chopping sticky dried fruits, place the fruits in the freezer for about 10 minutes and
add a little our or sugar to keep the pieces from sticking together.
• When preparing cake or cookie batter, use the S blade to cream fat and sugar rst and
add dry ingredients last. Place nuts and fruit on top of the our mixture to prevent over
chopping. Process nuts and fruits using short pulses to blend with other ingredients.
• When using the discs, do not let the food accumulate too high (over 2/3 full); stop and
empty the workbowl.
• Do not use the multi processor to:
- Grind coffee beans, bones, grains or hard spices
- Liquefy fruits and vegetables
- Slice or chop warm meat
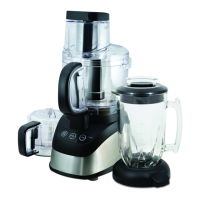
ASSEMBLY OF THE GLASS BLENDER JUG
1. If disassembled, turn the jug upside down and place at on counter top or work surface.
2. Place the blade assembly in bottom opening of the jar with blades down.
CAUTION: Blades are sharp. Handle carefully.
3. Place the jug base onto the blending jar and rotate counter clockwise until tight. It is
important to tighten the assembly to avoid leaking while blending.
4. Turn assembled jug right side up.
5. Place the lid on blender jar.
6. Place the blending jug on processor base with the handle forward at a 45-degree angle to
the right.
7. Holding the blender jug by the handle, turn counter clockwise to lock it on the base
until the jug base is aligned with the interlock component. You will hear it click when it is
securely attached.
8. The blender is now ready for use.
Note: Reverse steps to disassemble.
USING THE GLASS BLENDING JUG
Note: When blending hard foods, such as ice, nuts and coffee beans, keep one hand on the lid
to keep the blender in place.
9. Select the speed that best suits your desired task.
Note: When preparing beverages that include ice cubes, use the OFF|PULSE button to
begin the blending process; this helps produce a smoother texture. Release and then press
 Loading...