5
BEFORE FIRST USE
CAUTION: Handle chopping blades and discs carefully.
• Carefully remove all packaging material, any stickers and the plastic protector from the
power plug.
• As some parts may be packed separately, check to ensure all items have been unpacked
before disposing of the packaging.
• All parts need to be thoroughly cleaned before being used for the rst time (see CARE
AND MAINTENANCE).
• Remove and save instruction booklet.
• Select a level, dry countertop where the appliance is to be used, allowing air space on all
sides to provide proper ventilation for the motor (50mm gap min).
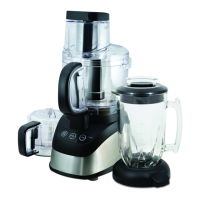
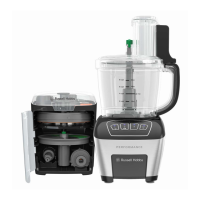
ASSEMBLY OF THE MULTI PROCESSOR
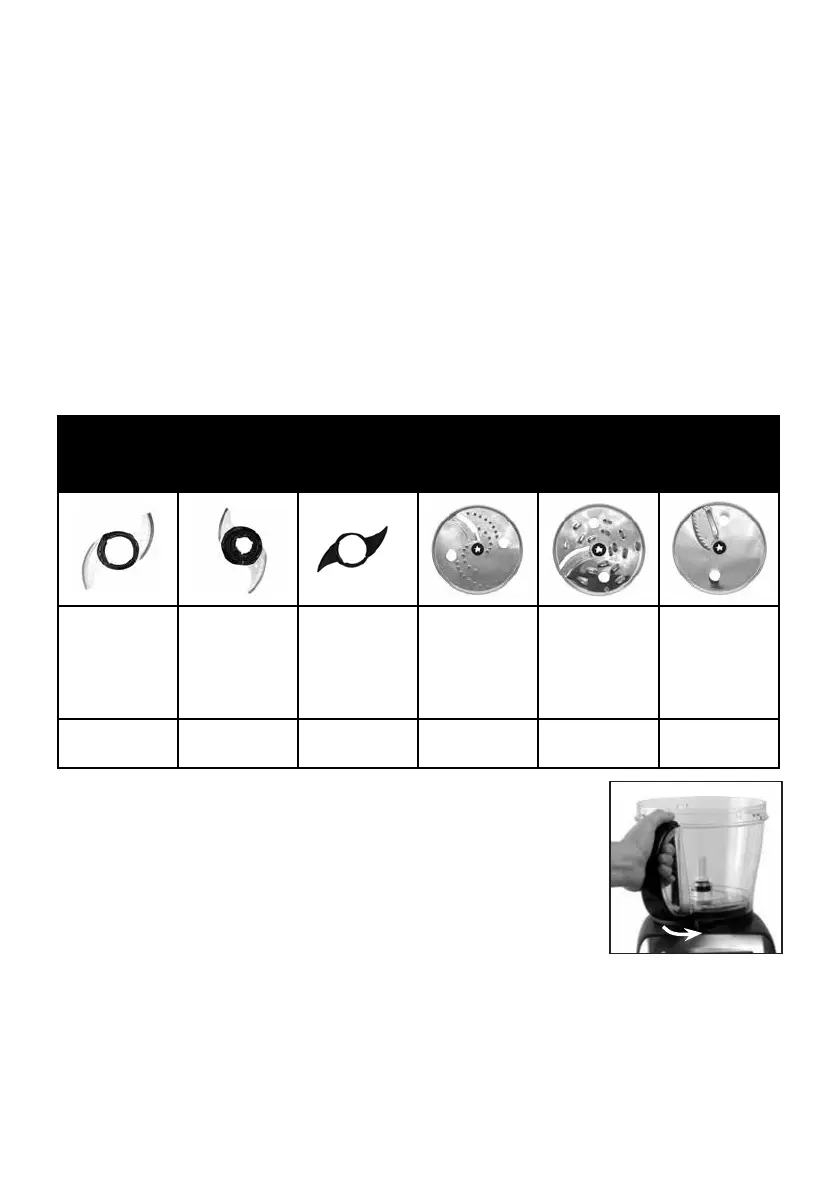
1. Determine which of the below attachment to use for the processing task:
S Blade Mini S Blade Dough Blade
Reversible
Grating/Slicing
Disc
Reversible
Shredding/
Slicing Disc
Julienne Disc
Chop, puree,
mix
Large
workbowl only
Chop, puree,
mix (small
quantities)
Small
workbowl only
Knead, mix
Large
workbowl only
Grate, slice
(thin)
Shred, slice
(thick)
Strip
High speed or
pulse
High speed or
pulse
Low speed Medium speed Medium speed Medium speed
IMPORTANT: Always make sure your multi processor is unplugged and
placed on a at, level surface before starting to assemble.
2. Place the large workbowl onto the base, with the handle facing
forward at a 45 degree angle to the left.
3. Holding the workbowl by the handle, turn the workbowl
counterclockwise to lock it on the base. You will hear it click when
it is securely attached. (A)
Note: Ensure that the workbowl is locked into place before attaching the
blades or discs and lid (see following sections for individual instructions on discs and blades).
4. Attach your selected blade or disc to the blade shaft and put the assembly onto the centre
post in the large workbowl (NOTE: The blades need to be locked onto the blade shaft.
Please see instructions for individual discs/blades on the following pages of this manual.)
5. Place the lid with the front feed chute latch (black part) to the left of the handle, onto the
workbowl. Align the tabs and lock the lid into place by turning counterclockwise. The lid is
4
GET TING STAR T ED
• Remove all packing material, any stickers, and the plastic band around the
power plug.
• Remove and save literature.
• Please visit www.prodprotect.com/applica to register your warranty.
• Wash all removable parts as instructed in CARE AND CLEANING
section of this manual.
• CAUTION: Handle blades and discs very carefully. They are very sharp.
• Select a level dry countertop where the appliance is to be used allowing air space on
all sides to provide proper ventilation for the motor.
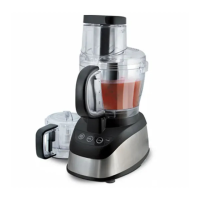
USING YOUR FOOD PROCESSOR
1. Determine whether you will be using the S Blade, the Mini S Blade, the Dough Blade, or the
Shredding/Slicing Disc.
S BLADE
MINI S
BLADE
DOUGH
BLADE
Slicing/
Shredding
Disc
CHOP, PUREE,
MIX
CHOP, PUREE,
MIX (small
quantities)
KNEAD, MIX
SLICE, SHRED,
GRATE
HIGH SPEED
OR PULSE
HIGH
SPEED
OR PULSE
LOW SPEED MEDIUM SPEED
Important: Always make sure your food processor is
to assemble.
2. Place the workbowl on the base, with the handle facing
forward at a 45 degree angle to the left.
3. Hold the bowl in place by the handle. Turn the workbowl
counterclockwise to lock it on the base. You will hear it click
when it is securely attached. (A)
HOW TO USE
This product is for household use only.
A
 Loading...