65
TRAMPOLINE MAT ASSEMBLY
Step 8 – Mat Assembly
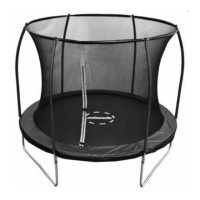
The complete trampoline SPRING lay out should look as shown below.
Place the Trampoline Mat (# 18) in the center of the trampoline frame with the warning labels facing up. Begin by
attaching Springs (# 17A and #17B) to the four corners of the mat as shown in FIGURE 16-A, then continue to
attach springs in the sequence shown in FIGURES 16-B, 16-C and 16-D.
Hint: The number of triangle-rings sewn onto the mat is equal to the number of holes on the frame. If you notice
that you have missed a corresponding hole or triangle-ring
, remove and reinstall the springs as necessary while
maintaining an even distribution of tension of the mat. Make sure to wear gloves and goggles to avoid injuries
during assembly.
23
17A*17pcs
17A*17pcs
17B*8pcs
17B*8pcs
17B*8pcs
17B*8pcs
17A*22pcs
17A*22pcs
NOTE! There are two lengths of spring. They must be fi tted according to the illustration. /
OBS! Det fi nns två längder på fjädrarna, de ska monteras enligt illustrationen. /
OBS! Fjærene har to lengder og skal monteres som vist på illustrasjonen. /
HINWEIS! Es gibt zwei Federlängen, die wie unten abgebildet montiert werden. /
HUOMIO! Jousia on kahden pituisia. Ne tulee asentaa kuvan mukaisesti.
8
TRAMPOLINE MAT ASSEMBLY
Trampoline Mat Assembly
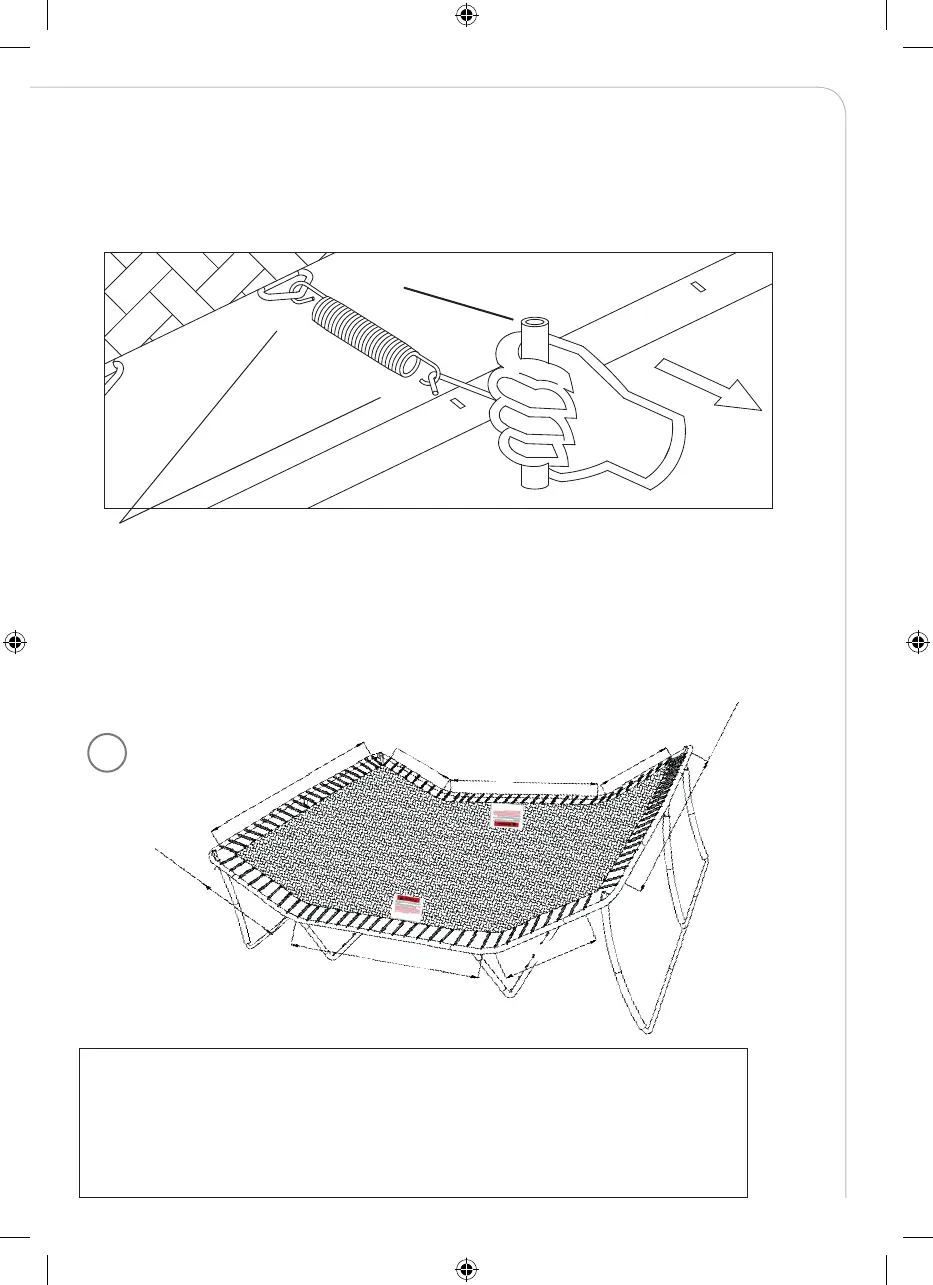
To assemble the trampoline mat, you will only need the Spring Loading Tool (# B) provided with this product.
When attaching the springs, do not place your hands, arms, legs or any other body part close to the springs or
connector points (i.e. joints connecting the steel tubes). These can become pinch points as the trampoline
springs tighten up. Wear heavy duty working gloves to protect your hands from injuries during installation by the
springs and protective goggles to avoid injuries to the eyes. Be steady when installing the springs as it can
rebound and fly off if you inadvertently let go when not hooked properly. Make sure no children are playing
nearby when installing the trampoline.
Spring Assembly Instructions –To install the springs, hook one end of Spring (# 17) into the Triangle-Ring on
the Mat (# 18). Holding the Spring Loading Tool (# B) underhand, pull the other end of the spring and lock it into
the hole on the frame as shown in FIGURE 13.
Hint: Tap on the Spring (# 17) with the handle of the Spring Loading Tool to make sure it is securely latched into
the hole.
SPRING LOADING TOOL (# B)
• Note that the two ends of the spring are diff erent. They must be fi tted in accordance with
the fi gure above.
• Notera att fjäderns båda ändar är olika, måste monteras enligt fi guren ovan.
• Merk at de to endene av fjæren er forskjellige og må monteres som vist på fi guren ovanfor.
• Beachten Sie, dass beide Enden der Feder unterschiedlich sind und gemäß die Abbildung
montiert werden muss.
• Huomaa, että jousen päät ovat erilaiset. Ne täytyy asentaa yllä olevan kuvan mukaisesti.
FITTING THE TRAMPOLINE MAT / MONTERING AV STUDSDUKEN / MONTERING
AV TRAMPOLINEDUKEN / MONTAGE DES SPRUNGTUCHS / TRAMPOLIININ
MATON ASENNUS
B
IM_759013120301_Trampoline_Advanced_550x400cm_v3.indd 65 2021-01-27 17:49