TRAMPOLINE MAT ASSEMBLY
Step 8 – (Continued)
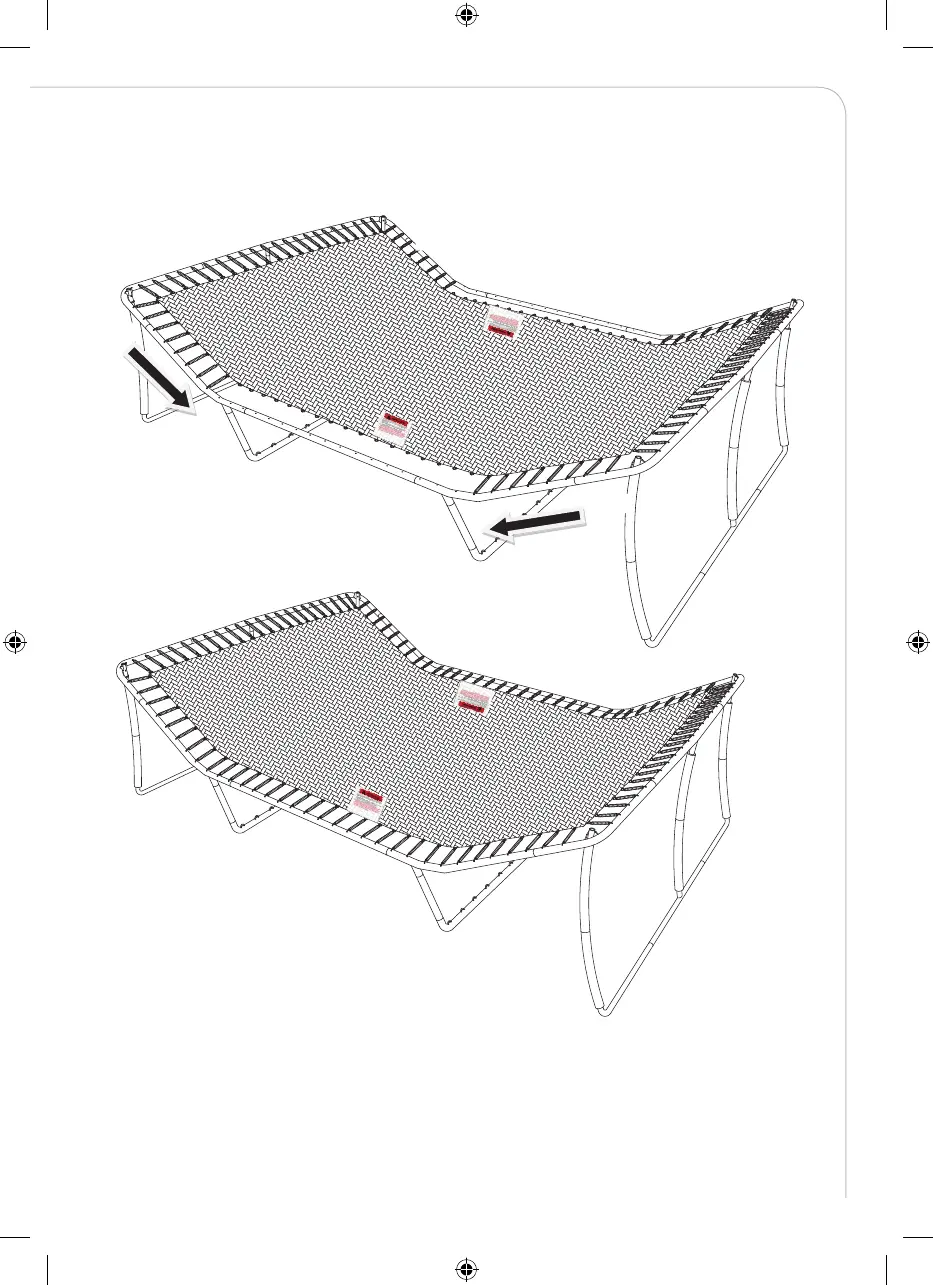
After you have secured all the springs to the two sides of the trampoline, begin to attach springs to the longer
side of the trampoline as shown in FIGURE16-E. To ensure even tension of the mat, you should have five people
installing the springs, each starting from the corners and working your way towards the middle of the mat at the
same pace. The completed trampoline mat should look as shown in FIGURE 16-F.
IMPORTANT: Once all the springs are properly installed, you must go back to previous steps and now
fully tighten all the screws on the trampoline frame.