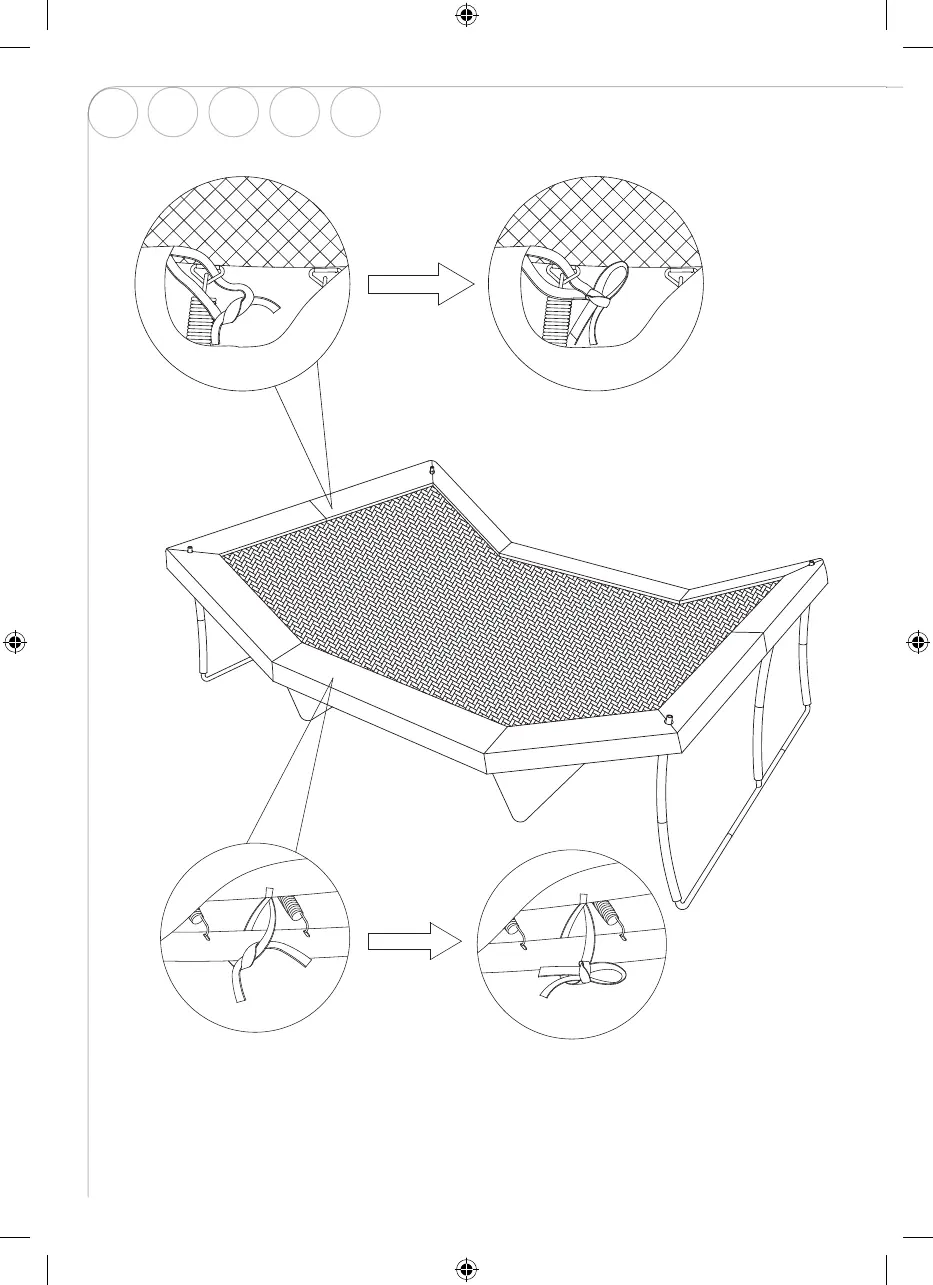
FRAME PAD ASSEMBLY
C. Attach L-Shape Frame Pad (# 20) to the other side in the same manner. Make sure the frame pads fully
cover all springs and steel frame.
D. Finally, to secure the frame pad, the straps need to be tied to the trampoline frame and also to the triangle
rings on the mat as shown in DIAGRAM C, D, E and F. However, this should not be done until the enclosure is
installed in the next steps. PLEASE RETURN TO COMPLETE THIS STEP AFTER THE ENCLOSURE
NETTING IS INSTALLED.
F
E
C
D
DISASSEMBLY OF THE TRAMPOLINE AND ENCLOSURE
Step14
Connect Short Horizontal Tube A (# 27) to Short Horizontal Tube B (# 26) using Arc Washer (# G), Spring Lock
Washer (# E), Screw (# F) and Allen Wrench (# I) as shown in FIGURE 24.
Repeat the same for the other set.
Step 15
Slide the TWO sets of Short Horizontal Tube connected in previous step into the two sides of Enclosure
Netting (# 29) as shown in FIGURE 25.
ENG
SE NO DE FI
76
IM_759013120301_Trampoline_Advanced_550x400cm_v3.indd 76 2021-01-27 17:49