DISASSEMBLY OF THE TRAMPOLINE AND ENCLOSURE
Step 20
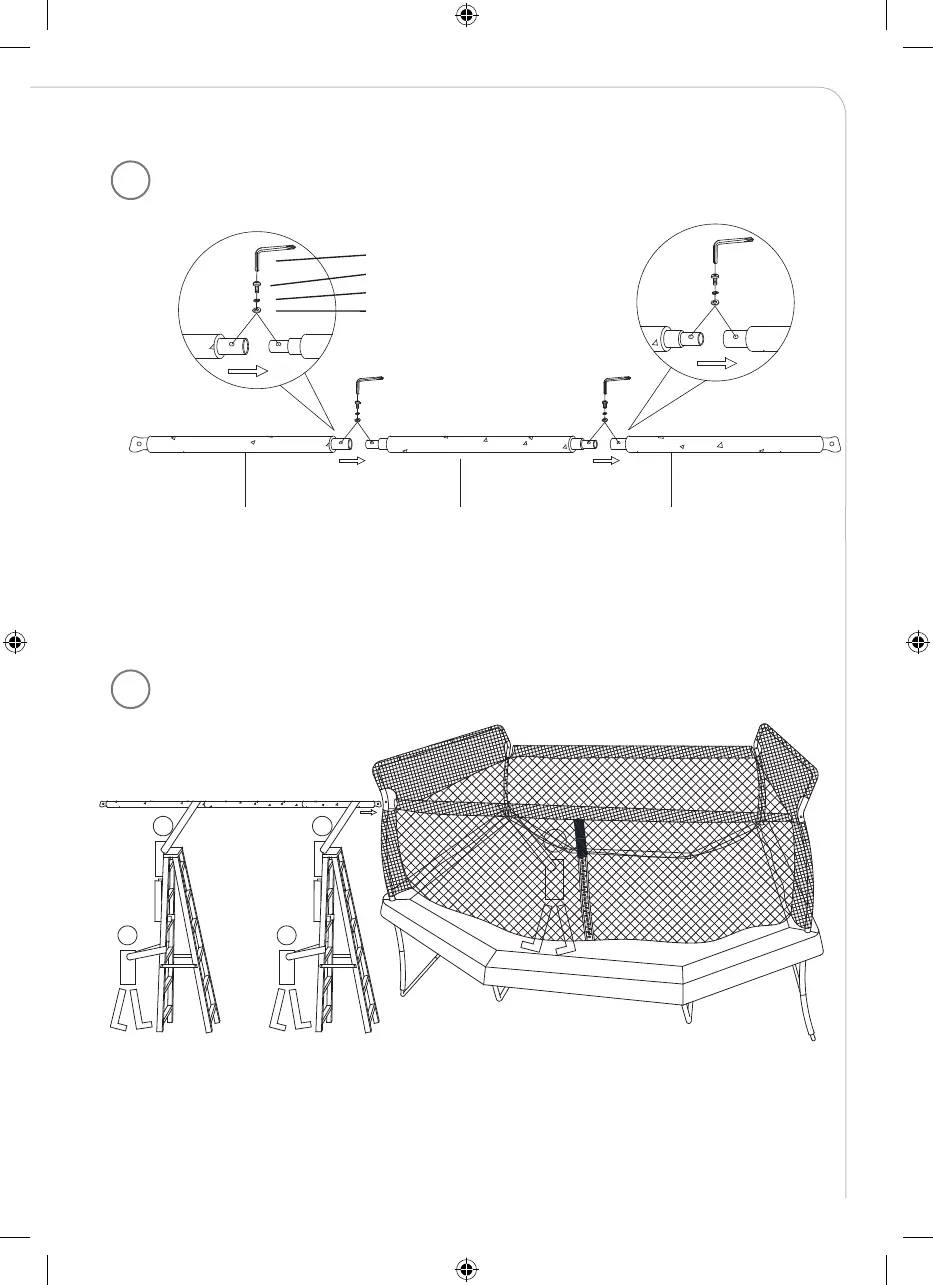
Connect Long Horizontal Tube with Flat End (# 24) to the two ends of Long Horizontal Tube (# 25) using Arc
Washer (# G), Spring Lock Washer (# E), Screw (# F) and Allen Wrench (# I) as shown in FIGURE 30. Repeat
the same for the other set.
DISASSEMBLY OF THE TRAMPOLINE AND ENCLOSURE
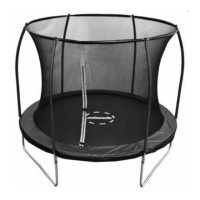
Step 21
Note: At least two tall ladders (not provided with the product) and five people are needed to assemble
the next few steps. As parts are heavy and need to be lifted to a high level, you must have sufficient
number of people and proper equipment in order to avoid serious injuries during assembly. DO NOT
ATTEMPT TO INSTALL THE ENCLOSURE WITH LESS THAN FIVE PERSONS.
Insert the Long Horizontal Tube assembled in the previous step into the top sleeve of Enclosure Netting(#29)
as shown in FIGURE 31. It is recommended for one person to stand in the middle of the trampoline to
guide the tube as it is being slid through the sleeve and across to the other side. Make sure to have
somebody hold the ladders steady to avoid falls.
Important tip: Please be careful when inserting the tubes to avoid snagging or ripping the netting.
Step 22
After the Long Horizontal Tube (# 24) is fully inserted, secure the ends to Arched Tube (# 28) using Short
Screw (# L), Arc Washer (# G), Spring Lock Washer (# E) and Nut Cap (# A) as shown in FIGURE 32. Tighten
using Allen Wrench(# I) and Wrench (# H). Repeat the same process for the other side.