EasyManua.ls Logo

Ryobi 137R - User Manual

Ryobi 137R
16 pages
Print Icon
To Next Page IconTo Next Page
Loading...
FOR QUESTIONS, CALL 1-800-345-8746 in U.S. or
1-800-265-6778 in CANADA
www.ryobi.com
IMPORTANT MANUAL DO NOT THROW AWAY
OPERATOR’S MANUAL
Electric Trimmers
105r, 132r, & 137r

Questions and Answers

  • J
    James LongAug 5, 2025
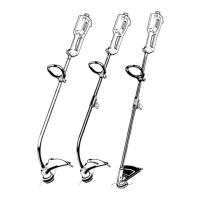
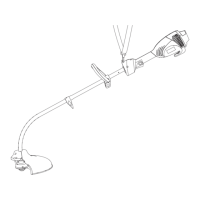
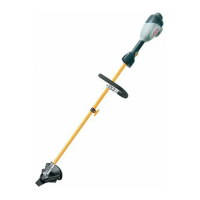
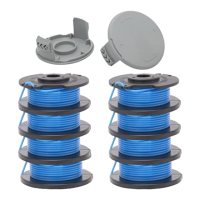
    What to do if the cutting head of my Ryobi Trimmer will not advance line?
    • S
      Scott WhiteAug 5, 2025
      If the cutting head of your Ryobi Trimmer won't advance the line, it might be due to several reasons. The cutting head could be out of line, the inner reel might be bound up, or the cutting head could be dirty. Indexing teeth might be worn or burred, the line could be welded or twisted when refilled, or there might not be enough line exposed. To resolve this, refill with genuine replacement cutting line, replace the inner reel, clean the cutting head reel/spool, replace the reel and spool, disassemble, remove the welded section, and rewind the line; or disassemble the cutting head and rewind the inner reel. Alternatively, push the Bump Knob and pull out the line until a minimum of 4 in (102 mm) is outside of cutting head.
  • C
    christinafordAug 21, 2025
    Why is the cutting head of my Ryobi 137R not turning when I squeeze the trigger?
    • G
      Gina WebbAug 21, 2025
      If the cutting head of your Ryobi Trimmer isn't turning when you squeeze the trigger, the cutting head might be bound with grass or debris. To fix this, stop the motor and clean the cutting head.

Summary

Safety Warnings

Important Safety Information

Provides critical safety guidelines for using electric gardening appliances.

Electrical Safety Warnings

Details electrical safety precautions, including cord usage and grounding.

Before Operating

Lists essential checks and preparations before starting the trimmer.

While Operating

Outlines safe practices and precautions to follow during trimmer operation.

Other Safety Warnings

Covers general safety advice, maintenance, and storage recommendations.

Safety and International Symbols

Explains safety symbols and pictographs used in the manual and on the product.

Assembly Instructions

Installing the D-Handle

Step-by-step guide for attaching and securing the D-handle.

Adjusting the D-Handle

Instructions on how to adjust the D-handle for optimal user comfort.

Installing the String Guard - Models 105 r and 132 r

Procedures for attaching the string guard to models 105r and 132r.

Installing the String Guard - Model 137 r

Procedures for attaching the string guard to model 137r.

Operating Instructions

Connecting the Cord

Guide on properly connecting the extension cord to the trimmer.

Operating the Two-Speed Switch

How to use the two-speed switch for different trimming tasks.

Operating the Click-Link System

Instructions for using the Click-Link system and attachments.

Removing the Lower (Attachment) Boom

Steps to detach the lower boom from the Click-Link system.

Adjusting the Trimming Line Length

Method for releasing and adjusting the trimmer line.

Decorative Trimming

Techniques for decorative trimming using a 30-degree angle.

Edging - Models 132 r and 137 r

Specific instructions for edging with models 132r and 137r.

Maintenance and Repair Instructions

Line Installation for the SpeedSpool

Guide on replacing or winding trimmer line onto the SpeedSpool.

The Correct Line to Use

Specifies the correct diameter and type of trimming line to use.

Winding the Existing Inner Reel with New Line

Detailed steps for winding new trimming line onto the inner reel.

Releasing the Inner Reel

How to release the inner reel if the speed spool is not functioning correctly.

Cleaning the SpeedSpool

Instructions for cleaning the SpeedSpool to ensure proper operation.

Installing a Prewound Reel

Steps for installing a pre-wound reel onto the trimmer.

Specifications

Motor

Technical specifications for the trimmer's motor.

Drive Shaft and Cutting Head

Specifications related to the drive shaft and cutting head components.

Troubleshooting

Motor Will Not Start

Addresses issues where the trimmer motor fails to start.

Cutting Head Will Not Turn When Trigger is Squeezed

Solutions for when the cutting head doesn't rotate upon trigger activation.

Cutting Head Will Not Advance Line

Troubleshooting steps for when the trimmer line does not advance.

Notes

Limited Two-Year Warranty

Ryobi 137R Specifications

General IconGeneral
BrandRyobi
Model137R
CategoryTrimmer
LanguageEnglish

Related product manuals