Page 4
Making a Normal Biscuit Cut (Fig. 6~7)
Position your work pieces together and draw a reference
mark at 90
o
to the center point of each proposed joint
location. Space the joints about 4 inches apart.
Separate your work material and clamp each piece securely
to a stable work bench or work table.
Set the biscuit depth selector (6) to correspond with the size
of biscuit you are using. Generally #20 biscuits suit most
applications. If you are using stock that is 16mm thick or
less, you will need smaller biscuits.
Adjust the height of the fence as required and if using the
xed fence rmly tighten height lock knob (5) using nger
pressure only. If using the adjustable fence rmly tighten
angle lock knob (11).
Place one hand on the handle (2) and the other hand on
the motor housing (12).
Place the cutting guide at the center point of each slot in
turn and press the fence against the edge of the work piece
(see gure 6). Make sure the jointer fence is ush to both
sides of your work surface.
Switch on the power switch and push the motor housing
towards the work material. Once the cut is made pull the
motor housing back and allow the return spring to retract the
blade from the slot. Turn the power switch off. Repeat the
procedure until all slots are cut in your work piece.
Cut the slots in the matching piece of work material,
again lining up the center point of each slot and to make
the cuts.
Once all the cuts are complete dry t your biscuits into
your joints and test t your materials to ensure proper
alignment.
Remove the biscuits and insert glue into the slots using a
nozzle applicator or thin wood scrap. It is also helpful to
apply a small amount of glue to the biscuits themselves
before inserting them into the slot.
Place the biscuits in position and clamp your work materials
together until the joint line becomes invisible. Keep your
work materials clamped until the biscuits swell and the
glue sets.
It is possible that thick pieces of timber may require two biscuits
at each location, one at a height of about 1/3 the thickness of
the wood, and the other at about 2/3 the tickness.
NOTE: Unlike other saws and drills, mastering the biscuit joiner
does take some practice. Remember that the ultimate goal is
to achieve a parallel set of cuts in your work surface. If you
nd yourself making uneven cuts, you are probably working
too fast. Make sure of these points:
When the tool powers on it might vibrate out of position.
Prior to making a cut make sure the center of the tool is
aligned with the center of your cut mak.
Make sure the height lock knob is rmly tightened.
Go slow - visually make sure you have the joiner lined up
with your cut mark and most importantly that the fence is
ush with both the top and side edge or your work material
prior to making the cut. Once these are accomplished then
make the cut. Patience and practice are the keys to creating
perfect joints.
OPERATION
ADJUSTMENTS
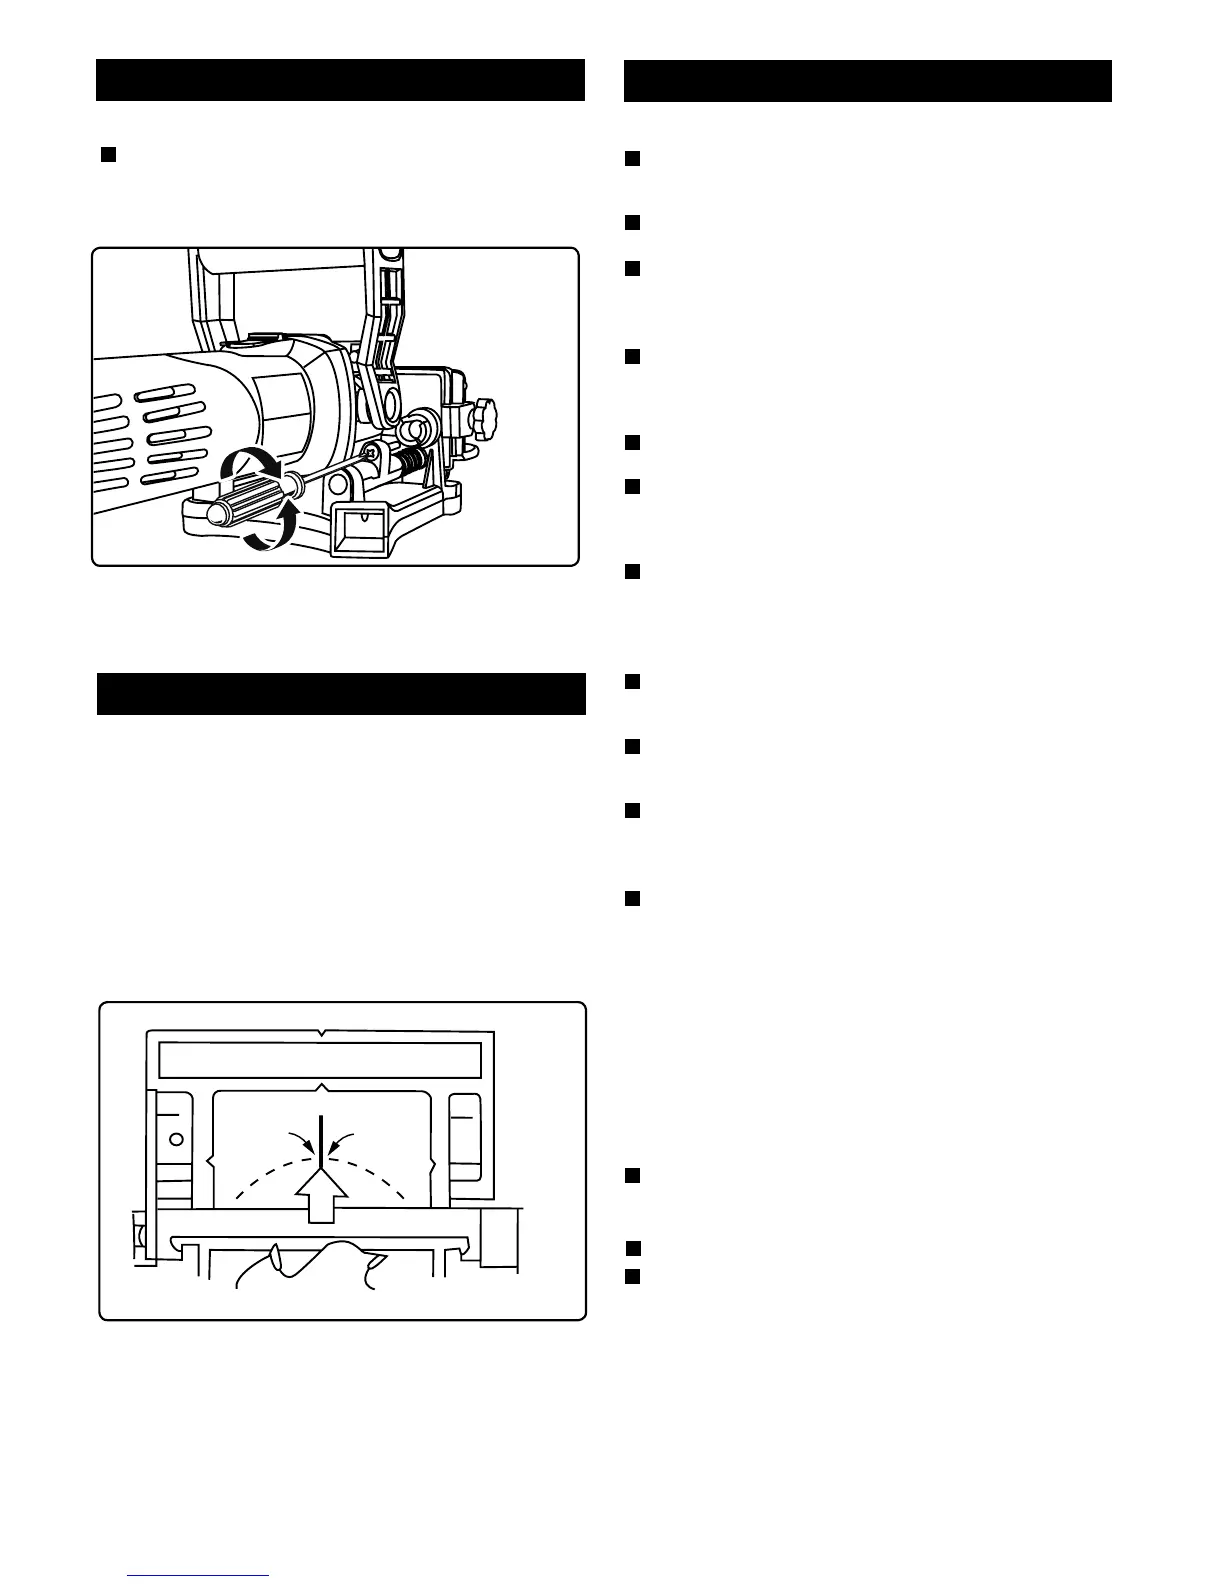
Fine Depth Adjustment (Fig. 4)
All biscuits are manufactured to slightly different sizes, so
you might need to adjust the depth of cut on the tool. The
depth adjustment rod (7) can be rotated to increase or
decrease the depth of cut.
Biscuit jointers can be used for making various types of strong,
accurate joints in pieces of timber or wood sheeting.
To cut the biscuit slot the body of the jointer is moved toward
the material after alignment, by utilizing the various features of
the Biscuit Joiner you can create a wide range of different types
of joints. Always make a reference line to line up the machine
with the center of the material to be plunged to ensure accurate
biscuit placement (Figure. 5 - Please note in the picture the
center of the adjustable fence is omitted in order to better
explain the joining process).
OPERATION
 Loading...