6 – English
OPERATION
WARNING:
Do not allow familiarity with this product to make you
careless. Remember that a careless fraction of a second
is sufficient to inflict serious injury.
WARNING:
Always remove battery pack from the tool when you are
assembling parts, making adjustments, cleaning, or when
not in use. Removing battery pack will prevent accidental
starting that could cause serious personal injury.
WARNING:
Always wear eye protection with side shields marked to
comply with ANSI Z87.1. Failure to do so could result in
objects being thrown into your eyes and other possible
serious injuries.
WARNING:
Do not use any attachments or accessories not recom-
mended by the manufacturer of this product. The use of
attachments or accessories not recommended can result
in serious personal injury.
APPLICATIONS
You may use this tool for the purposes listed below:
Cutting all types of wood and wood products, thin sheet
metal, plastics, and laminates
OVERLOAD PROTECTION
When the tool is forced or overloaded, the Li-ion battery pack
will automatically shut off the tool. To reset the tool, slide
the switch OFF, and then back ON to resume operation. If
the tool still does not resume operation, remove and reinsert
the battery. Do not force the tool.
HIGH TEMPERATURE PROTECTION
Li-ion battery packs are equipped with a high temperature
protection feature that automatically deactivates the tool
when it is overheated. Slide the switch to OFF, and allow the
battery to cool. To resume operation, slide the switch ON.
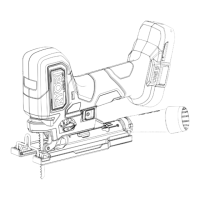
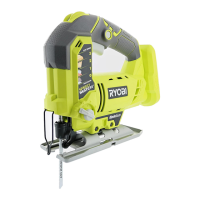
INSTALLING/REMOVING BATTERY PACK
See Figure 1, page 11.
To install:
Insert the battery pack into the product as shown.
Make sure the latches on each side of the battery
pack snap in place and battery pack is secured before
beginning operation.
To remove:
Depress the latches on each side of the battery pack.
ON-OFF SWITCH AND VARIABLE SPEED DIAL
See Figure 2, page 11.
The variable speed dial delivers higher speed when rotated
to a larger number and slower speed when rotated to a
smaller number.
To turn the tool ON, slide one of the spring loaded switches
on either side of the tool forward. The switch will return to
the original position. To turn it OFF, slide one of the spring
loaded switches on either side of the tool forward and allow
the blade to come to a complete stop.
VARIABLE SPEED DIAL
See Figure 2, page 11.
The speed selector dial, located under the handle of the tool,
allows the saw to operate at different maximum speeds. The
maximum speed can be adjusted before or during operation.
To change the maximum speed during operation, hold the saw
in a normal operating position, and rotate the speed selector
dial to the desired speed setting. To change the maximum
speed prior to operation, rotate the speed selector dial to
the desired setting and slide the switch button towards the
front of the tool to operate the saw.
SETTING OPERATION
A Saw runs at reduced speeds until blade engages
workpiece. The saw speed will increase
automatically to provide the most efficient cut.
1-2 Slow speeds are ideal when minimum speed
and power is required, for example, starting
cuts.
3-4 Medium speeds are suitable for cutting hard
metals, plastics, and laminates.
5-6 Maximum speeds produce best results when
maximum power is required, for example,
cutting wood. Soft metals such as aluminum,
brass, and copper may also require high
speeds.