14
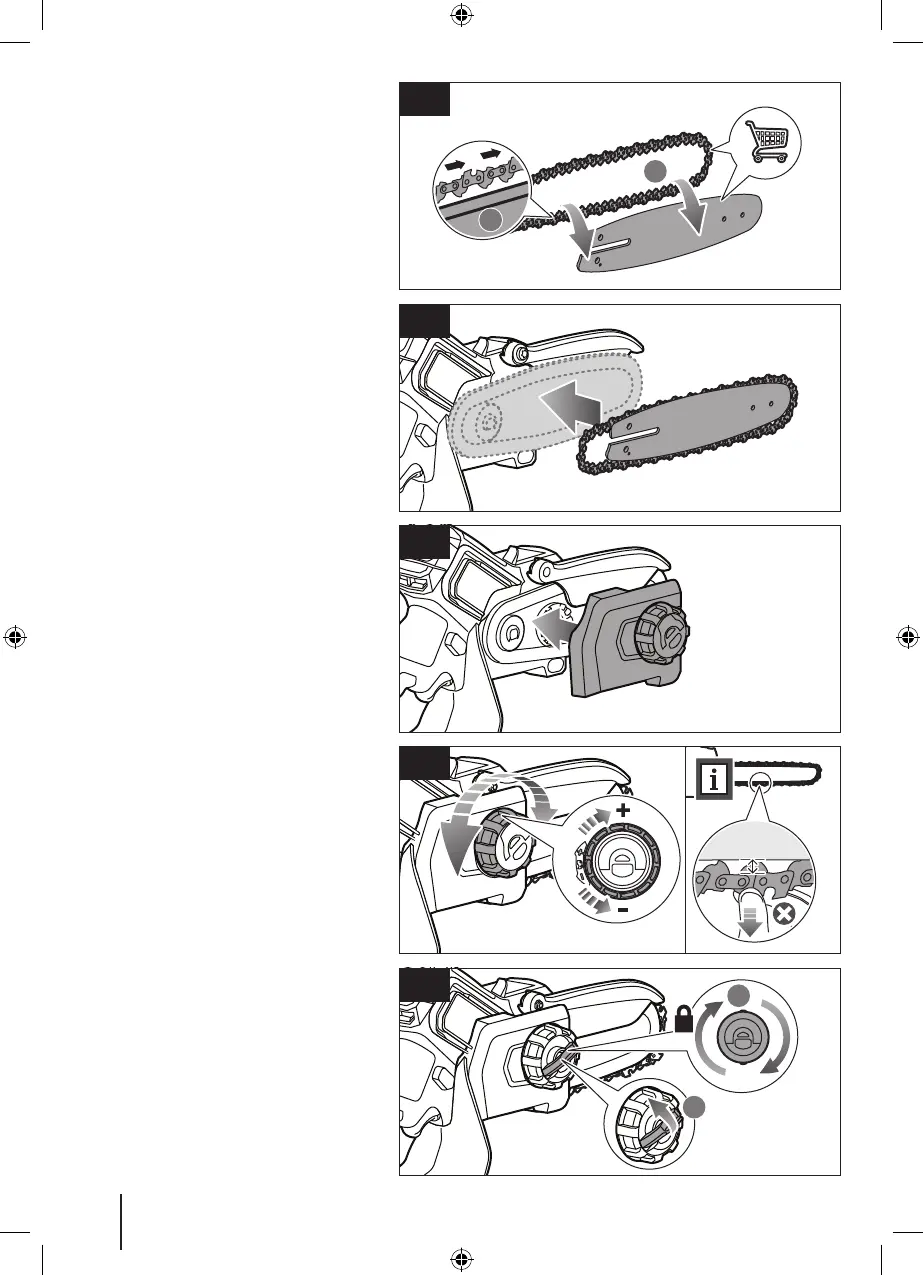
6. Install the new chain on the bar.
Insert the chain drive links into the bar
groove. Position the chain so that there is
a loop at the back of the bar.
NOTE: The saw chain should face in the
direction of chain rotation. If the saw chain
faces backwards, turn the loop over.
7. Hold the chain in position on the bar, and
place the loop around the drive sprocket.
Lower the bar and place it flush against
the mounting surface.
8. Reinstall the sprocket cover, guide bar
locking knob, and chain tension knob.
9. Adjust the chain tension until the gap
between the drive teeth and bar is
between 2 and 3 mm.
To increase the chain tension, turn the
chain tension knob clockwise.
To reduce the chain tension, turn the
chain tension knob counterclockwise.
NOTE: Frequently check the chain
tension while turning the chain tensioning
screw.
10. Turn the guide bar locking knob clockwise
then push it back into position to lock.
1
2
7
6
9
8
2
1
10
 Loading...