Do you have a question about the Ryobi RTS30 and is the answer not in the manual?
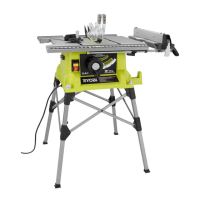
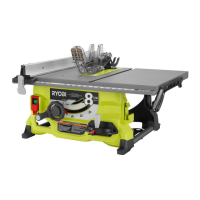
Overview of the tool's features for pleasant and enjoyable use, prioritizing safety and performance.
Details the limited three-year warranty and 90-day exchange policy for Ryobi power tools.
Understand the operator's manual, applications, limitations, and specific potential hazards of the tool.
Prevent shock via grounded surfaces, proper cords, and keeping tools dry.
Wear safety glasses, dress properly, clean area, secure work, and keep others away.
Use guards, disconnect tools, avoid accidental start, never stand on tool.
Bolt saw securely, guard against kickback, use rip fence/miter gauge.
Support large panels, avoid freehand cuts, use guides for all operations.
Ensure ample lighting, clear area; avoid operations if tired or rushed.
Explains symbols like Safety Alert, Read Operator's Manual, Eye Protection, No Hands Symbol.
Defines signal words like DANGER, WARNING, and CAUTION to indicate risk levels.
Use appropriate gauge, 3-wire extension cords with grounding plugs for safe operation.
Proper grounding via a 3-prong plug is mandatory to reduce the risk of electric shock.
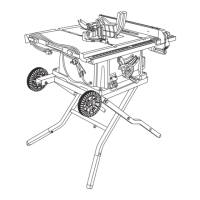
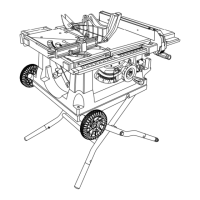
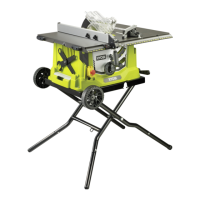
Identifies main parts like rip fence, blade guard, miter gauge, and switch assembly.
Details blade arbor, diameter, tilt, input power, speed, and cutting depths.
Explains the function of anti-kickback pawls and the importance of the blade guard for safety.
Carefully unpack, inspect for damage, identify all parts, and remove foam block.
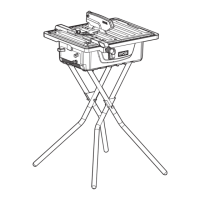
Mount the saw to a workbench or leg stand using provided holes and hardware.
Guides for assembling the wheels, legs, and handle to the table saw structure.
Detailed steps on how to open (set-up) and close (tear down) the table saw's leg stand.
Instructions for removing/installing throat plate and switching spreader/riving knife positions.
Procedure for correctly installing the blade guard and anti-kickback pawls for safe operation.
Steps to check and adjust the alignment of the spreader/riving knife with the saw blade.
Guidance on moving the saw using its wheels and installing the dust bag.
Lists various cutting operations like cross cuts, rips, dadoes, and woodworking uses.
Details factors causing kickback and methods to avoid it, ensuring operator safety.
Explains the use of push sticks and blocks for safely guiding workpieces through cuts.
Describes six basic cuts: cross, rip, miter, bevel cross, bevel rip, and compound miter cuts.
Procedure to set the blade depth and adjust the blade angle for bevel cuts.
Instructions on how to use, align, and set the rip fence scale indicator for precise cuts.
Guidance on using the miter gauge for angled cuts and the outfeed support for long workpieces.
Ensures blade is parallel to miter gauge groove to prevent wood binding and kickback.
Step-by-step procedures for making basic cross, rip, and miter cuts with the table saw.
Instructions for making bevel cross, bevel rip, and compound miter cuts accurately.
Guidance for cutting large panels and performing non-through cuts like grooves and dadoes.
Procedure for making dado cuts, including necessary accessories and safety precautions.
Detailed steps for safely unplugging, removing, and installing saw blades.
Instructions for adjusting the miter gauge stops and aligning the rip fence to the blade.
Procedure to set the blade angle precisely to 0° (vertical) and 45°.
Guidance on cleaning plastic parts, checking hardware, and maintaining table surfaces.
Solutions for excess vibration, rip fence not moving smoothly, or not locking at the rear.
Fixes for cutting binding/burning, misaligned fences, and spreader alignment problems.
Solutions for inaccurate cuts, hard-to-turn handwheels, saw not starting, and poor cut quality.
| Type | Table Saw |
|---|---|
| No Load Speed | 5000 RPM |
| Blade Diameter | 10 in |
| Max Cut Depth at 45 Degrees | 57 mm (2-1/4 inches) |
| Arbor Size | 5/8 inches |
| Power Input | 120 V |
| Max Cut Depth at 90 Degrees | 79 mm (3-1/8 inches) |
| Max Rip Capacity (Right) | 635 mm (25 inches) |
| Max Rip Capacity (Left) | 318 mm (12-1/2 inches) |