Do you have a question about the Ryobi RTS31 and is the answer not in the manual?
Emphasizes reading the manual and understanding the tool's applications and hazards.
Covers preventing electrical shock and using proper cords and grounding.
Advises on keeping the area clean, secure, and well-lit, and dressing properly.
Covers proper tool use, maintenance, and avoiding misuse.
Highlights specific warnings like not standing on the tool or using it while impaired.
Focuses on safe blade handling, sharpness, and keeping hands away from the cutting area.
Advises on operating switch correctly, using proper blades, and securing adjustments.
Warns against using tool in explosive atmospheres or under the influence of substances.
Covers bolting the saw down, not operating on the floor, and securing work.
Details guarding against kickback, using fences, and supporting work.
Emphasizes using blade guards, riving knives, and anti-kickback pawls.
Covers avoiding freehand cuts, improper hand positions, and unsafe operations.
Discusses using correct blades, accessories, and ensuring proper lighting.
Explains that DANGER indicates an imminently hazardous situation resulting in death or serious injury.
Explains that WARNING indicates a potentially hazardous situation resulting in death or serious injury.
Explains the grounding requirements for the tool and proper outlet connection.
Warns about the risks of improper grounding plug installation.
Advises on correctly connecting the grounding wire and avoiding flat blade terminals.
Explains how anti-kickback pawls prevent or reduce kickback by digging into wood.
Advises keeping the blade guard down over the blade for through-sawing cuts.
Explains the riving knife's purpose in keeping the kerf open and preventing kickback.
Stresses the importance of the blade guard assembly for through-sawing operations.
Explains the switch assembly's locking feature to prevent hazardous use.
Explains how to lock the saw by pressing the switch and removing the key.
Warns to always remove the switch key when the tool is not in use.
Warns to ensure the workpiece is not contacting the blade before starting the tool.
Advises ensuring the switch is OFF before plugging the tool into power.
Warns against using the product if parts are already assembled that should be customer installed.
Warns not to operate the product if parts are damaged or missing.
Warns against modifying the tool or creating unauthorized accessories.
Prohibits connecting to power supply until assembly is complete.
Warns against standing in line with the blade or reaching over/across it.
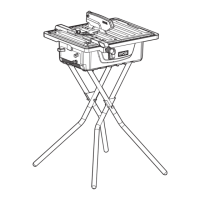
Advises securely mounting the saw to a workbench or leg stand, not operating on the floor.
Warns that the miter fence must not touch the blade guard.
Warns against using the miter fence holder if tabs are not properly installed.
Explains how to position the riving knife for through or non-through cutting.
Guides on checking blade installation, ensuring teeth point correctly.
Explains how to install anti-kickback pawls by pressing a button and aligning slots.
Warns that dull or damaged pawls may not stop kickback effectively.
Provides instructions for installing the blade guard by aligning it with the riving knife.
Guides on checking alignment using a framing square against the blade and riving knife.
Explains how to adjust the riving knife using screws to ensure alignment.
Warns against carelessness, using recommended accessories, and operating without blade guard.
Explains actions that can cause kickback, such as blade binding or dull blades.
Provides methods to avoid kickback, including proper blade depth, sharp blades, and using safety devices.
Explains the use of push sticks and blocks for pushing workpieces safely.
Guides on creating and using a jig when ripping narrow workpieces safely.
Lists and illustrates six basic cuts: cross, rip, miter, bevel cross, bevel rip, and compound miter.
Reminds users to ensure the blade guard and anti-kickback pawls are in place for safety.
Advises using a push stick for narrow wood pieces to keep hands safe.
Reiterates warning against using blades rated below the tool's speed.
Lists causes (dull blade, fast feed, warped wood, misaligned fence) and solutions.
Lists causes (dull/unsharpened blade, misaligned fence) and solutions.
Refers to page 27 for adjustments to the sliding miter table assembly.
Lists causes (misaligned stops, misaligned fence) and solutions.
Lists causes (clogged gears/screw post) and solutions.
Lists causes (unplugged cord, blown fuse, tripped breaker, damaged cord/switch) and solutions.
Lists causes (dull/dirty blade, wrong blade type, backward blade) and solutions.
Lists causes (locking lever not down) and solutions.
Lists causes (improper rip cut blade) and solutions.
Lists causes (unbalanced/damaged/warped blade, loose hardware, uneven surface) and solutions.
Lists causes (incorrect mounting, dirty rails) and solutions.
Lists cause (out of adjustment clamp screw) and solution.