Do you have a question about the Ryobi RY40702 and is the answer not in the manual?
User must read and understand all instructions before operation to reduce risk of injury.
Covers eye protection, lungs, proper dress, and keeping children away from the tiller.
Covers alertness, avoiding poor lighting, grounding, environment, correct tool use, and avoiding overreach.
Instructions on releasing the bail, checking start button/bail, and disconnecting battery packs.
Covers handling damaged parts, guards, tines, and wet conditions.
Includes avoiding slopes, caution when reversing, and starting carefully.
Details on cleaning, lubrication, and inspecting parts for damage.
Covers battery handling, charging, disposal, and precautions against fire or explosion.
Includes avoiding extreme temperatures, checking for damage, and using the tool safely.
Explains DANGER, WARNING, CAUTION, and NOTICE and their associated risk levels.
Details specific symbols used on the product and their meanings for safe operation.
Lists technical details like motor, tines, width, depth, and wheel direction.
Emphasizes understanding the product and safety rules before use.
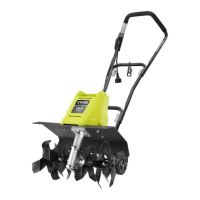
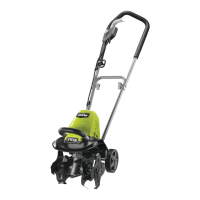
Describes Battery Cover, Brushless Motors, Bull Bar, Drive Speed Control, Battery Ports, Start Button/Bail, and Start Key.
Instructions for unpacking the product and preparing for assembly, including warnings.
Details on connecting the upper and lower handles and securing wire harnesses.
Steps to attach the bull bar to the front of the tiller.
Instructions for mounting the ballast tank onto the bull bar.
Guide on attaching wheels for self-propulsion and transport.
Procedure for securing the dirt flap to the rear of the tiller.
Instructions for mounting the left and right tine assemblies onto the tine shaft.
Steps for attaching the upper and lower side panels to the tiller.
Guide on how to attach and position the depth bar for tilling.
Lists the intended uses of the tiller, such as breaking up soil and cultivating weeds.
Step-by-step guide for inserting and removing the 40V battery packs.
Instructions on how to safely start and stop the tiller, including battery and key insertion.
How to move the tiller between locations without engaging the tines.
Explains how to use the lever for forward, reverse, and speed adjustments.
Guidance on tilling soil to prepare a seedbed, including depth bar adjustment.
Guidelines for cleaning plastic parts and avoiding solvents or harsh chemicals.
Information that no further bearing lubrication is required for the life of the unit.
Instructions on cleaning, protecting tines, and storing the tiller in a clean, dry place.
Addresses issues where tines are clogged or wrapped with debris.
Covers problems with battery charge, orientation, start key, or button depression.
Solutions for when the start button is not depressed or transport mode is active.
Guidance for when the unit is overloaded.
Information on purchasing replacement parts online or via service centers.
How to find service centers online or by phone.
Contact information for technical assistance and customer support.
| Voltage | 40V |
|---|---|
| Handle Type | Adjustable |
| Forward Rotating Tines | Yes |
| Power Source | Electric |
| Weight | 29 lbs |
| Warranty | 5 years |
| Tilling Depth | 8 inches |